8 Advanced Cluster Configuration
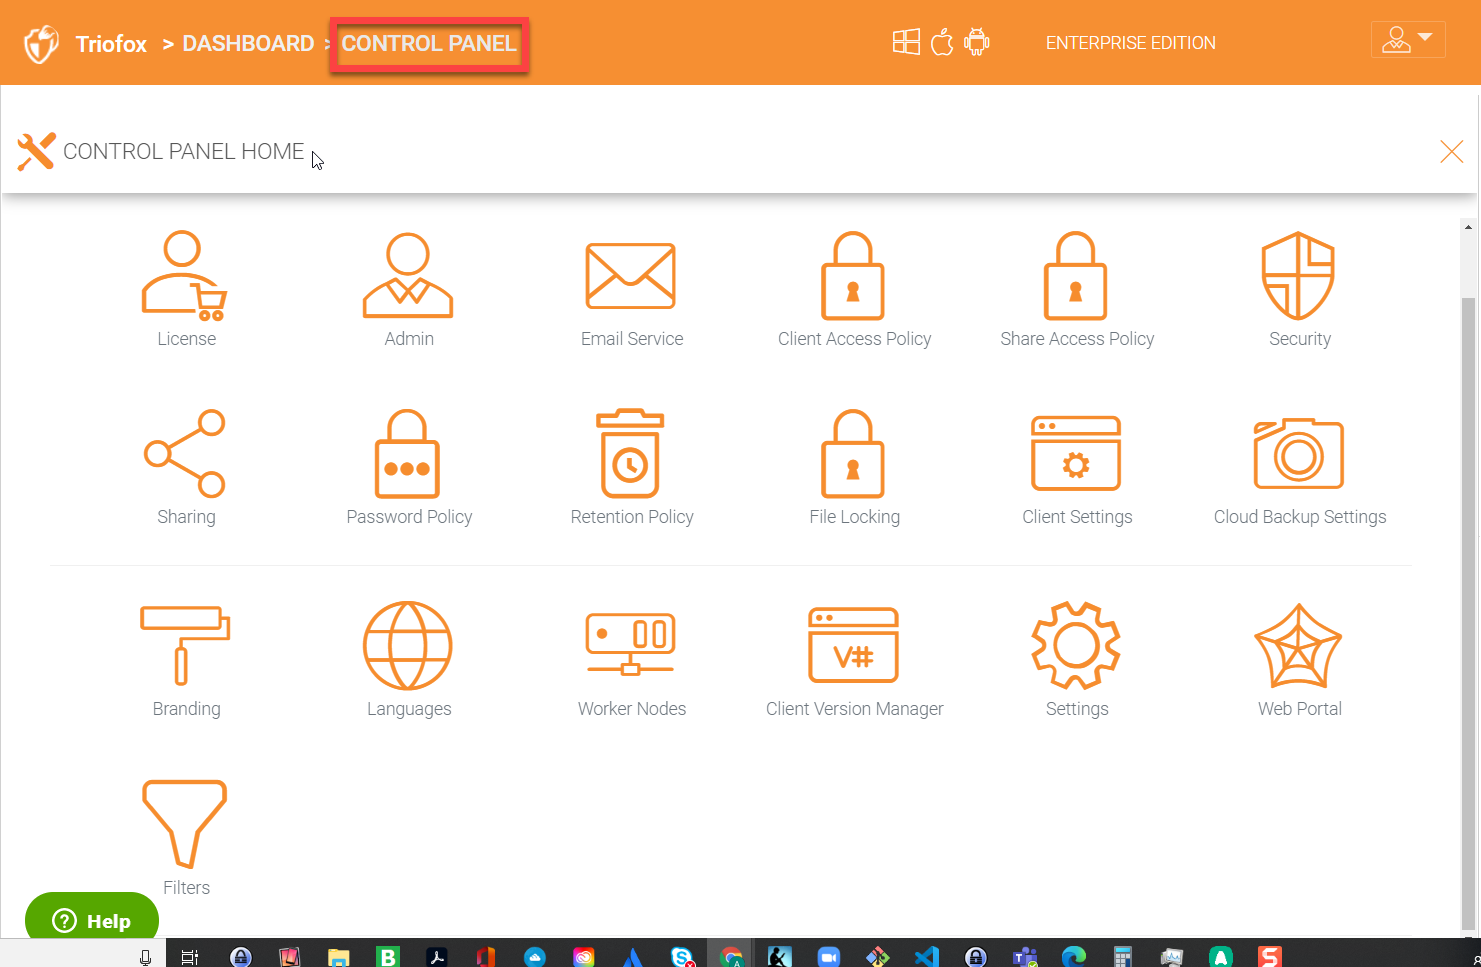
In order to configure advanced features, you will need to go into the control panel. Control Panel is available in the cluster admin dashboard in the right panel.
8.1 License Panel
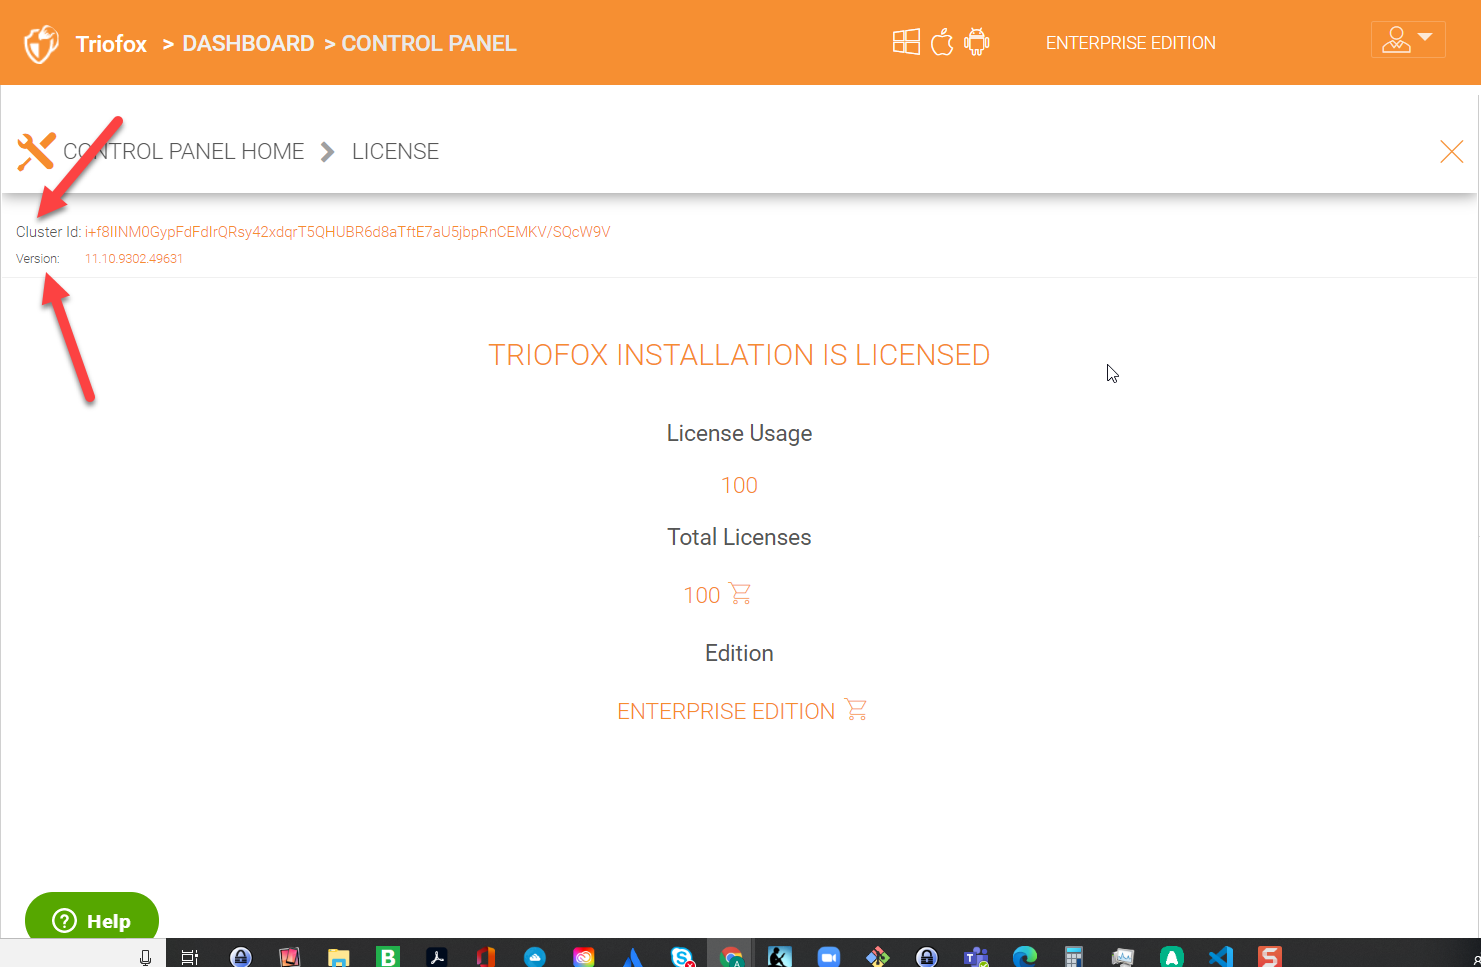
In order to look at the license details including the license edition, number of licenses, purchase additional licenses or upgrade your current edition to a higher edition, you can go into the license page and check all the details. Triofox comes in three different editions, Office (recommended for small offices), Businesses (for mid-size companies), and Enterprise (for large enterprises).
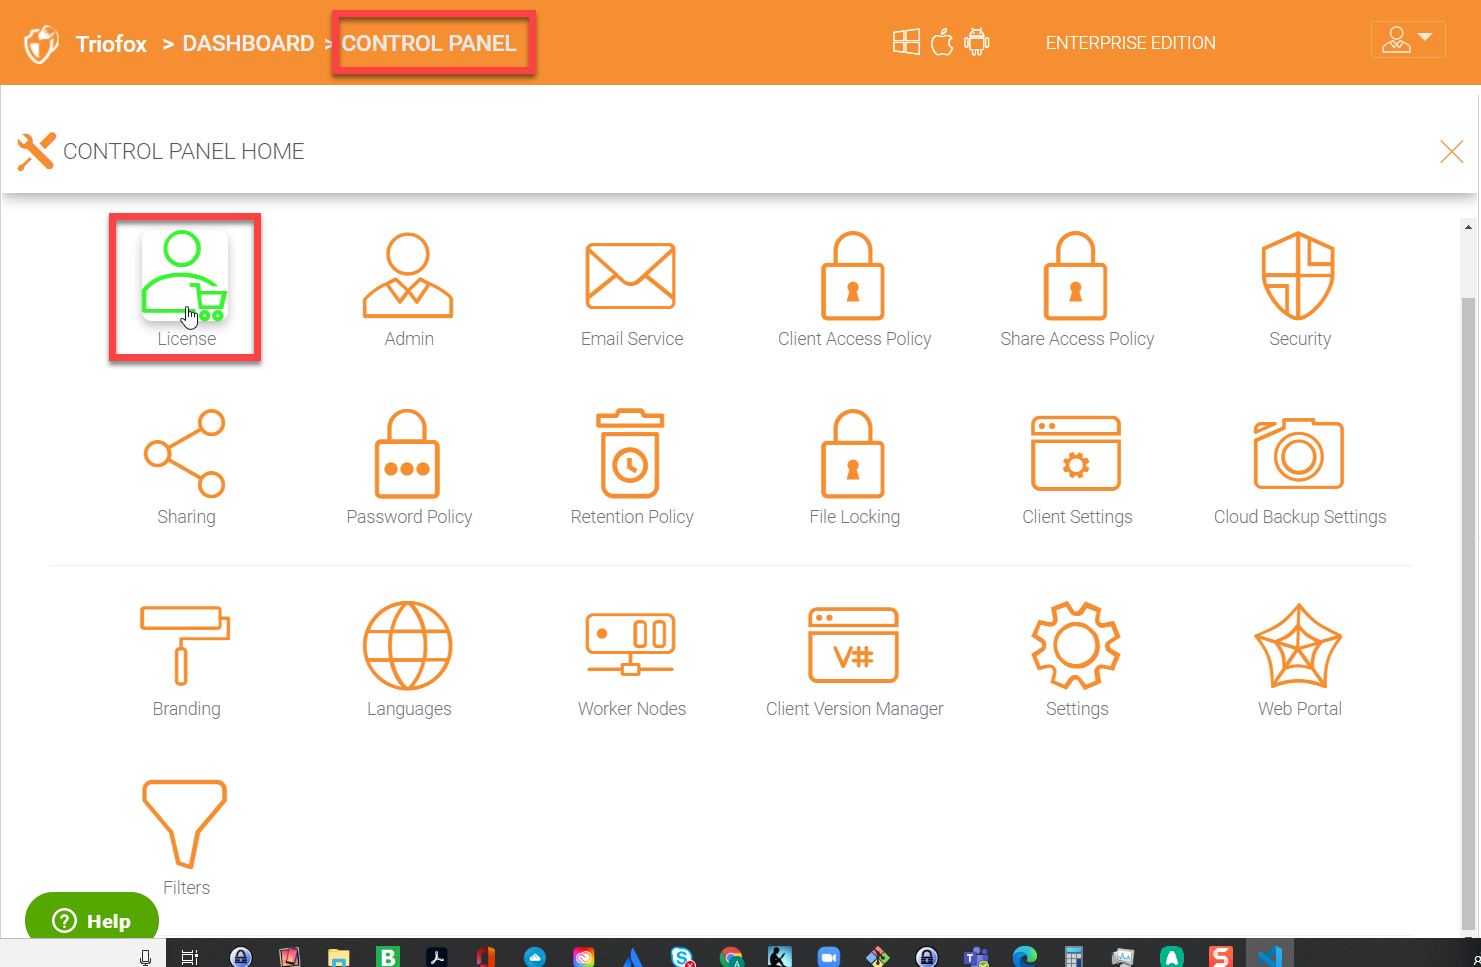
Click on the License option above to go into the License Admin page.
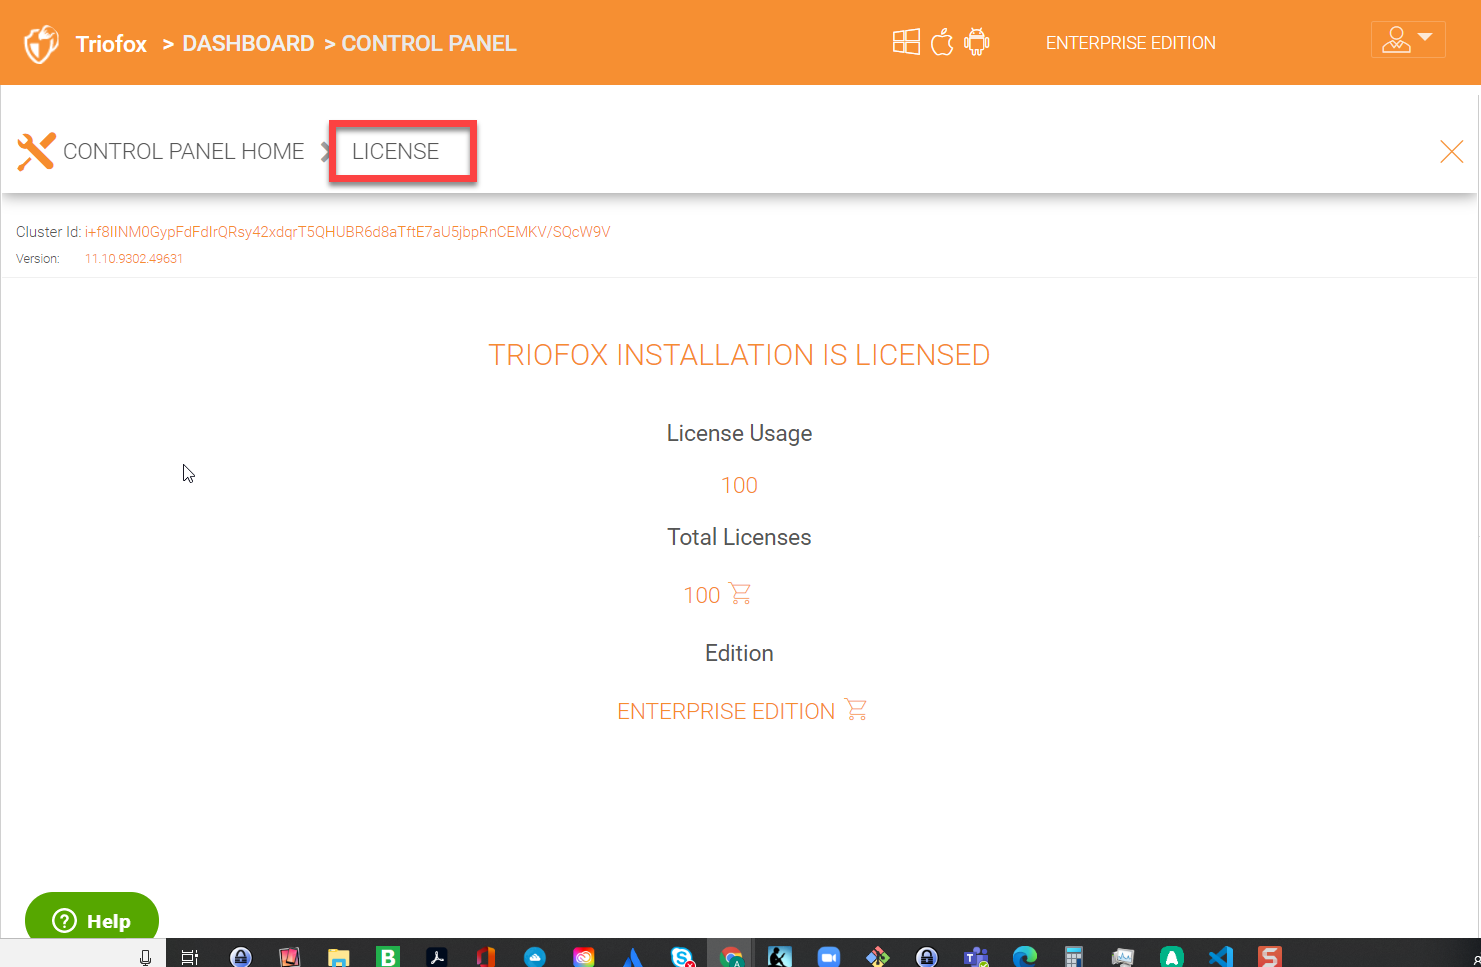
You will also see your unique cluster ID and your Triofox server version in the License panel.
8.2 Admin Panel
In the admin panel, you can find the default cluster administrator account details. You can also change the email address of the cluster administrator and reset the password.
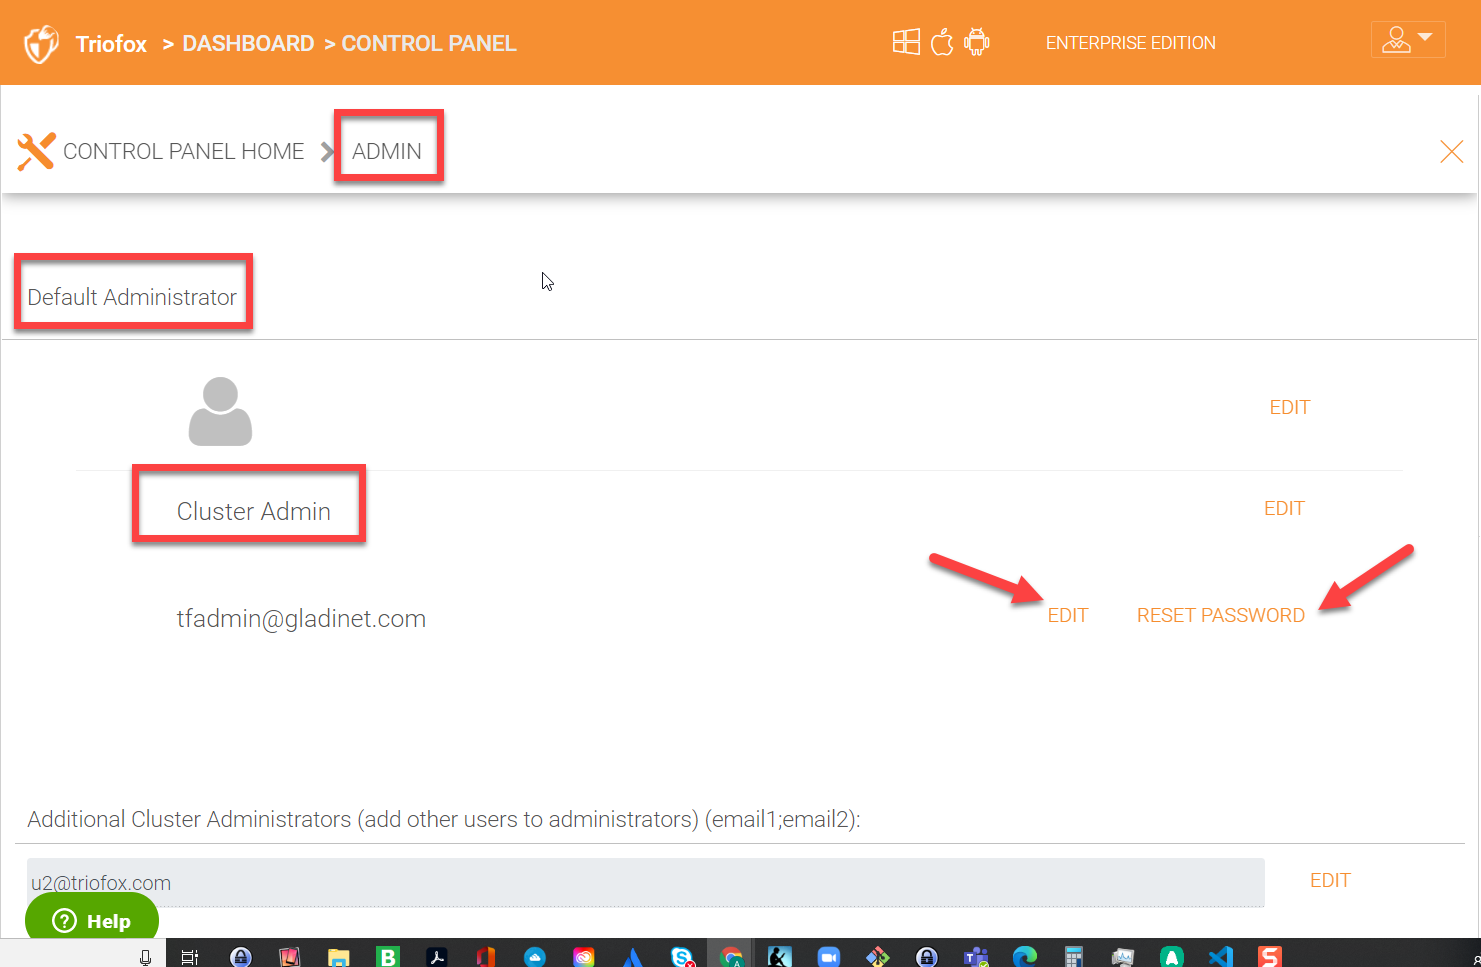
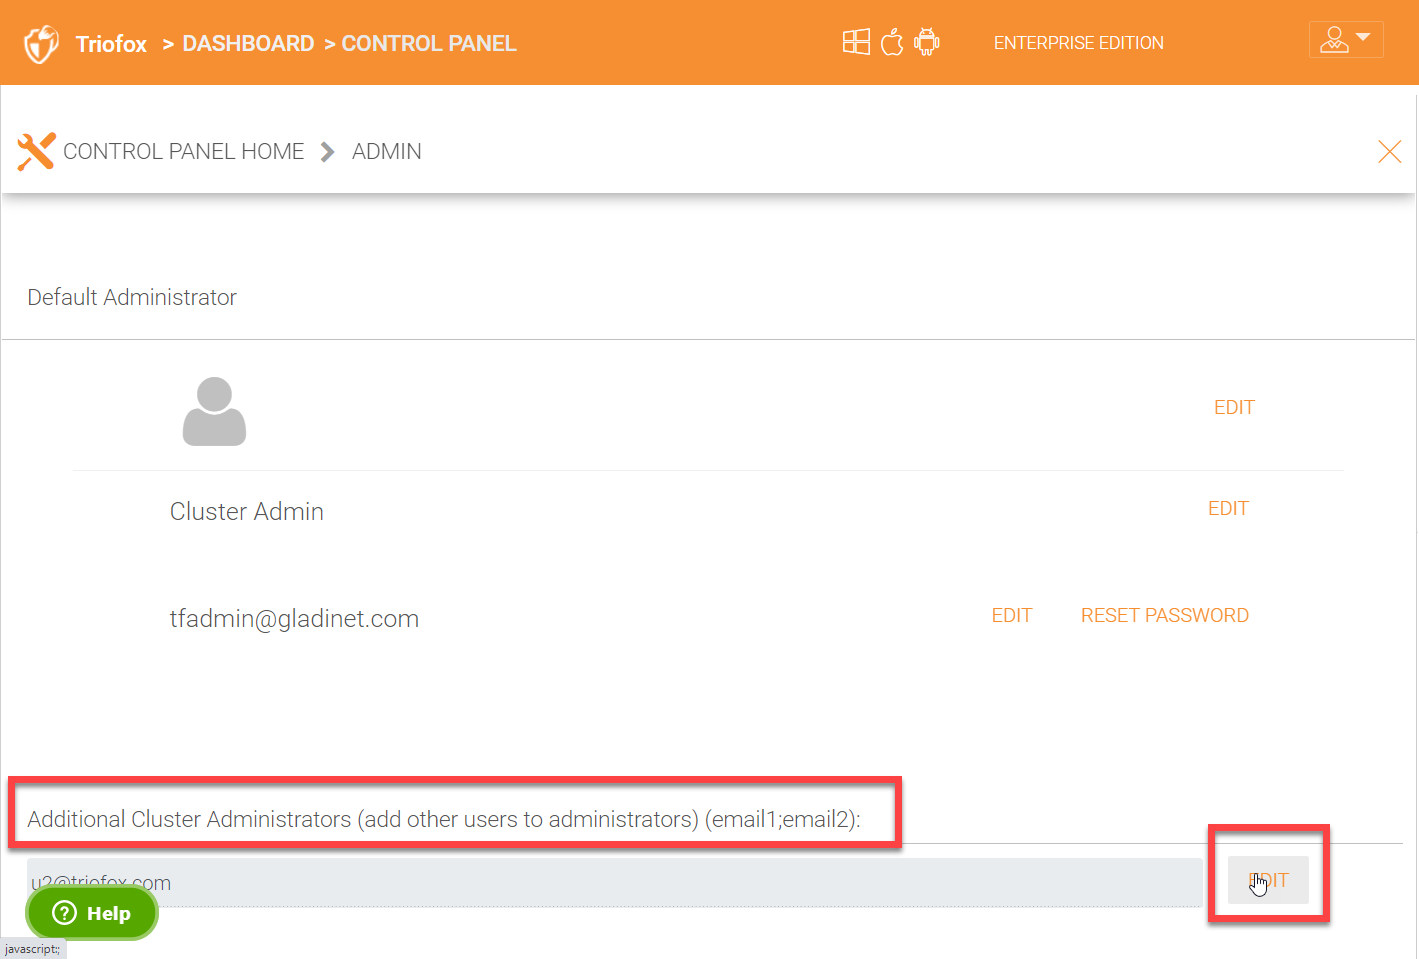
You can additional cluster administrators by clicking the ‘Edit’ button under Additional Cluster Administrators and add the users’ email addresses. The user’s address should already be present under ‘Users’ panel.
8.3 Email Service Panel
Cluster Admin Dashboard > Cluster Control Panel > Email Service
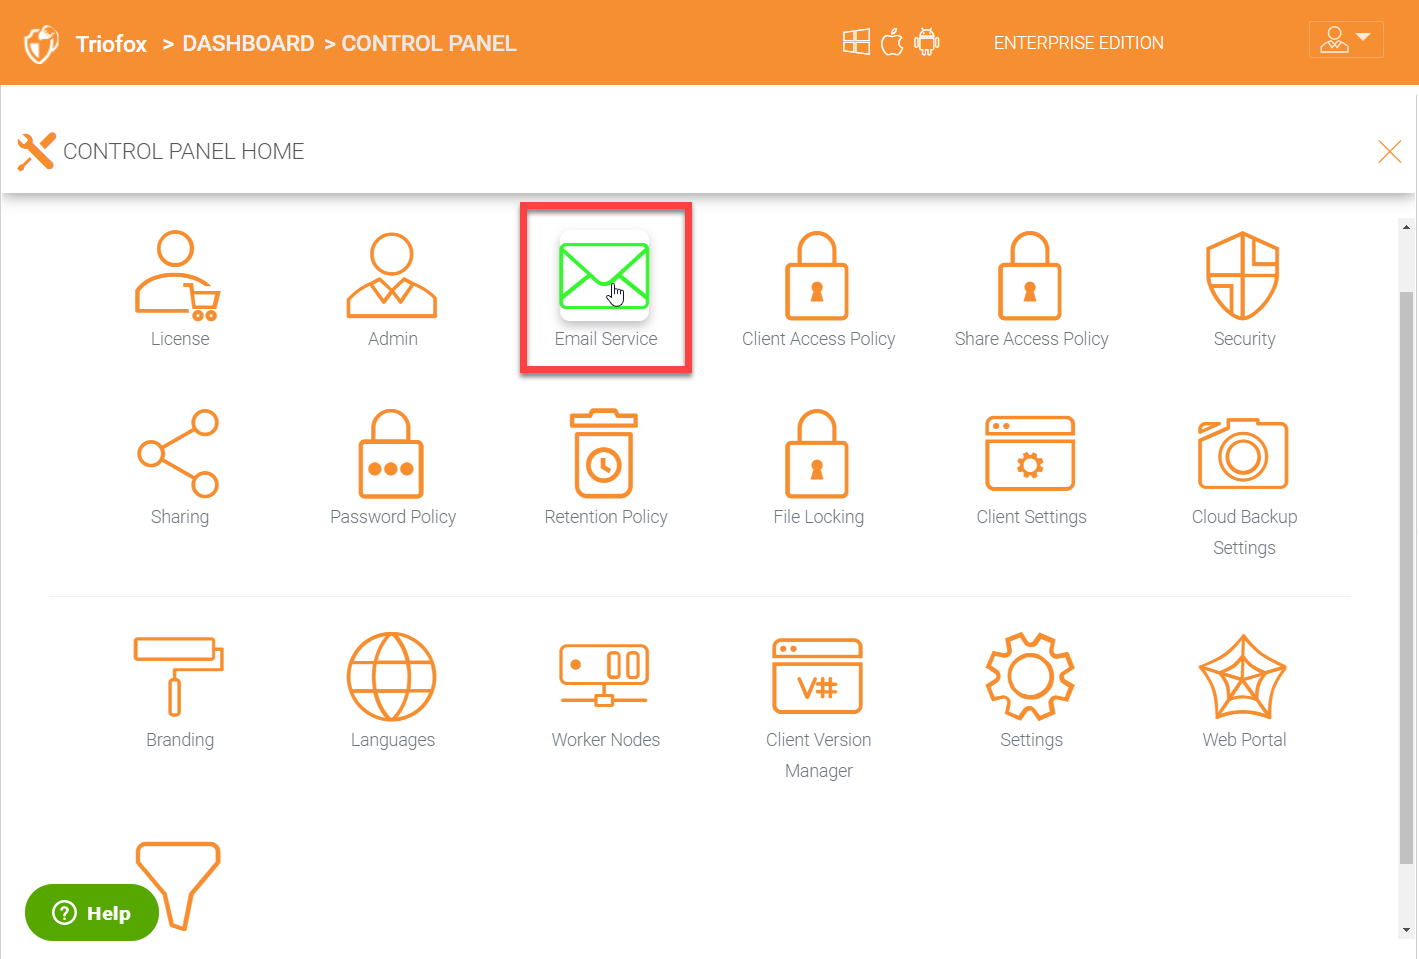
There are many places in the Triofox solution that the user needs to be contacted by Email. The Email service is used to set up the SMTP email service to send out the emails.
By default, it works out of box using the default email service with the Cluster Server’s customer support email address as the sender.
It is recommended that the SMTP service be setup to use your own SMTP service to send out emails.
In the Authenticate User field, if your SMTP service doesn’t require authentication, you can put dummy email in the field.
Note
For example, if your email service is on Office 365,
- :SMTP Server Address
smtp.office365.com- :Use SSL
True- :SMTP Server Port
587
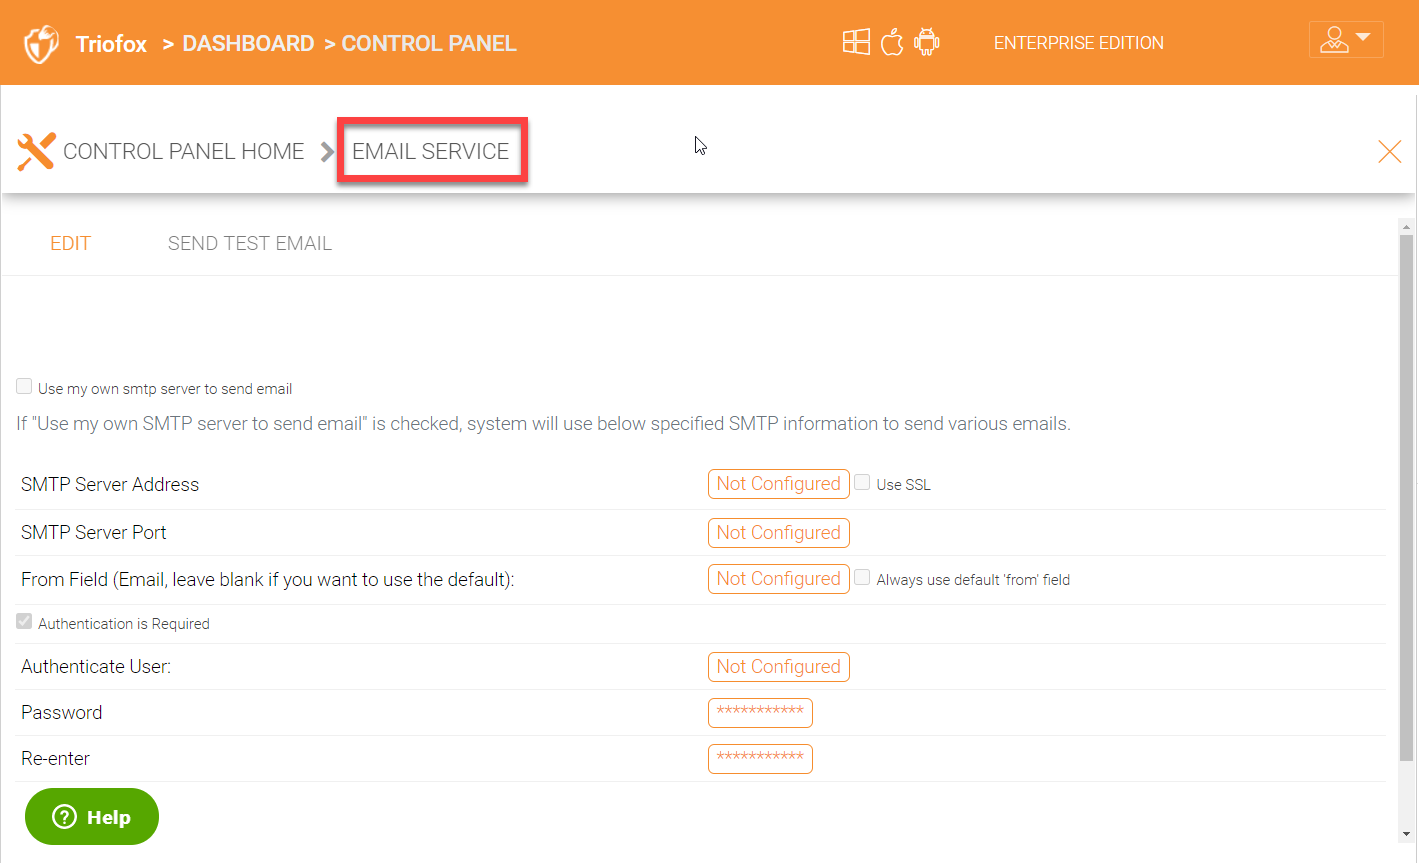
EMAIL SERVICE SETTINGS
8.4 Client Access Policy
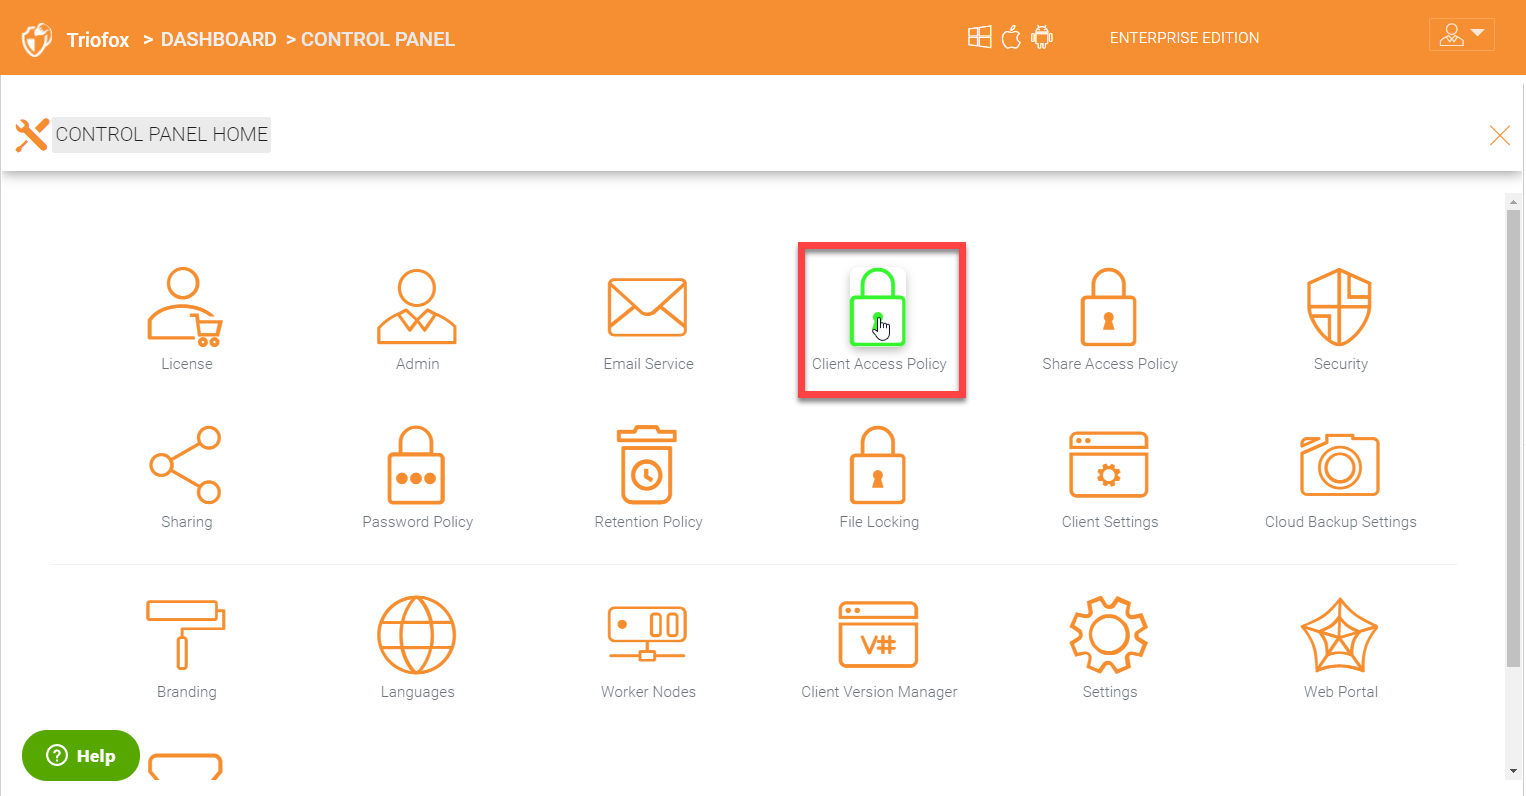
Define customized access policies to restrict and allow access based on the device location. For example, a company can enable access from the internet to only Windows clients and web clients. IT can configure allow or deny client access policies from the following locations:
Access from the internet
Access from local network
Access from Anywhere
Access from customer-defined networks
Deny access from customer defined networks
The above allow and deny client access policies can be configured for the following clients:
Web client
Web management
Windows client
Mac client
Mobile client
Share Acces Policy
IT can also prevent data loss and data leakage of important company confidential shares by configuring ‘Share Access Policies’ for external users who are not company employees. You can configure allow or deny shares access policies from the following locations:
Access from the internet
Access from local network
Access from Anywhere
Access from customer-defined networks
Deny access from customer defined networks
The above allow and deny share access policies can be configured with the following conditions:
Visible
Permissions to list files
Permissions to read files
Permissions to create or update files and folders
Permissions to delete files and folders
Secure data room
8.6 Share Access Policy
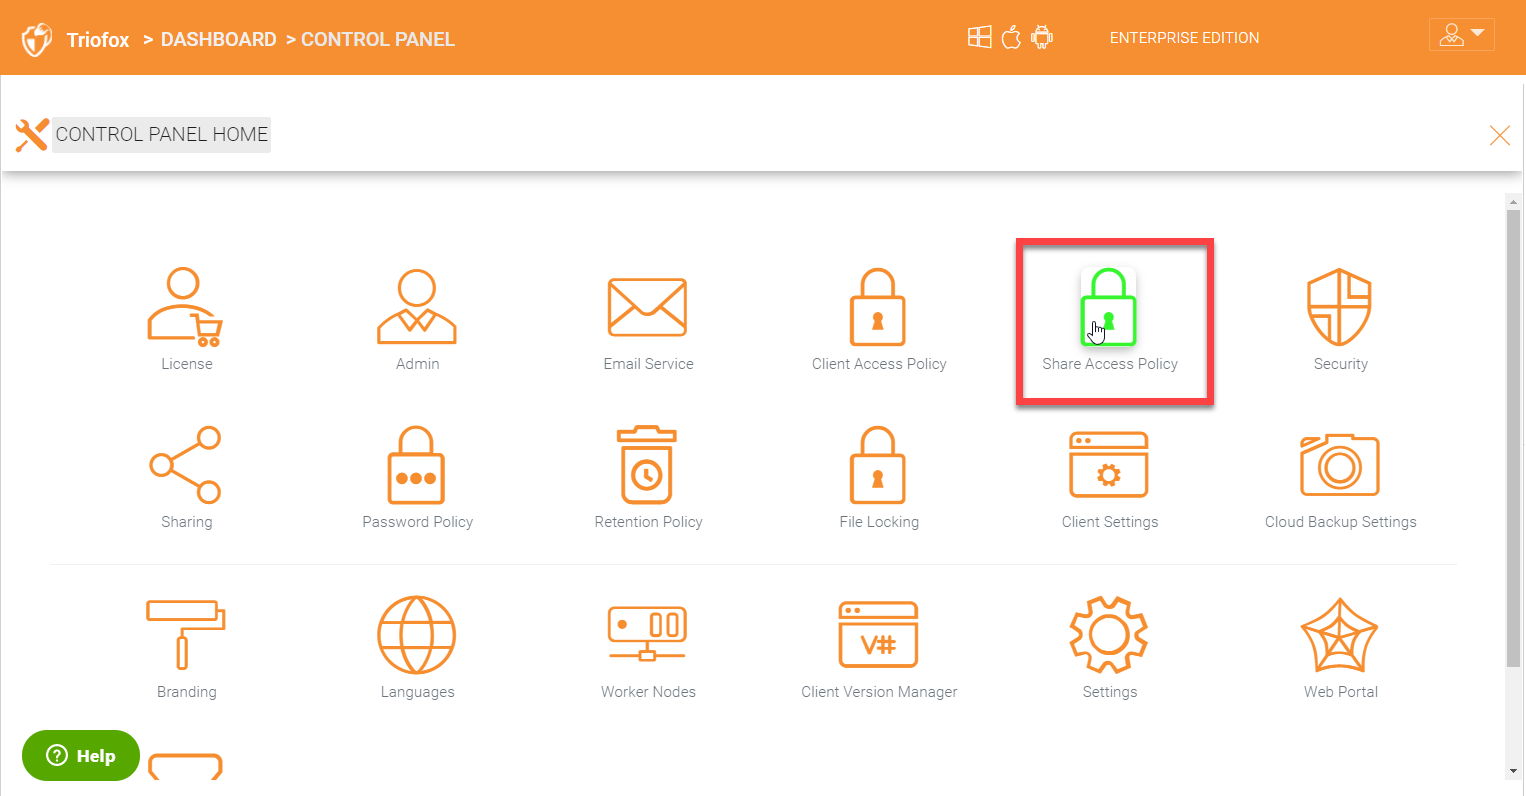
IT can also prevent data loss and data leakage of important company confidential shares by configuring ‘Share Access Policies’ for external users who are not company employees. You can configure allow or deny shares access policies from the following locations:
Access from the internet
Access from local network
Access from Anywhere
Access from customer-defined networks
Deny access from customer defined networks
The above allow and deny share access policies can be configured with the following conditions:
Visible
Permissions to list files
Permissions to read files
Permissions to create or update files and folders
Permissions to delete files and folders
Secure data room
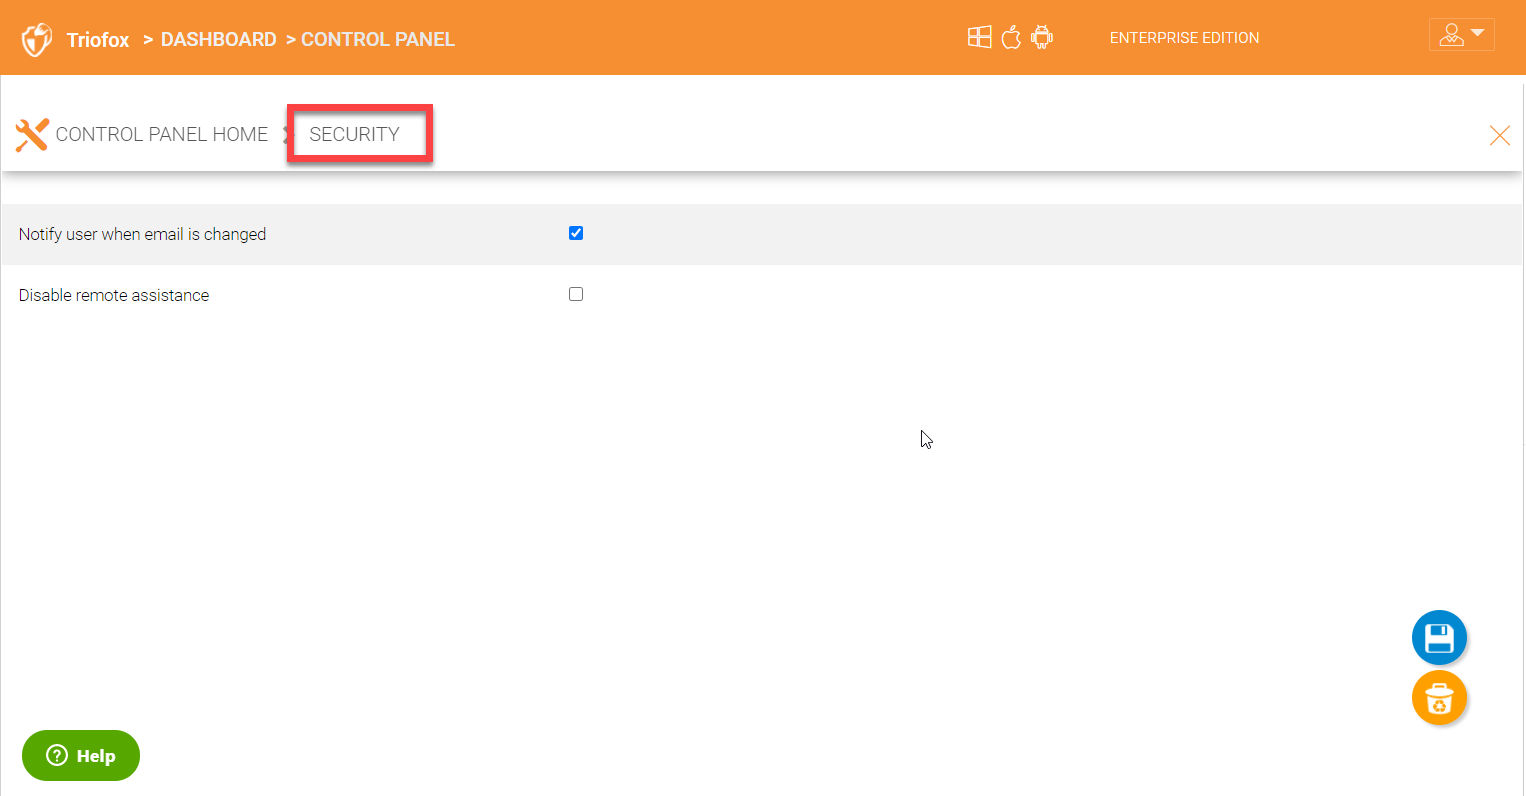
8.7 Security
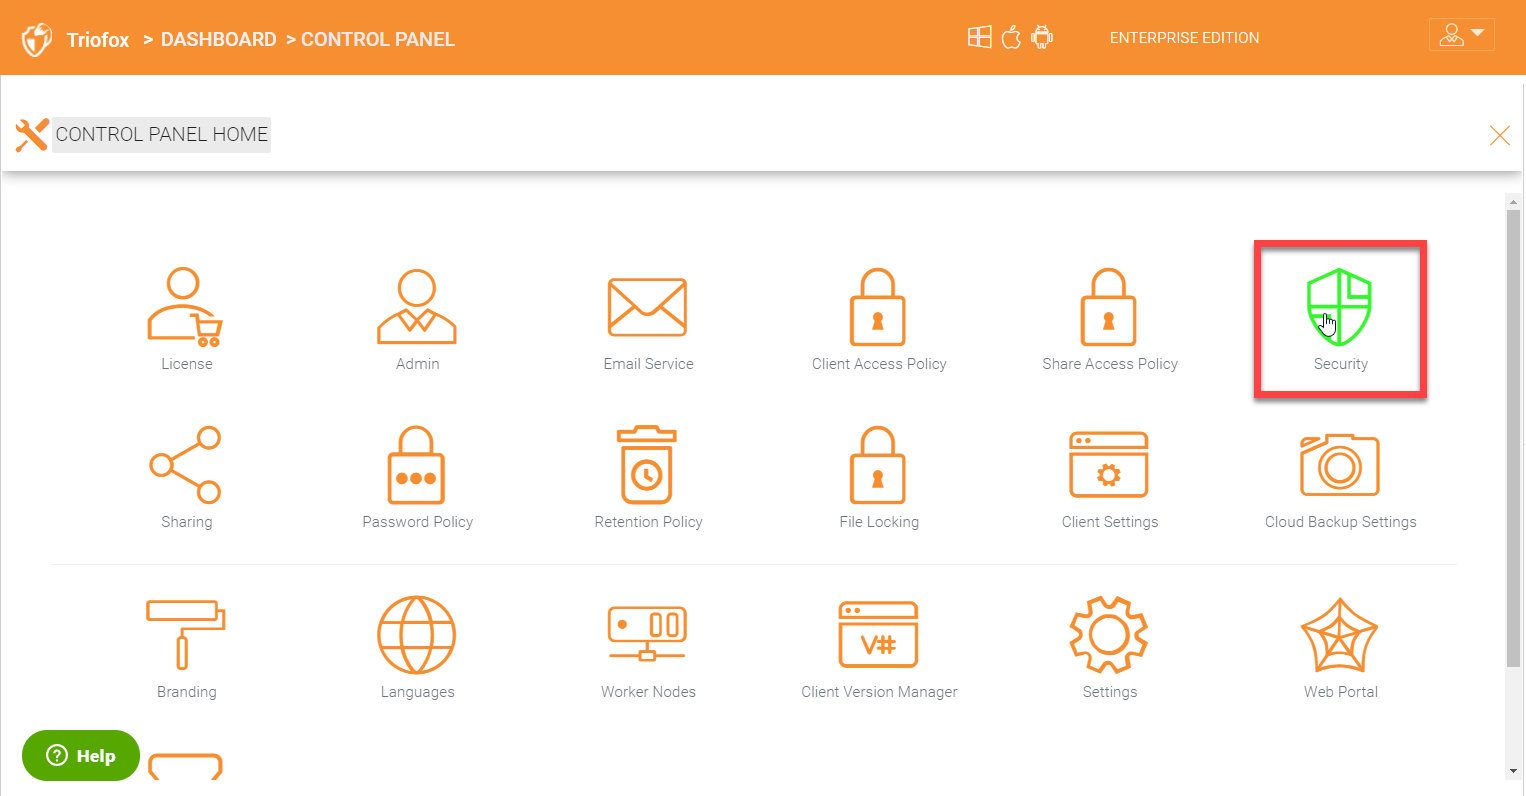
Under the security panel, you can enable more settings:
Notify the user when email is changed (enabled by default)
Disable remote assistance - If you want to disable the ability for remote assistance, disable this setting.
8.8 Sharing
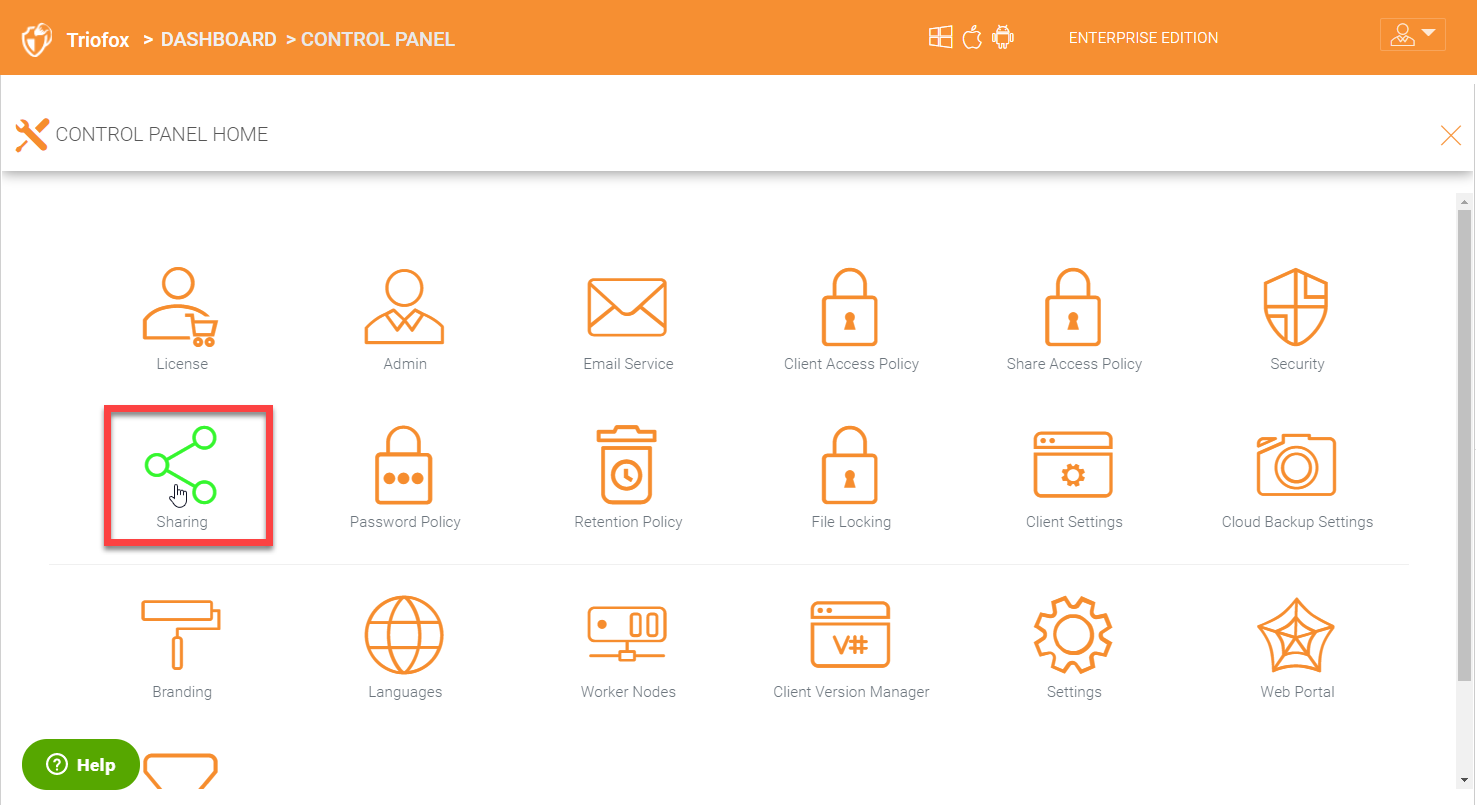
Under the sharing panel, you can enable more settings for external sharing:
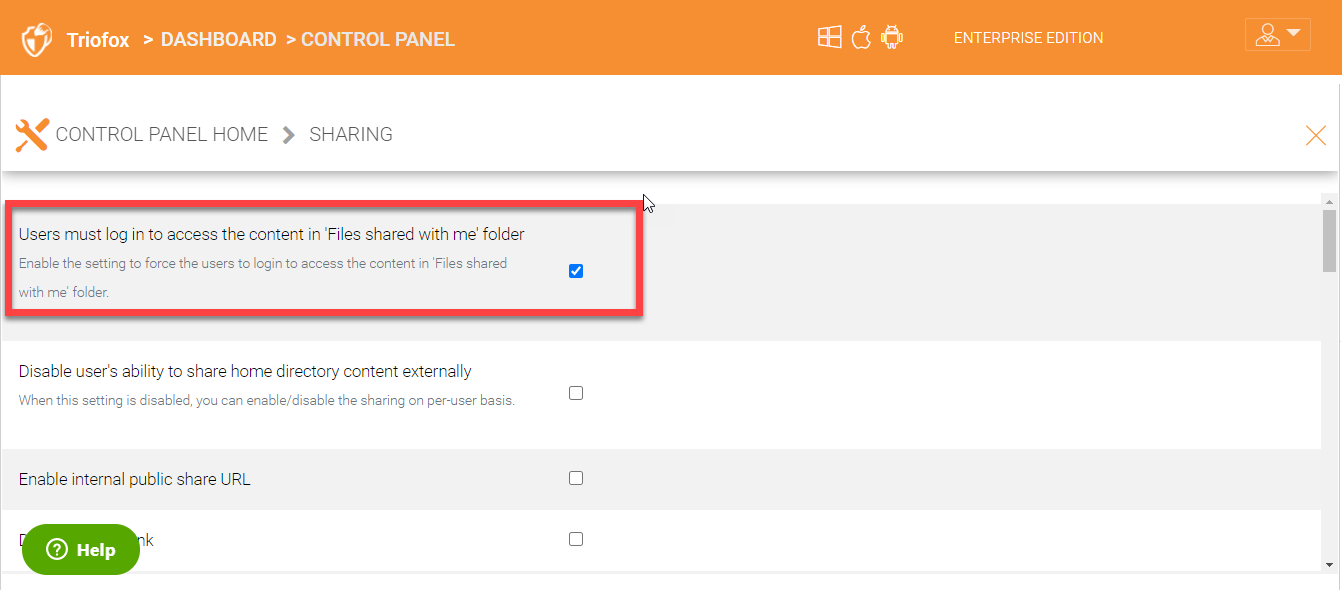
Users must log in to access the content in ‘Files shared with me’ folder
Tha above setting should be enabled to force the users to login to access the content in ‘Files shared with me’ folder. This will ensure that even external users need to login before they can view shared documents.
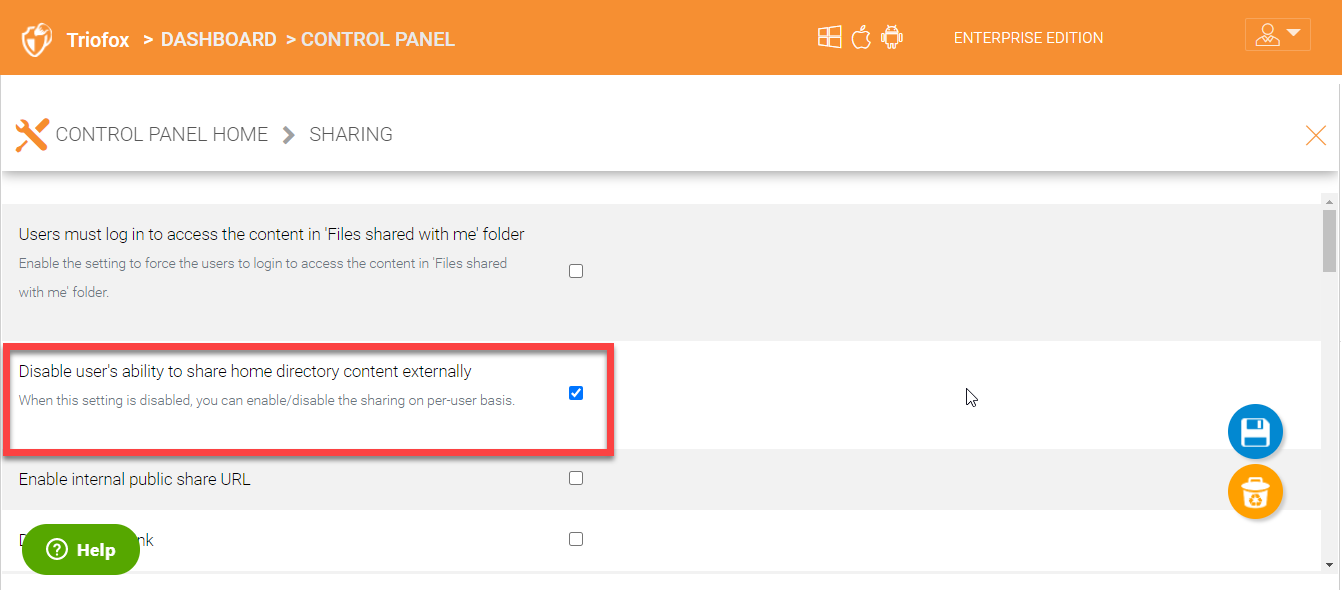
Disable user’s ability to share home directory content externally
When this setting is enabled, users will not be able to share their home direcotry content with external users.
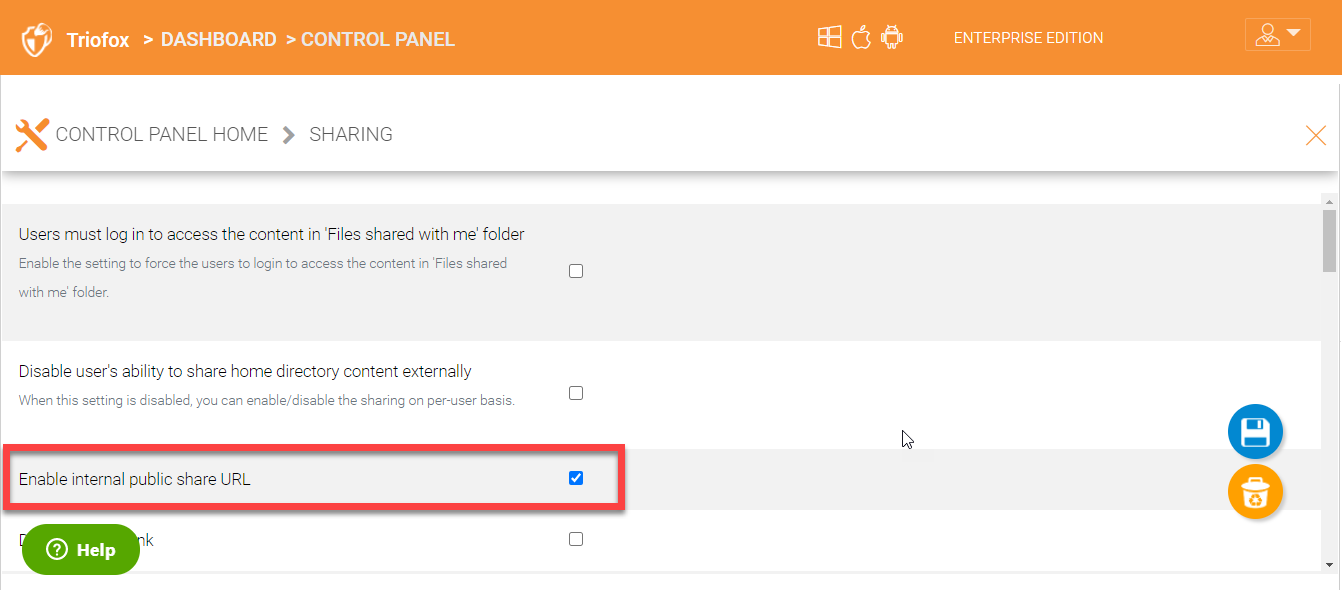
Enable internal public link share
When this setting is enabled, internal public share URL can be used.
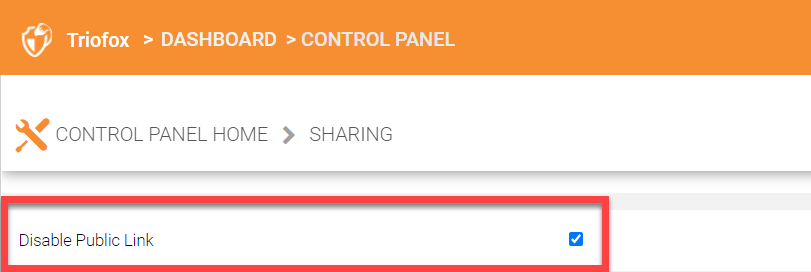
Disable Public Link
If you would like to disable the user’s ability to generate public links for shared documents, you can enable this setting.
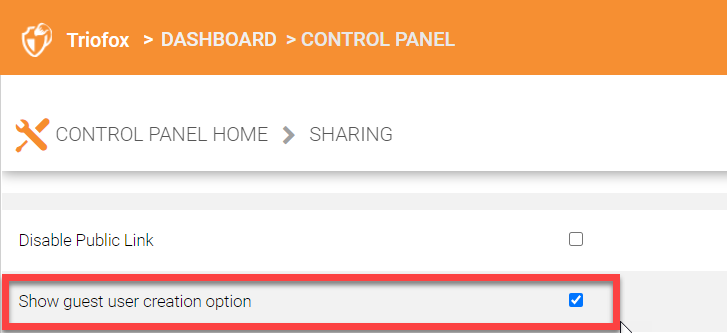
Show guest user creation option
When this setting is enabled, users initiating a share will also see the guest user creation options.
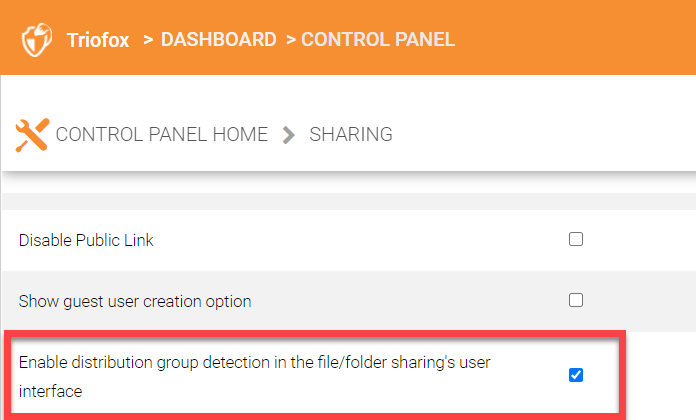
Enable distribution group detection in the file/folder sharing’s user interface
When this setting is enabled, users initiating shares can also choose distribution group’s email from the sharing interface.
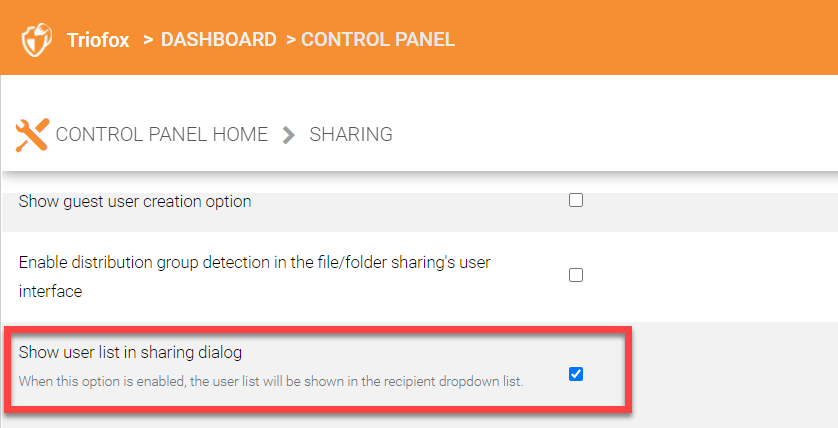
Show user list in sharing dialog
When this option is enabled, the user list will be shown in the recipient’s dropdown list.
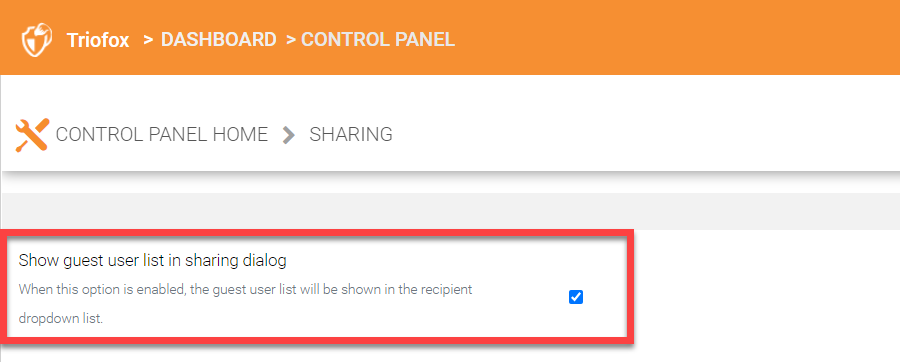
Show guest user list in sharing dialog
When this option is enabled, the guest user list will be shown in the recipient’s dropdown list.
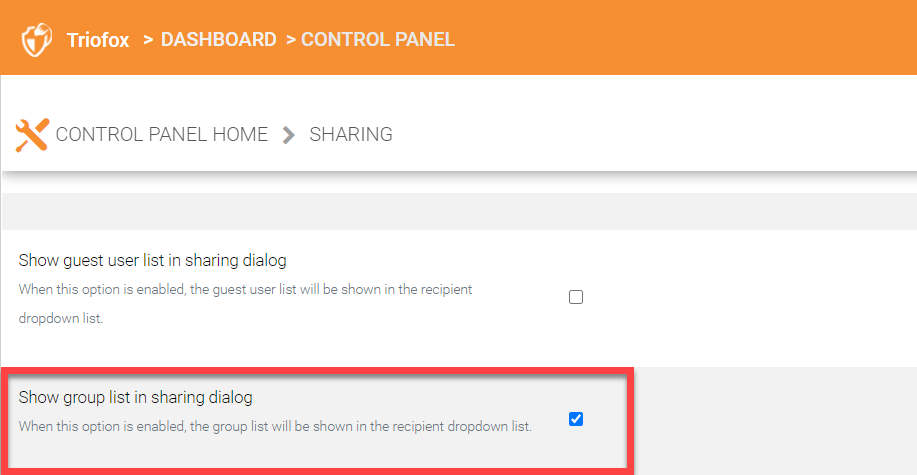
Show group list in the sharing dialog
When this option is enabled, the group list will be shown in the recipient’s dropdown list.
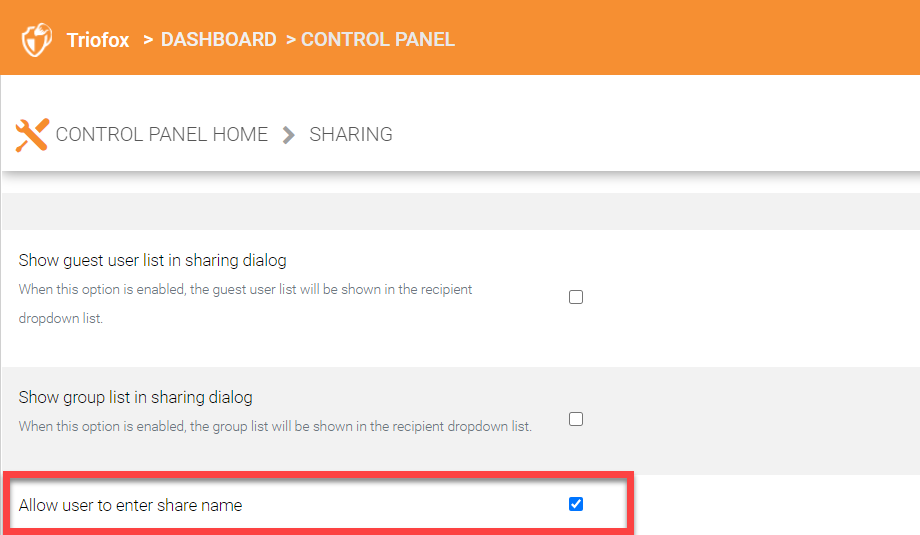
Allow users to enter the share name
This setting allows users who are initiating shares to enter their own share name.
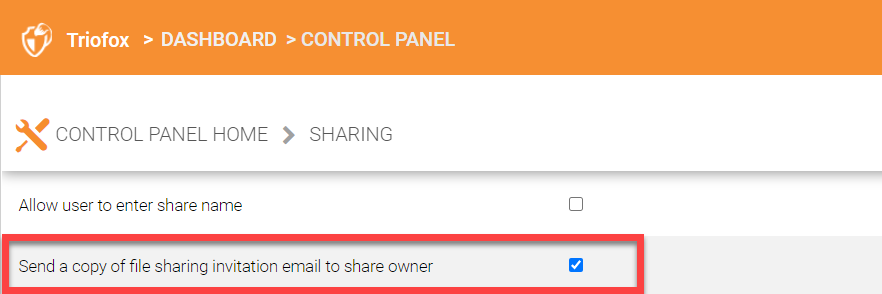
Send a copy of file sharing invitation email to share owner
Enable this setting if the share owner would also like to receive the file sharing invitation email.
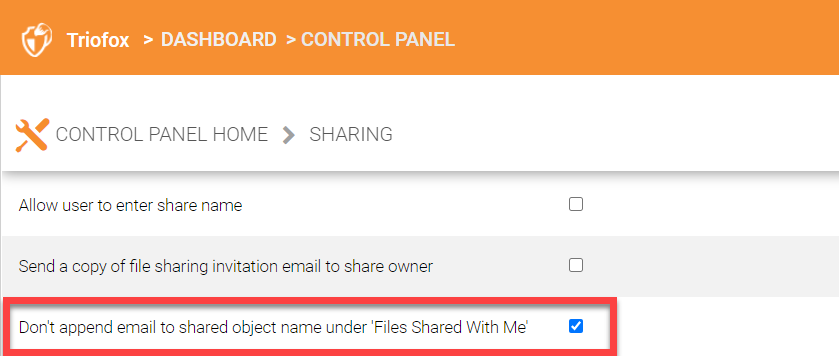
Don’t append email to shared object name under ‘Files Shared With Me’
This setting when enabled will not append the email to shared object name.
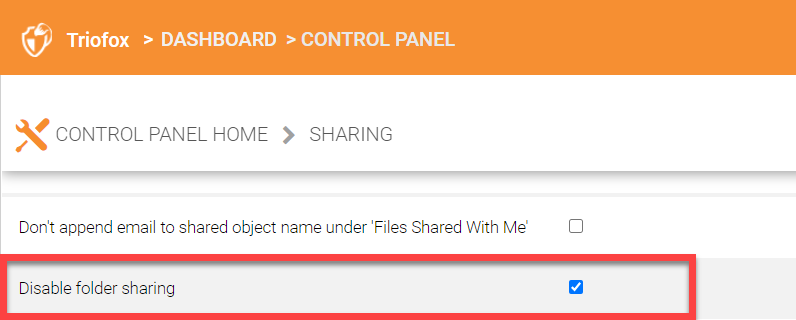
Disable folder sharing
If you would like to disable external sharing altogether then enable this setting.
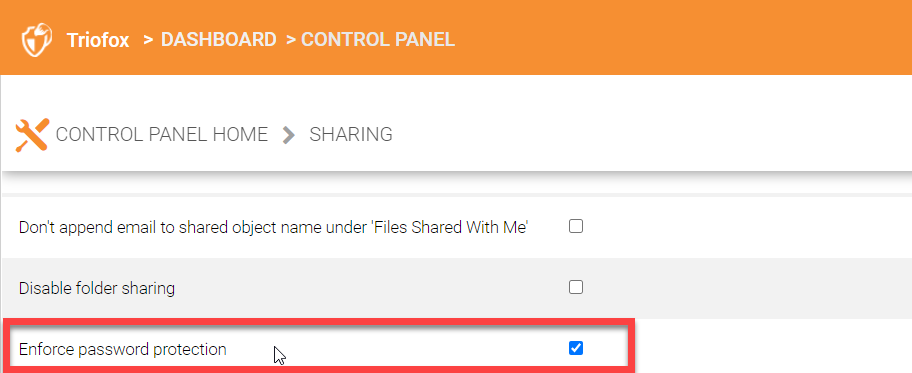
Enforce password protection
If this setting is enabled, users initiating the shares will be forced to password protect the content they are sharing.
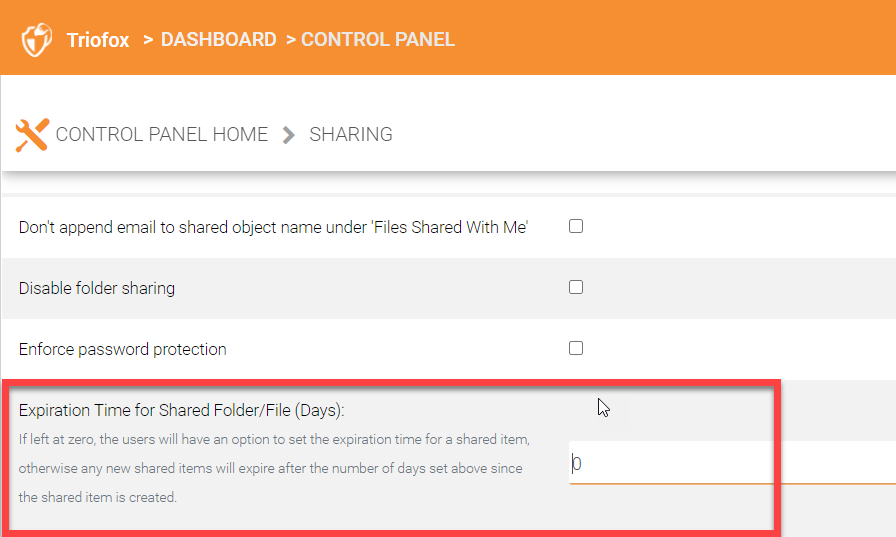
Expiration Time for Shared Folder/File (Days):
If left at zero, the users will have an option to set the expiration time for a shared item; otherwise, any new shared items will expire after the number of days set above.

Maximum Share Expiration Time (Days)
Enter the maximum number of days after which the shares will automatically expire.
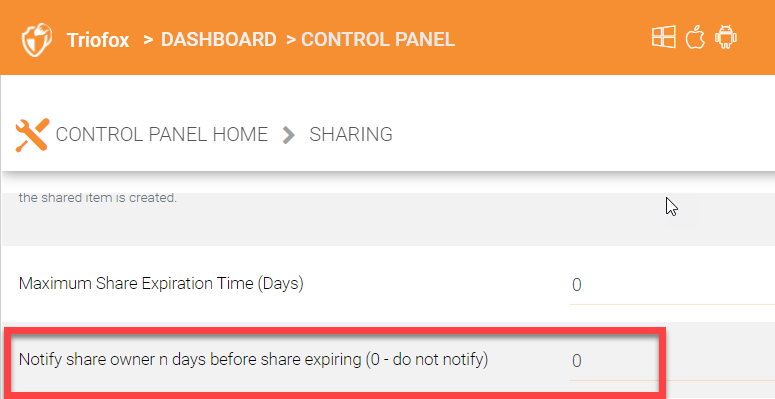
Notify share owner n days before share expiring (0 - do not notify)
Enter the number of days before the share expiration time that the user should be notified.
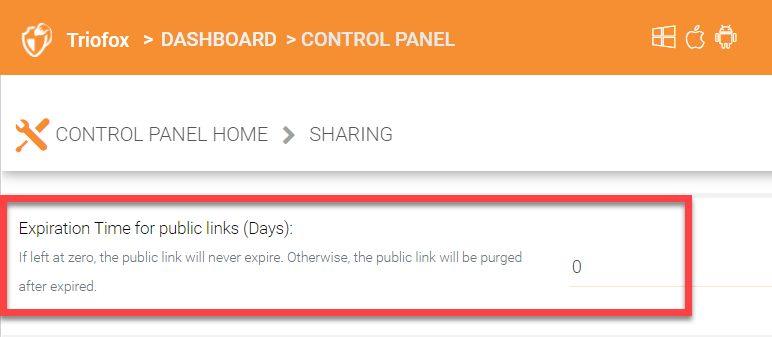
Expiration time for public links (Days)
Enter the number of days for public links to be expired automatically. If the default value ‘0’ is left, the shared public links will never expire.
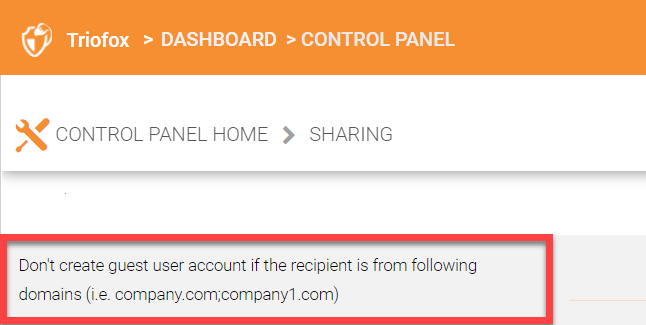
Don’t create guest user account if the recipient is from following domains (i.e. company.com;company1.com)
You can blacklist a domain for which no guest user accounts can be created in the system.
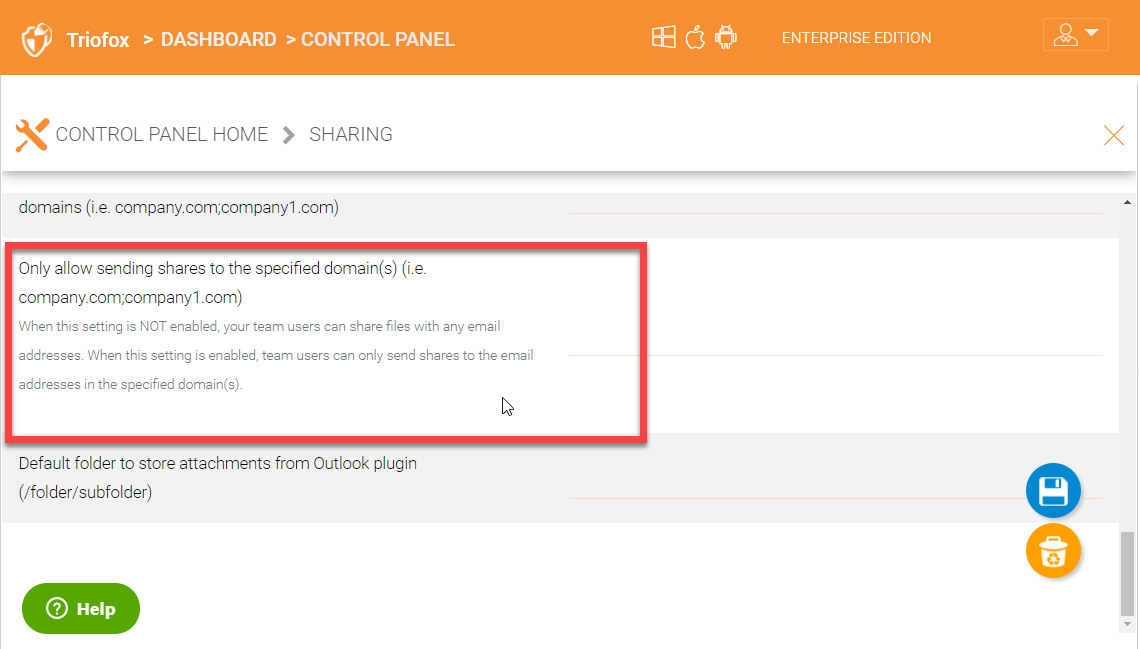
Only allow sending shares to the specified domain(s) (i.e. company.com;company1.com)
When this setting is NOT enabled, your team users can share files with any email address. When this setting is enabled, team users can only send shares to the email addresses in the specified domain(s).
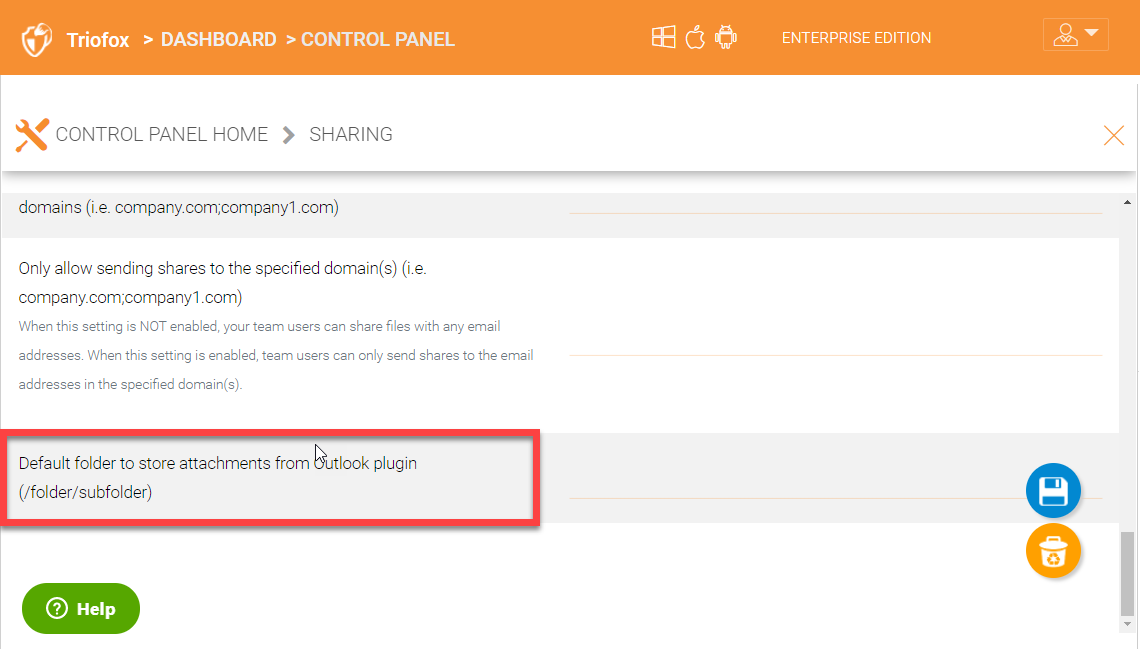
Default folder to store attachments from Outlook plugin (/folder/subfolder)
Specify the folder where all the attachments when using the Triofox Outlook plugin should be stored.
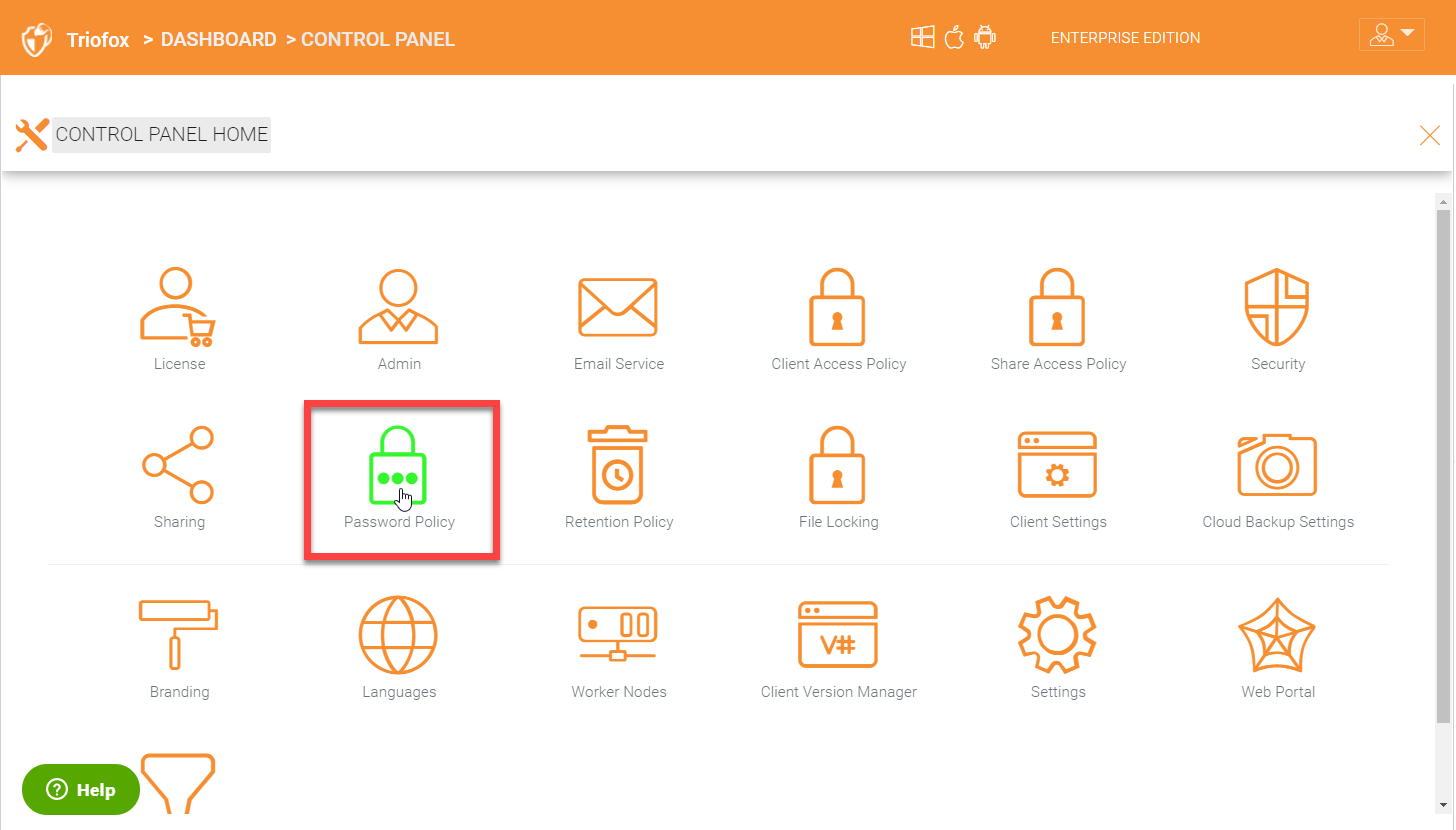
8.9 Password Policy
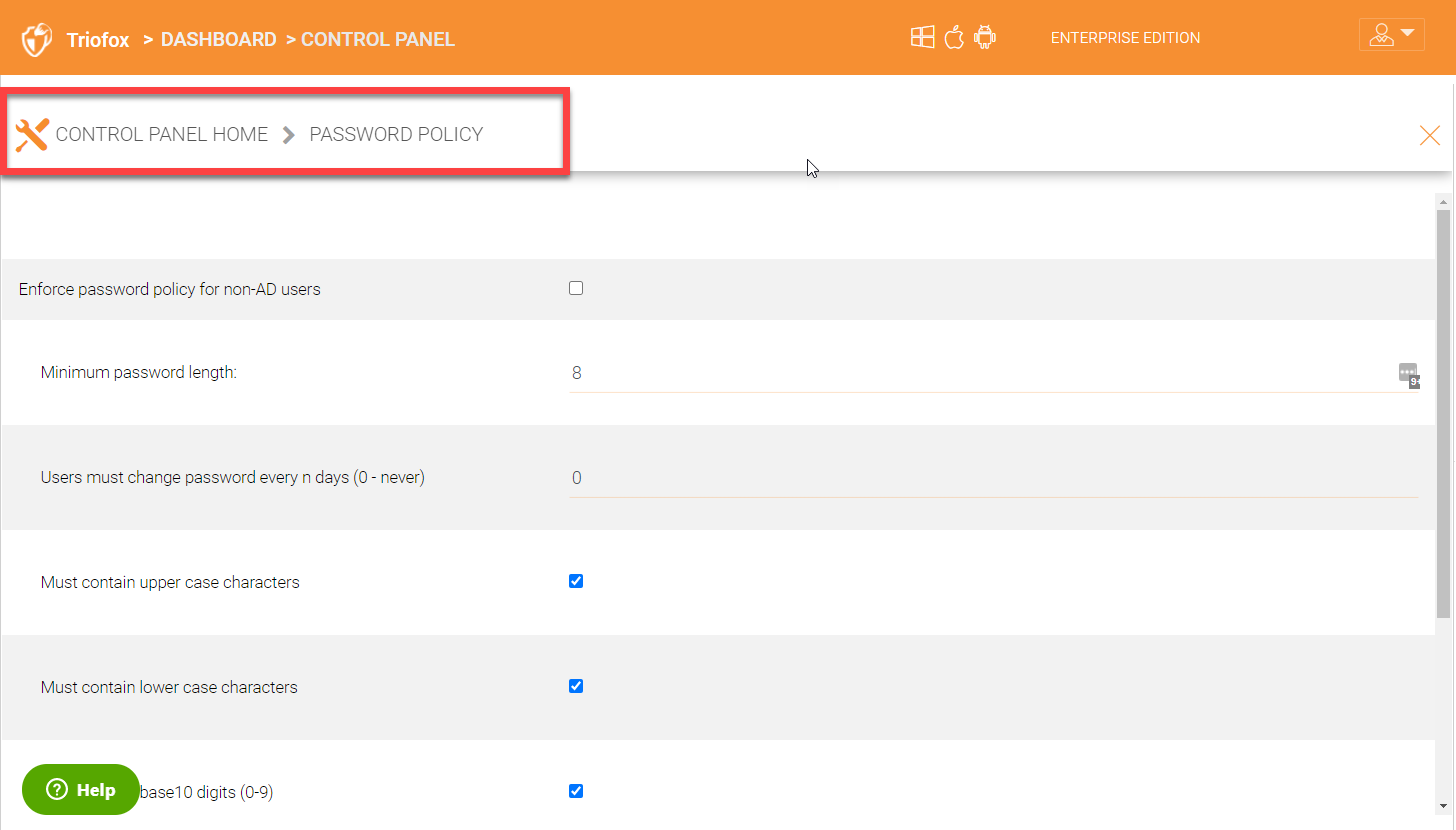
You can define customized mandatory password policy for all user accounts in Triofox under Control PanelPassword Policy.
You can see all the password policy settings under the ‘Password Policy’ panel as shown below. Configure the policies based on your company guidelines and requirements.
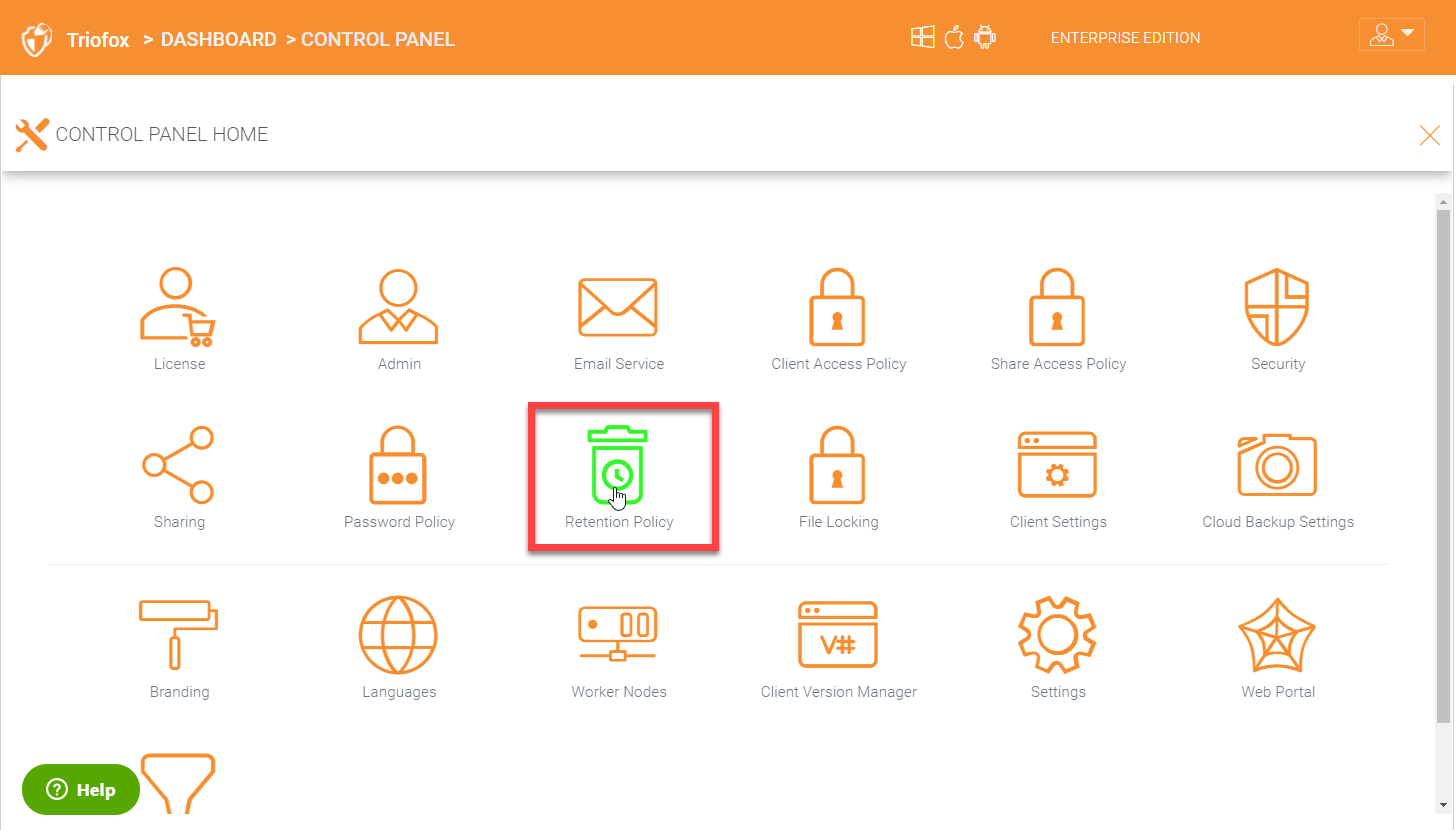
8.10 Retention Policy
Retention policy plays a critcal role and protects you from accidential deletions. You can configure your own customized retention policies based on your industry’s compliance and regulations.
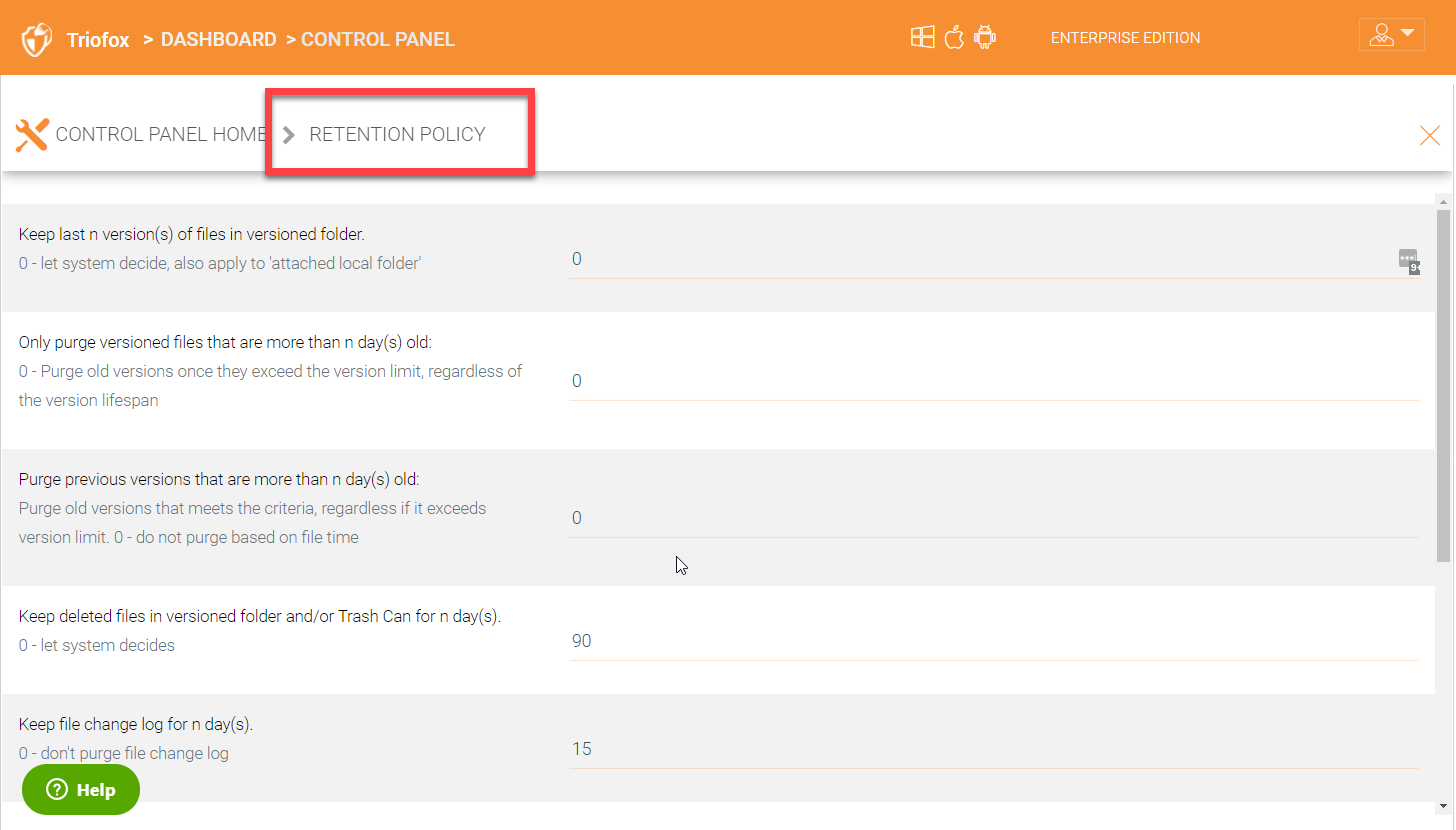
The following retention policies can be configred:
Keep last n version(s) of files in versioned folder
Specify how number of versions which should be kept in all versioned folders. If you leave the default zero value, the system will decide how many versions to keep based on the storage available. This setting also applied to attached folders.
Only purge versioned files that are more than n day(s) old:
Define the number of days for the versioned files to be purged. If you leave the default 0, all the versioned files will be purged after the number of revisions to keep is met.
Purge previous versions that are more than n day(s) old:
Purge old versions that meet the criteria, regardless if it exceeds version limit. 0 - do not purge based on file time.
Keep deleted files in versioned folder and/or Trashcan for n day(s). 0 - let system decides
Define the number of days the deleted files should be kept in versioned folders or in the trashcan.
Keep file change logs for n(days)
Define the number of days to keep the file change logs in the database. The default value is 15. If you choose zero, the file change logs are not purged at all.
Keep audit trace for n day(s)
Define the number of days to keep the audit trace in the database. Again, if a value of zero is chosen, the audit trace is not purged.
Hide purge option from web file browser (not application for cluster administrator)
When this setting is enabled, purge option will not be visible to users inside their web portal logins.
Don’t send email notifications when purging deleted content
When the above setting is enabled, no purge notifications will be sent to the admin.
Include deleted but not yet purged items in storage quota
If you would like to see the deleted items only under quota usage, then enable this setting.
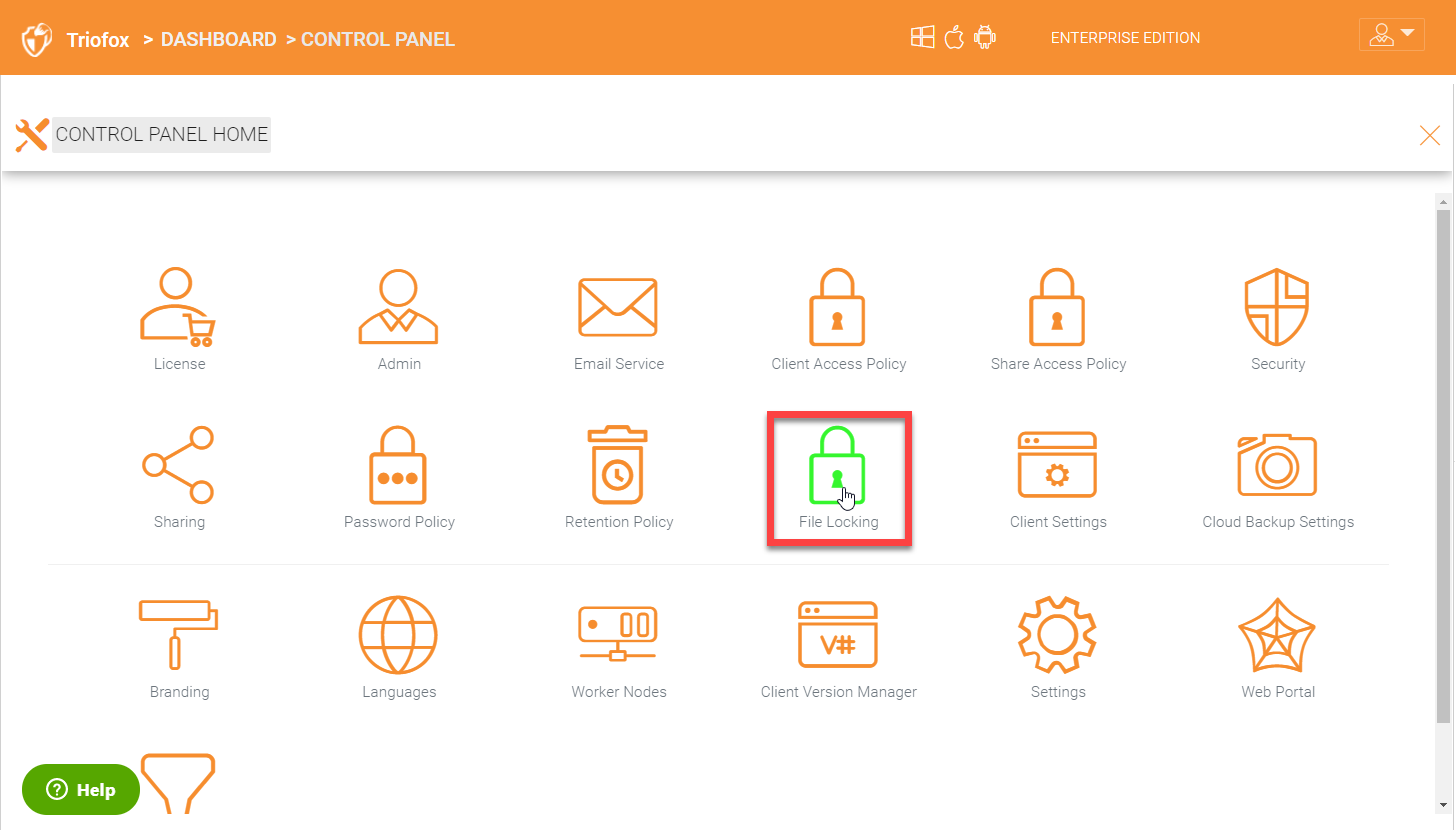
8.11 File Locking
File locking prevents mulitple users from editing the same file at the same time. This is a critical component to prevent file corruption. You can configure and enable many file locking features under Control PanelFile Locking.
Settings under file locking applies to all clients which include desktop clients as well as server agent clients.
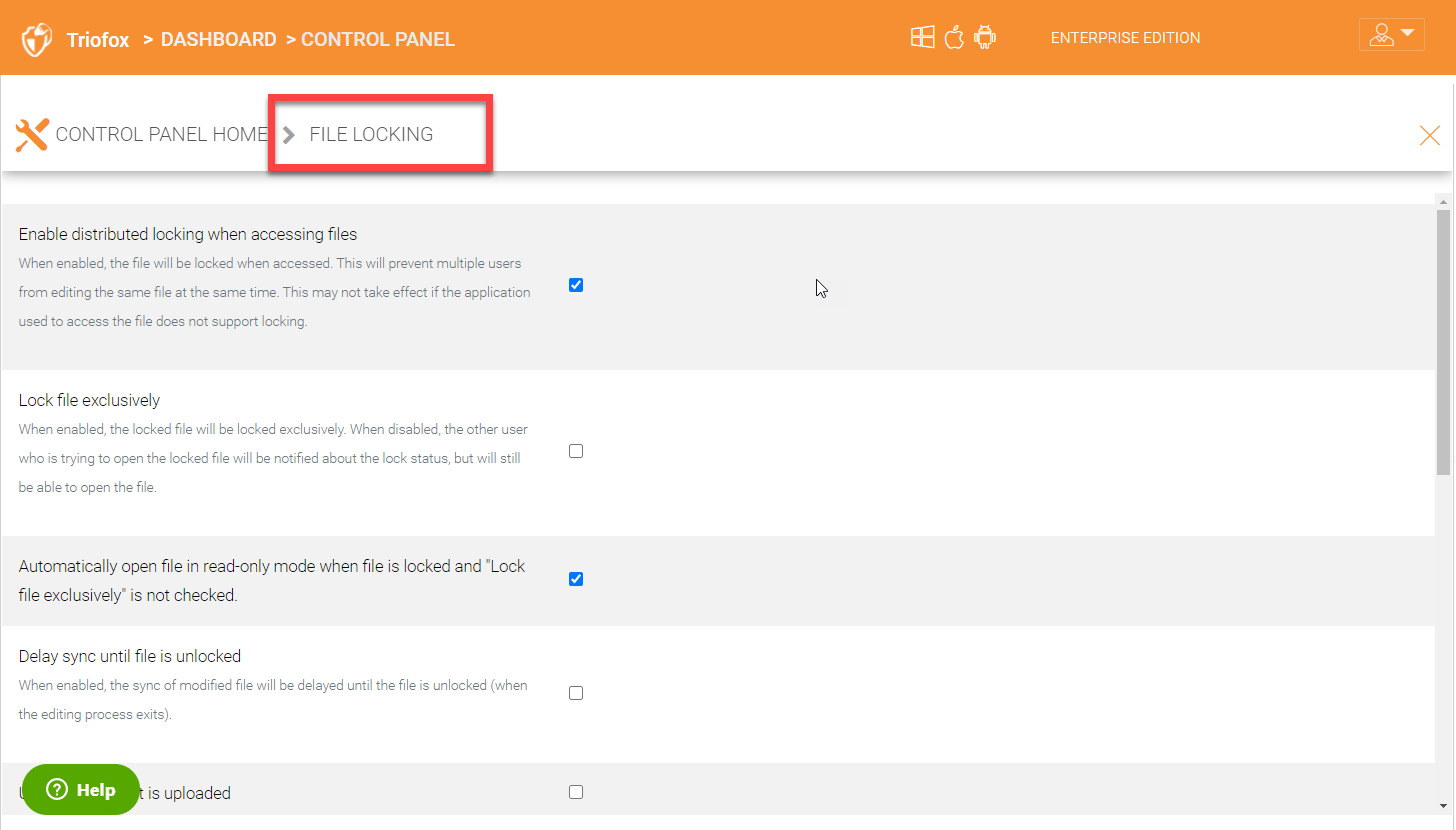
“Enable Distributed locking when accessing files”
In the Cluster Server, there are two ways to lock files, one is manually by right clicking on a file and select “Check out”. The other way is automatic based on certain binary executables. For example, you can see Microsoft Office executable files like winword.exe and so on.
“Lock file exclusively”
When enabled, the locked file will be locked exclusively. When disabled, the other user who is trying to open the locked file will be notified about the lock status, but will still be able to open the file.
“Automatically open file in read only mode when file is locked and “Lock file exclusively” is not checked.”
When this setting is enabled (default), a second attempt to open a locked file will result in the file opening in read-only mode. If “Lock file exclusively” is checked, then second user will not be able to open a locked file.
“Delay sync until file is unlocked”
It is recommended to check this setting. Most users have habit to save files in the middle of editing. You don’t want these edit to go every time to the cloud for these intermediate saves. You want to do a save to the cloud at the end like a grand finale. So you can delay sync until file is unlocked.
“Unlock file after file is uploaded”
After the file is uploaded, unlock the file.
“Lock file natively on network shares”
When a file is locked in the Triofox, if the file is from an attached network share, the Triofox lock will be converted into a native file system lock on the network share. This provides locking interoperability between the Triofox and the underlying file system network share.
“Enable scheduled sync for files with following extensions (i.e.[.mdb][.qbw]) when the file is locked”
When files are locked, the client will consolidate multiple changes into one upload event and use Volume Shadow Copy to avoid interfering with applications that are using the files. Typically this applies to database files that are constantly in use and constantly actively writing (commit) to the database file.
“How often to sync the files with above extensions”
This setting allows you to control the interval of synchronization that takes place on the above file extensions.
“Apply lock only to the following processes (Lower case)”
You can specify the processes here for which locking should be applied. By default, locking is enabled for Microsoft Word, Excel, and PowerPoint.
“Apply lock only to the following MAC processes”(Lower case)
You can specify the processes here for which locking should be applied. By default, locking is enabled for Microsoft Word, Excel, PowerPoint and MAC text editor.
“Locking is disabled for files with the following extensions (i.e.[.xml][.exe])”
You can use this setting to specify which file types will be ignored with regard to the file-locking feature.
8.12 Client Settings
Admin Dashboard > Control Panel > Client Settings
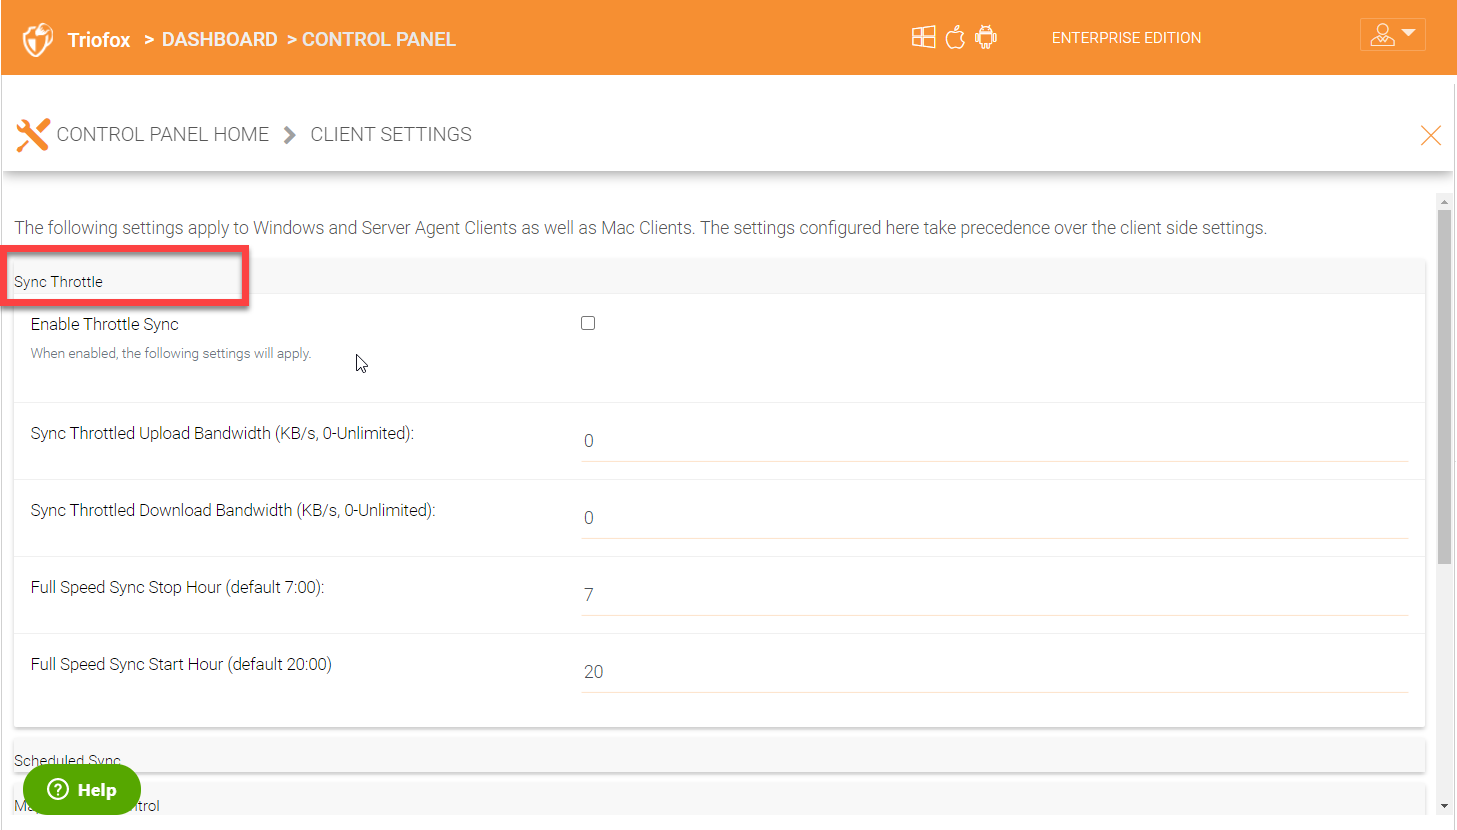
The following settings apply to Windows and Server Agent Clients as well as Mac Clients. The settings configured here take precedence over the client side settings.
Sync Throttle
SYNC THROTTLE SETTINGS
Enable Throttle Sync
When disabled (default) all Sync Throttle settings in this section are disabled. Must be enabled to activate the following settings.
Sync Throttled Upload Bandwidth (KB/s, 0-Unlimited):
This setting controls the upload bandwidth from the client machine.
Sync Throttled Download Bandwidth (KB/s, 0-Unlimited):
This setting controls the download bandwidth from the client machine.
Full Speed Sync Stop Hour (default 7:00):
Full speed sync means multiple thread concurrent upload or download. This is typically good for after hour activity. We recommend default setting stop at 7am so when people return to work, the full speed sync stops so to give back more bandwidth to users who may be using the Internet for other purposes.
Full Speed Sync Start Hour (default 20:00)
Similar to the above setting, we recommend start full speed sync after working hours.
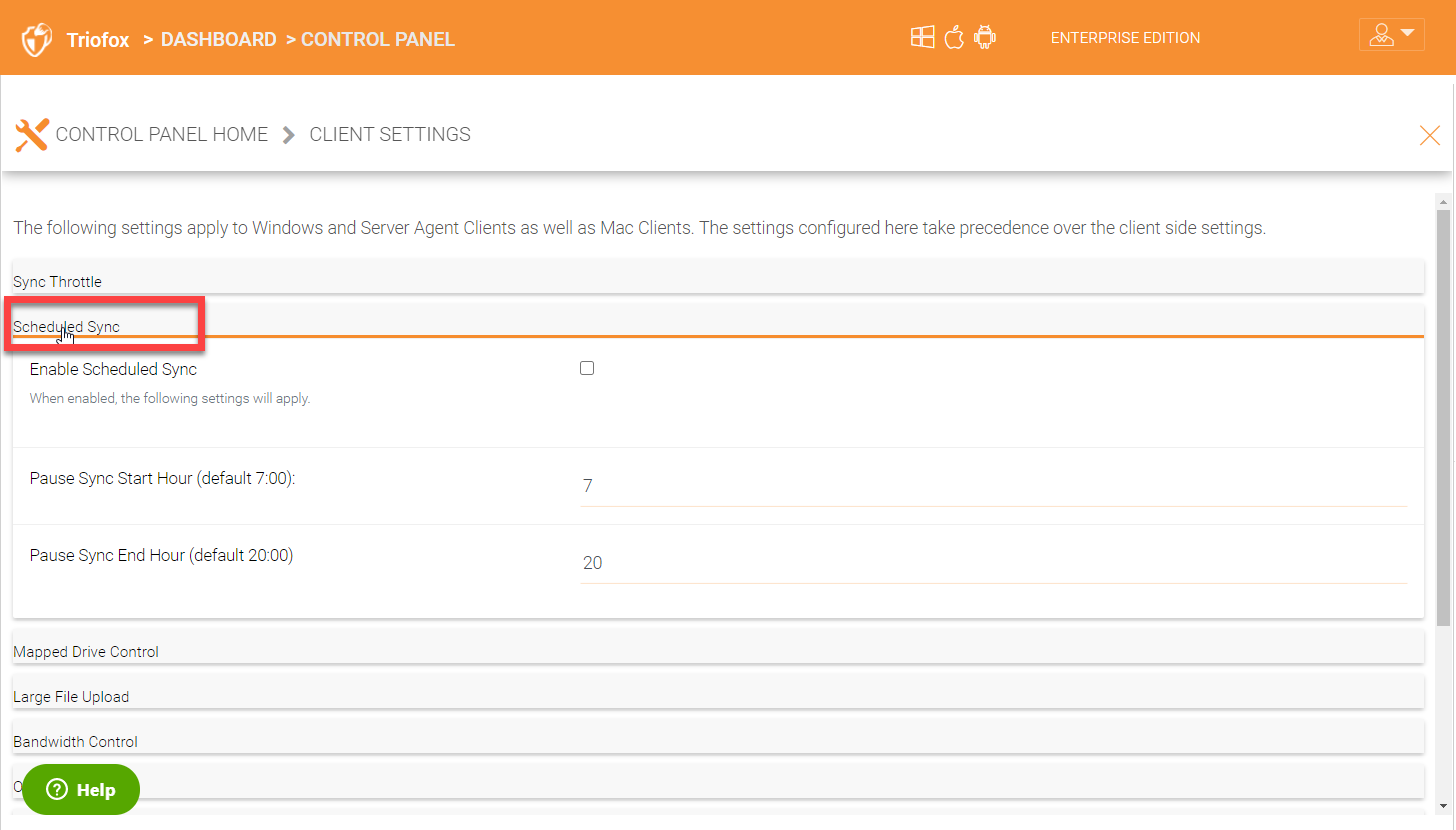
Scheduled Sync
Enable Scheduled Sync
On the client side, in addition to a mapped drive (or a mac mounted volume), there is also functionality about folder synchronization. This setting can control when to sync. For example, if the business has limited bandwidth to the Internet, avoid doing synchronization during the working hours can save bandwidth.
SCHEDULED SYNC SETTINGS
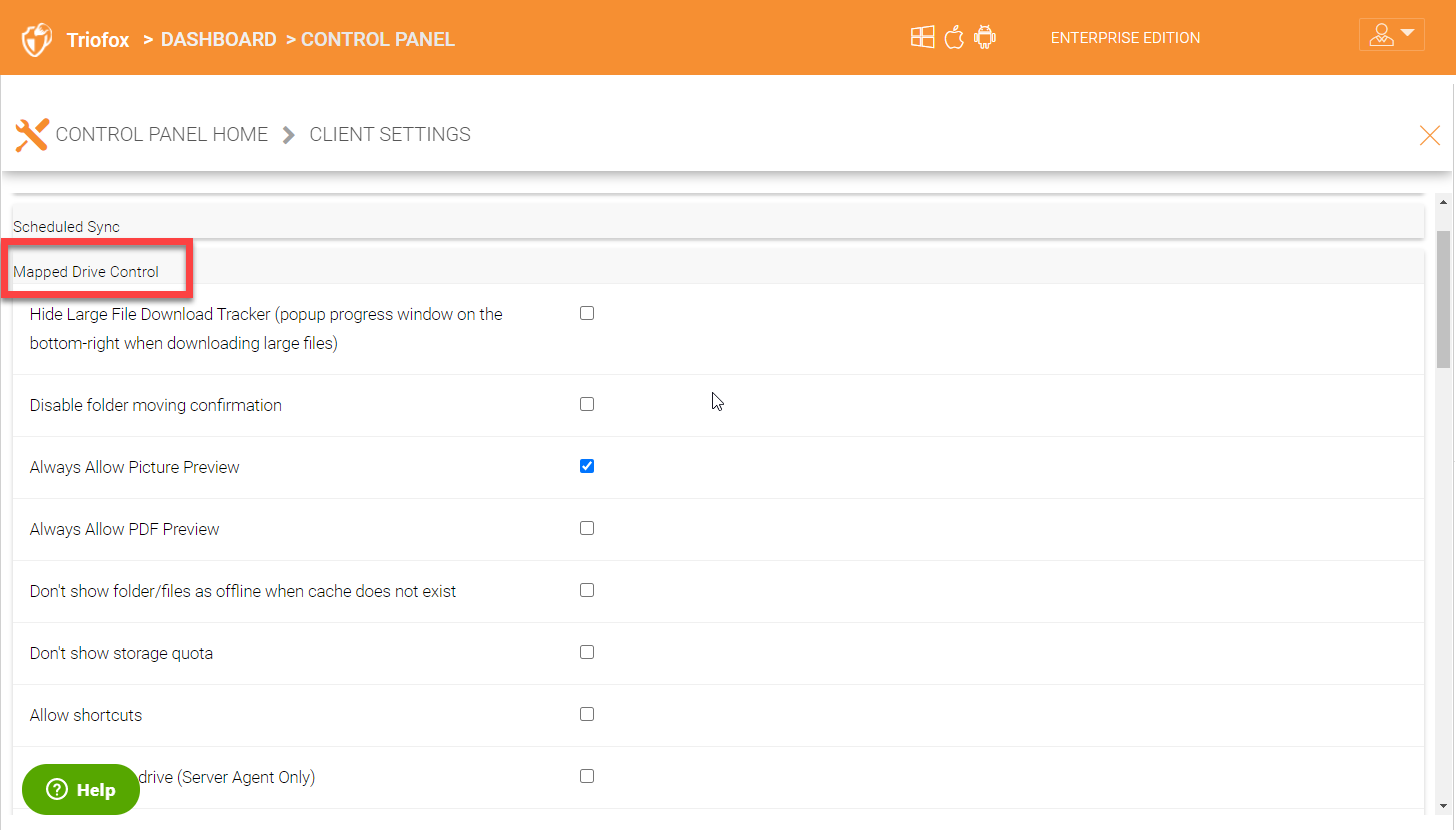
Mapped Drive Control
MAPPED DRIVE CONTROL SETTINGS
Hide Large File Download Tracker (popup progress window on the bottom-right when downloading large files)
This is usually good for usability but people may find it annoying if download is popping up a download progress dialog at the lower right corner.
Always Allow Picture Preview
Windows Explorer may want to download pictures in the background to generate thumbnails. This consumes bandwidth and may slow system down until all the preview thumbnails are generated. By default the client program disables the preview. However you can re-enable it.
Allways Allow PDF Preview
Windows Explorer may want to download PDFs in the background to generate thumbnails. This consumes bandwidth and may slow system down until all the preview thumbnails are generated. By default the client program disables the preview. However you can re-enable it.
Allow shortcuts
Allow shortcuts (.lnk) files.
When starting the client, open the mounted drive automatically
Enabling this opens the mounted drive in Windows Explorer when the client starts.
Do not show file change notifications
This is another feature that shows file change notification at the lower right hand corner of Windows desktop. People may find it annoying if the change notification comes in quite often.
Do not show file in-place editing/preview disabled notifications
This feature also shows file change notification at the lower right hand corner of Windows desktop. People may find it annoying if the change notification comes in quite often.
Enable Inplace Open Zip File
Windows Explorer has zip built-in extension that can open a zip file when double clicked on. It maybe good for local drive but for cloud drive, that means the zip file is unzipped and re-upload back into the cloud. By default client application disables opening zip file directly in the cloud drive.
Enable Single Sign On with login windows user identity
Enable Single Sign On with Login Windows User Identity - For Windows client agent running on a Windows Desktop machine, the login windows’ user’s identity will be used for single sign on to the Triofox account.
Max Size of Zip File Allowed to Open In-place (MB)
Limits the size of a Zip File that can be opened in-place.
Max Size of File Allowed to Generate Thumbnail (MB)
Limits the size of Files that can be used in the generation of thumbnails.
Cloud Drive Label
What do you want to call your windows client drive.
Drive Letter
What do you want to give the drive letter to the client application.
Cache Size Limit (MB)
The Windows client maintains a client-side cache of this size (0 - unlimited)
Minimal free disk space (GB)
This setting is used to establish a minimum amount of disk space used for the windows client drive.
Purge logging db n days old (0 - don’t purge)
This limits how many days of logging are kept in the Windows client cache.
Mount Drive in global space (Windows Client Only)
A drive mounted in the global space will not be subject to UAC (User Account Control) limitations, such as when legacy applications are required to run with administrative privilege and cannot see the drive guarded by the UAC. On the other hand, drives that are mounted in the global space are visible to any other users who log in on the same Windows machine at the same time.
In offline mode, only show files that are chached and available locally
Typically there will be place-holder files and representative icons created for all of the files in the client drive. If this setting is enabled, only locally stored files will be shown.
Disable “Check Out”
Turn off the “Check Out” feature and remove it from the right-click context menu.
Encrypt Local Cache
Once enabled, when a file is downloaded to cache, it is encrypted in-place. When an authorized user then accesses the file from the (M:) Mapped Cloud Drive, CentreStack automatically decrypts it on the fly and then returns it to the user.
Disable AutoCad Optimization
By default, there is an AutoCad optimization that delays the synchronization of updated .dwg file and schedules it to sync upwards to cloud at a later time. Use this setting to disable this AutoCad optimization and make saving AutoCad .dwg files act the same as saving other regular files and lets .dwg file behavior follow other policy settings.
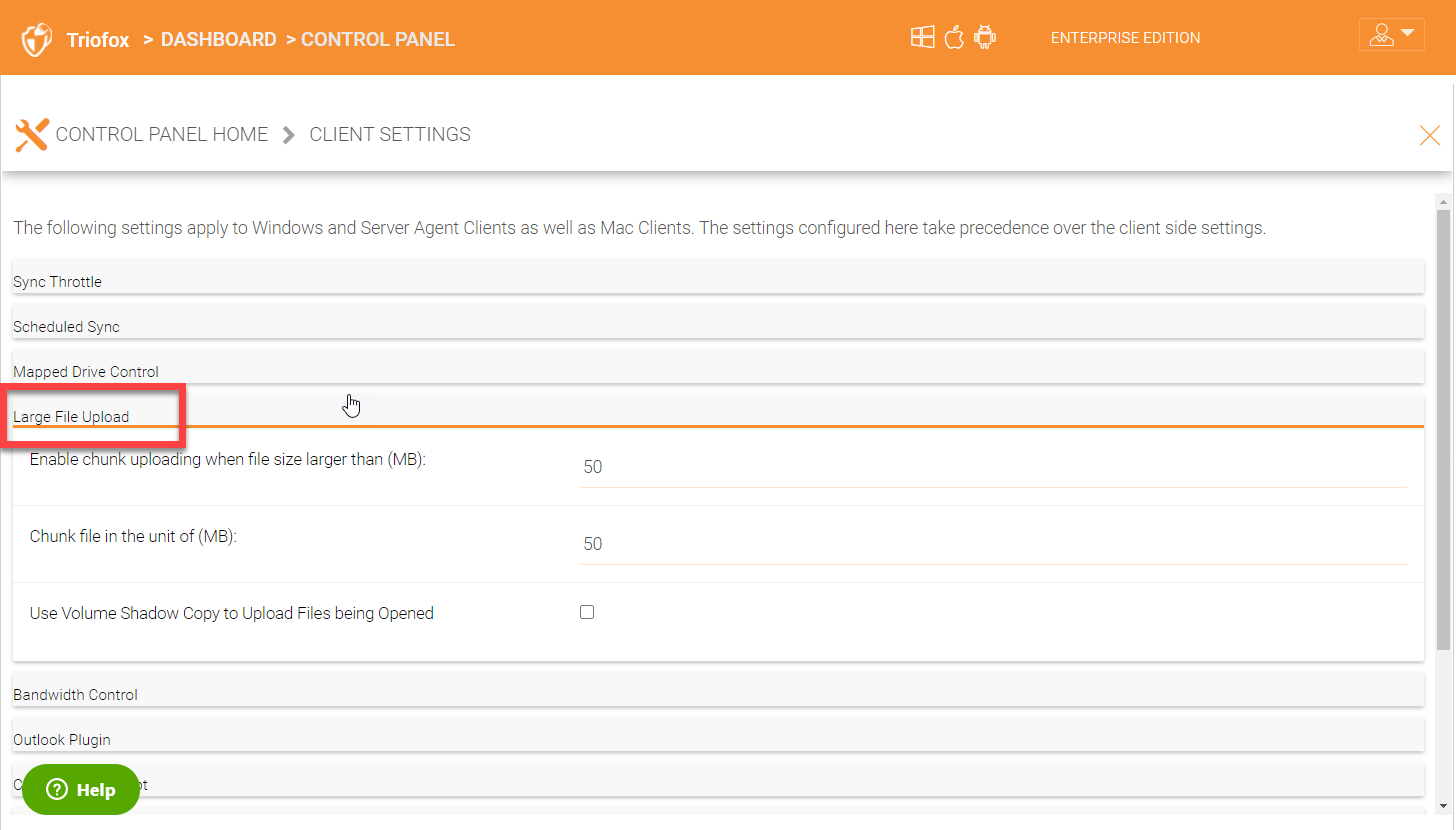
Large File Upload
LARGE FILE UPLOAD SETTINGS
Enable chunk uploading when file size larger than (MB)
Uploading a single large file can be disrupted by an Internet glitch. This setting breaks large files into smaller chunks to increase the success rate.
Chunk file in the unit of (MB):
Works with the above setting to establish what size the chunks will be in as they are transferred.
Use Volume Shadow Copy to Upload Files being Opened
There is pro and con of using this flag. When file is open by other application, the file usually is locked and can’t be uploaded until the file is closed. However using volume shadow copy can still upload the file. The down side is when the volume shadow copy happens, the file is not known to be in a consistent state.
Bandwidth Control
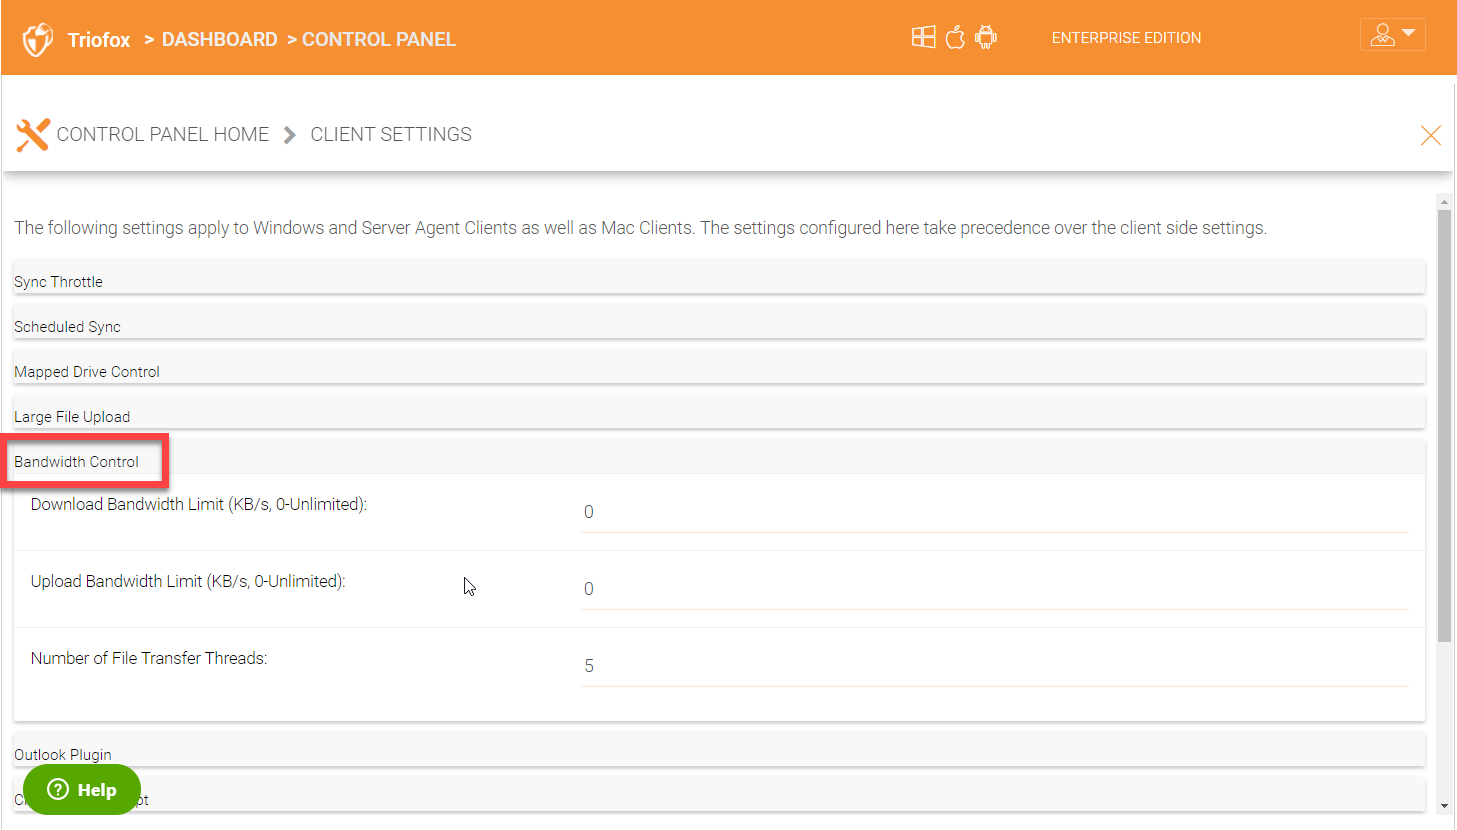
BANDWIDTH CONTROL SETTINGS
Download Bandwidth Limit (KB/s, 0 - Unlimited):
This is download bandwidth control.
Upload Bandwidth Limit (KB/s, 0 - Unlimited):
This is upload bandwidth control.
Number of File Transfer Threads:
This is the number of concurrent upload/download allowed (default is 5).
Outlook Plugin
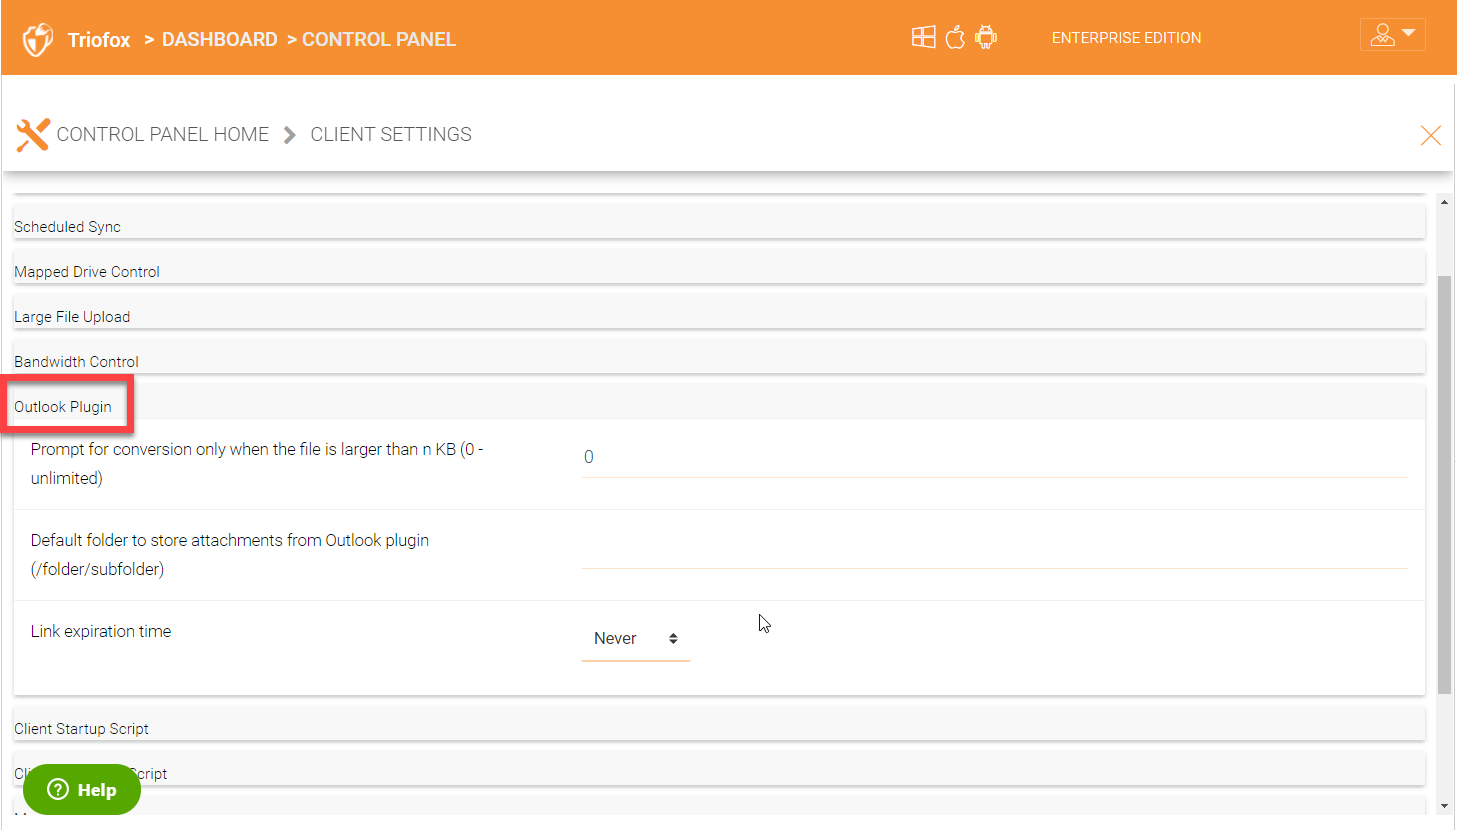
OUTLOOK PLUGIN SETTINGS
Prompt conversion only when file is larger than n KB (0 - unlimited)
For smaller files, it may be as well to just use the native outlook attachment.
Default folder to store attachments from Outlook plugin (/folder/subfolder)
Allows you to set a storage location for the above setting.
Link expiration time
Allows Outlook share link to last indefinately or expire in a specified timeframe (e.g., never, one day, one week, one month, six months, one year).
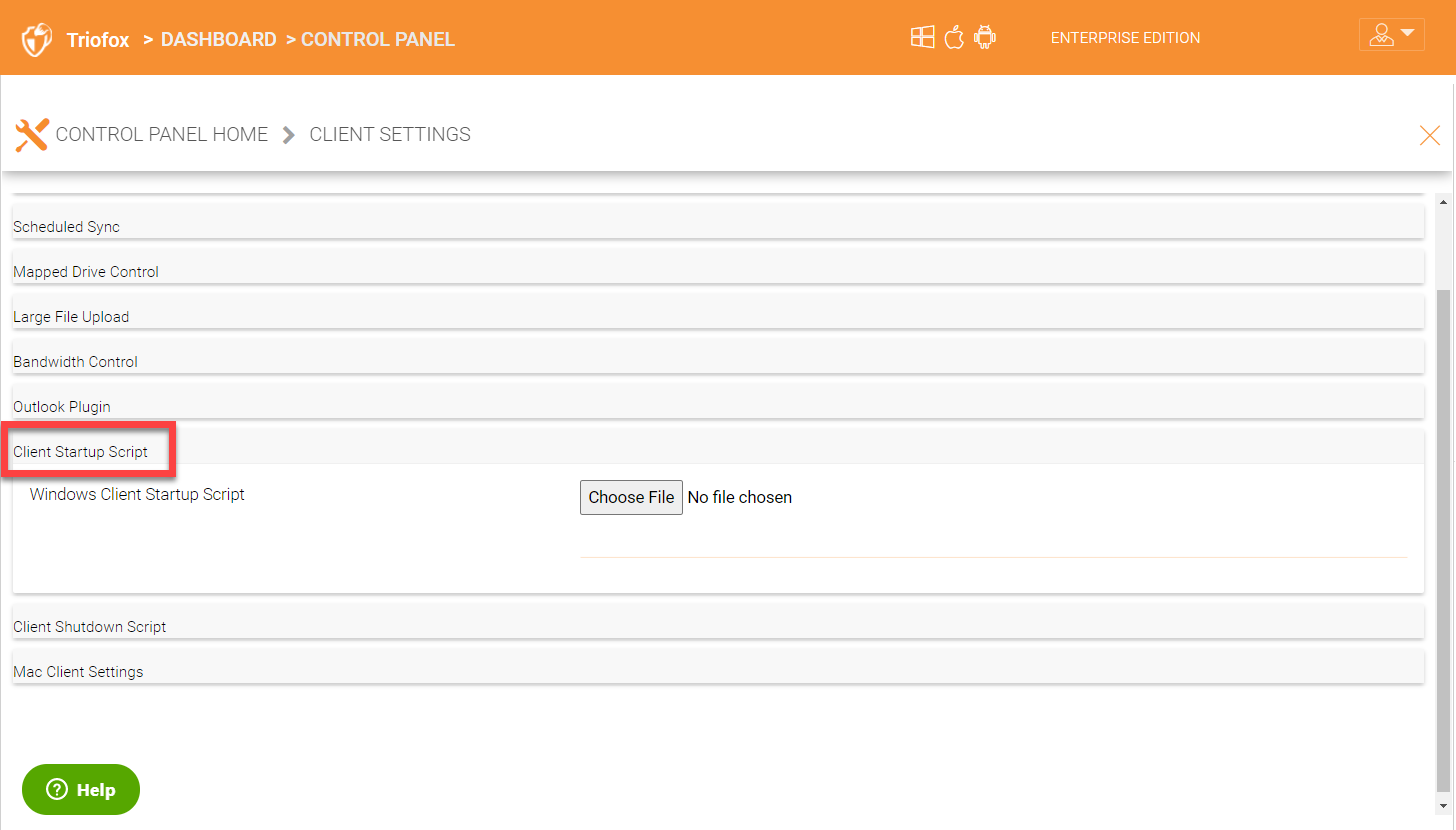
Client Startup Script
After the Windows client is completely started and finished loading, a command line script can be run. You can be upload that script here. For example, a script to map an additional drive letter to a specific folder inside the cloud drive.
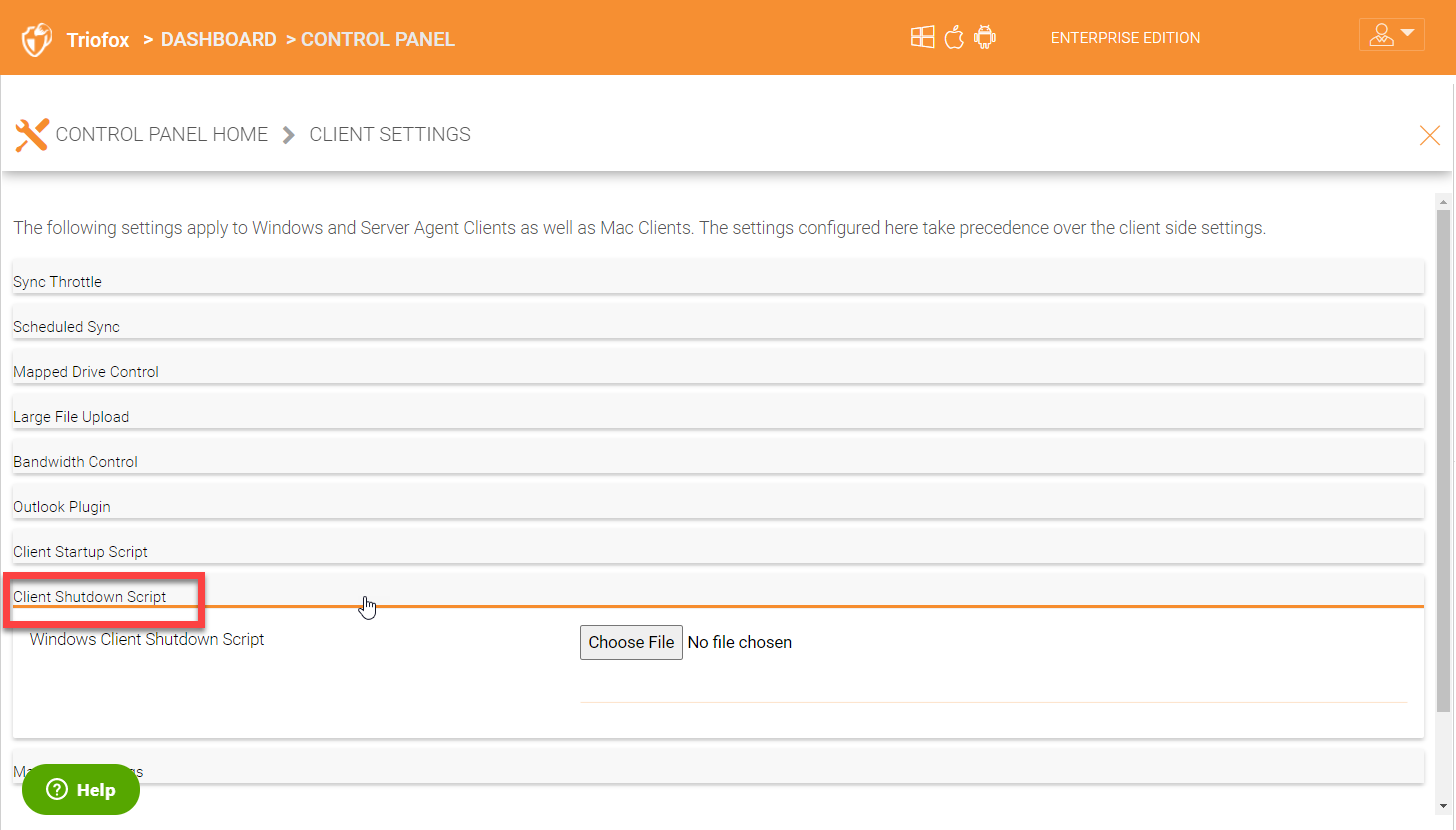
Client Shutdown Script
Right before the Windows client is completely shutdown and finished running, a command line script can be run. You can upload that script here. For example, a script to clean up any reference to folders and files inside the cloud drive.
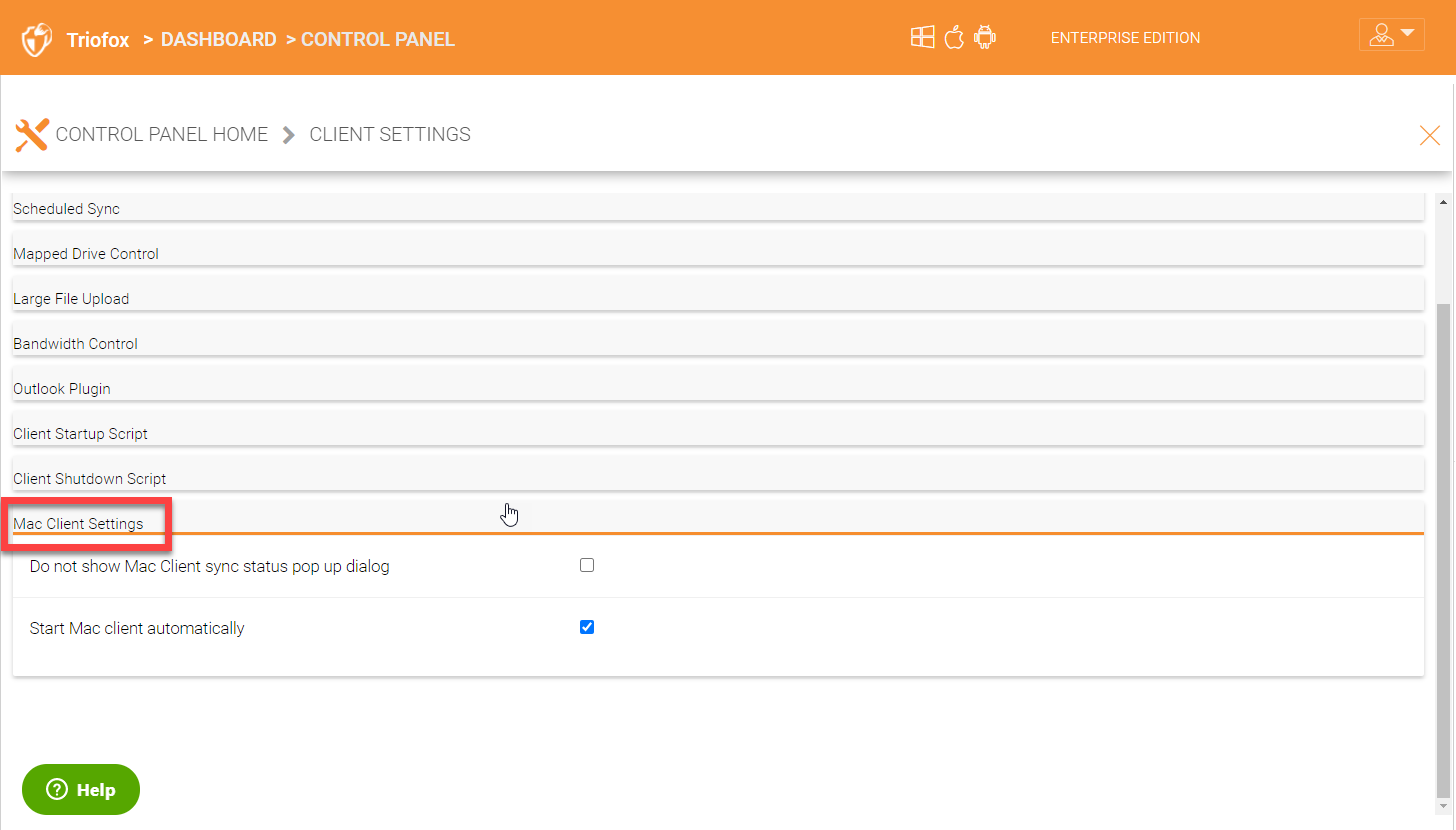
Mac Client Settings
Do not show Mac Client sync status pop up dialog
This is usually good for usability but people may find it annoying if the file status is popping up a progress dialog at the lower right corner.
Start Mac Client automatically
(Enabled by default.) If this is disabled, the Mac Client must be started manually.
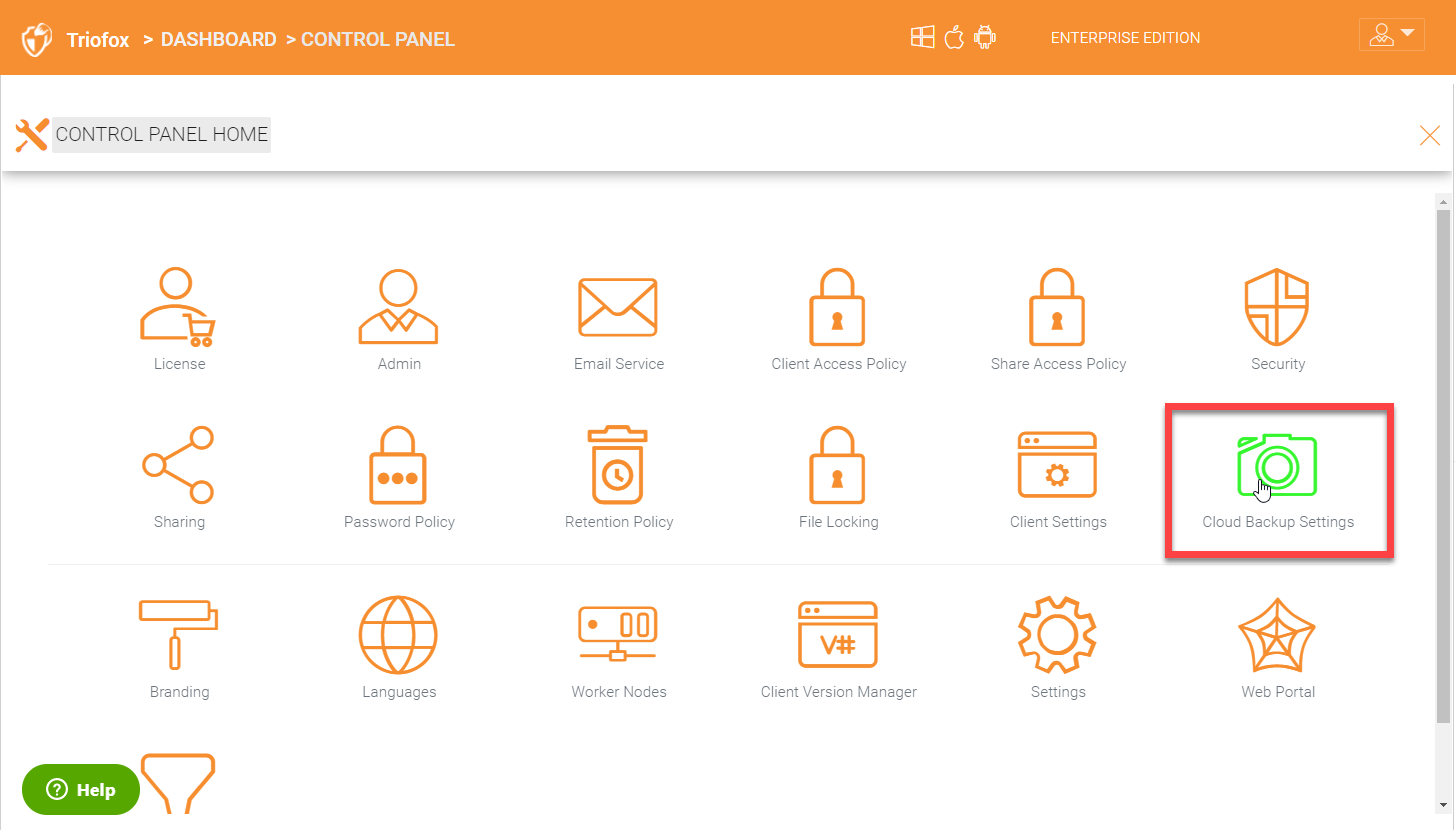
8.13 Cloud Backup Settings
Triofox Cloud Backup is highly configurable, allowing you to determine where the backups will be stored, when they will be scheduled, which folders should be backed up be default on the endpoints and so forth. Most of these settings can be found in the ‘Cloud Backup Settings’ section as shown below.
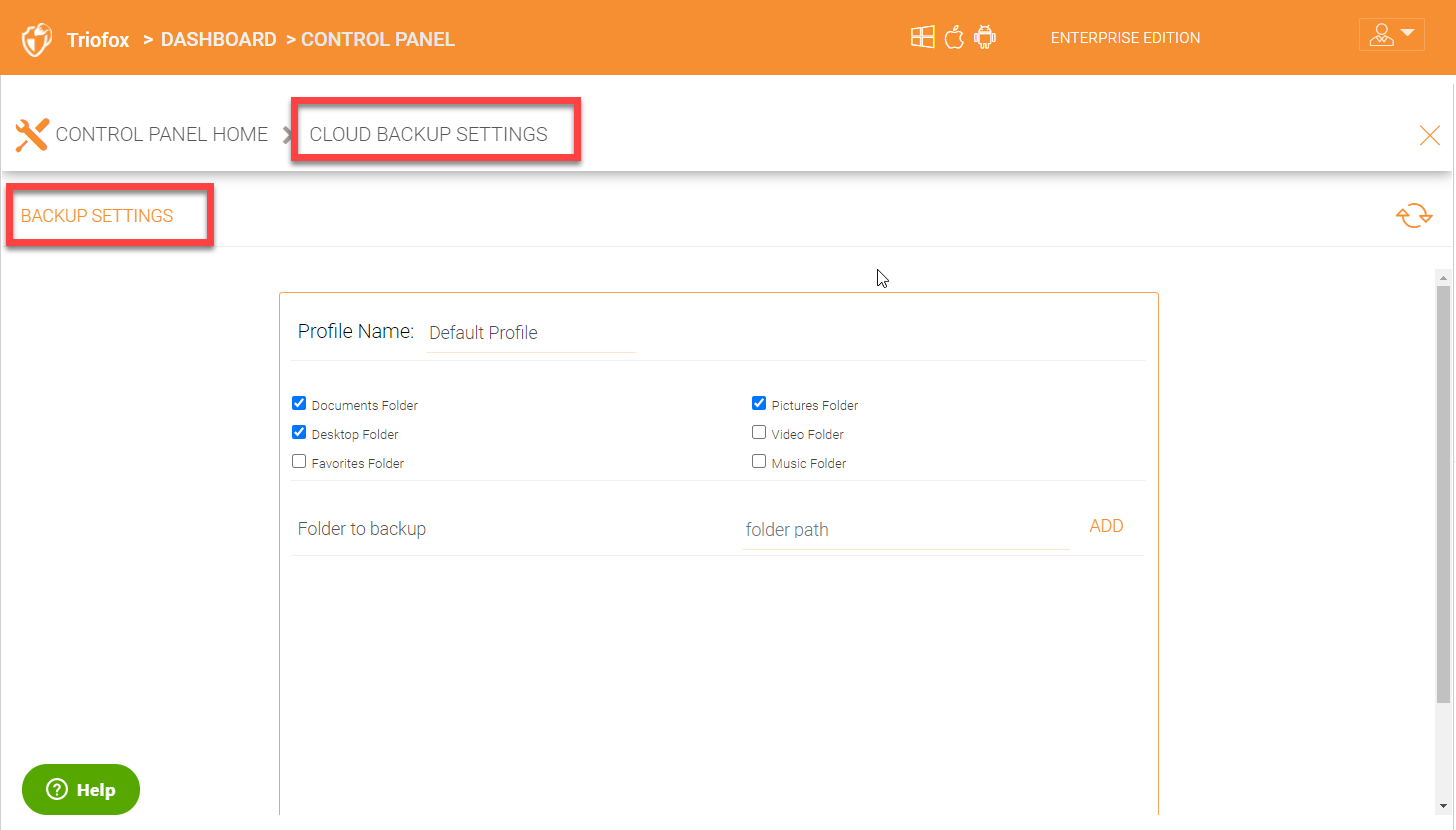
8.13.1 Enable Device Backup for All Users
Admin Dashboard > Control Panel > Cloud Backup Settings > Device Backup Profile
As a cluster administrator, go to Cloud Backup and Restore and then navigate to Settings and Details. Go to ‘Other Settings’ to enable ‘Backup all devices with below profile’. Select a profile and then click on ‘Save Changes’.
ENABLE DEVICE BACKUP FOR ALL USERS
Note
You must first create a device backup profile that can be attached to all devices. See below for details.
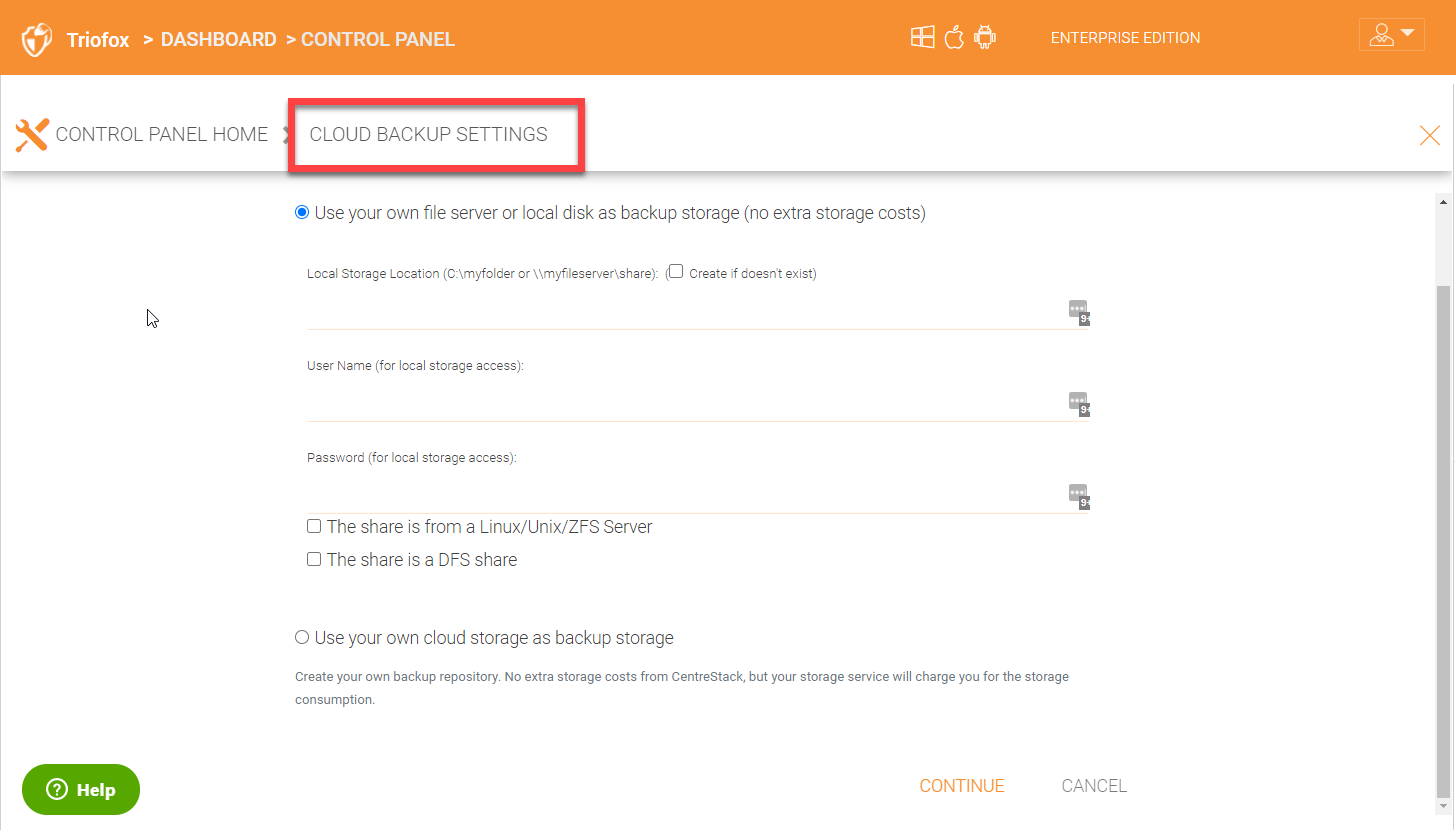
8.13.2 Change Backup Storage
Configure the cloud backup storage location. You can choose to back to another server in a disaster recovery site or you can backup cloud storage services like AWS S3 or Azure blob etc.
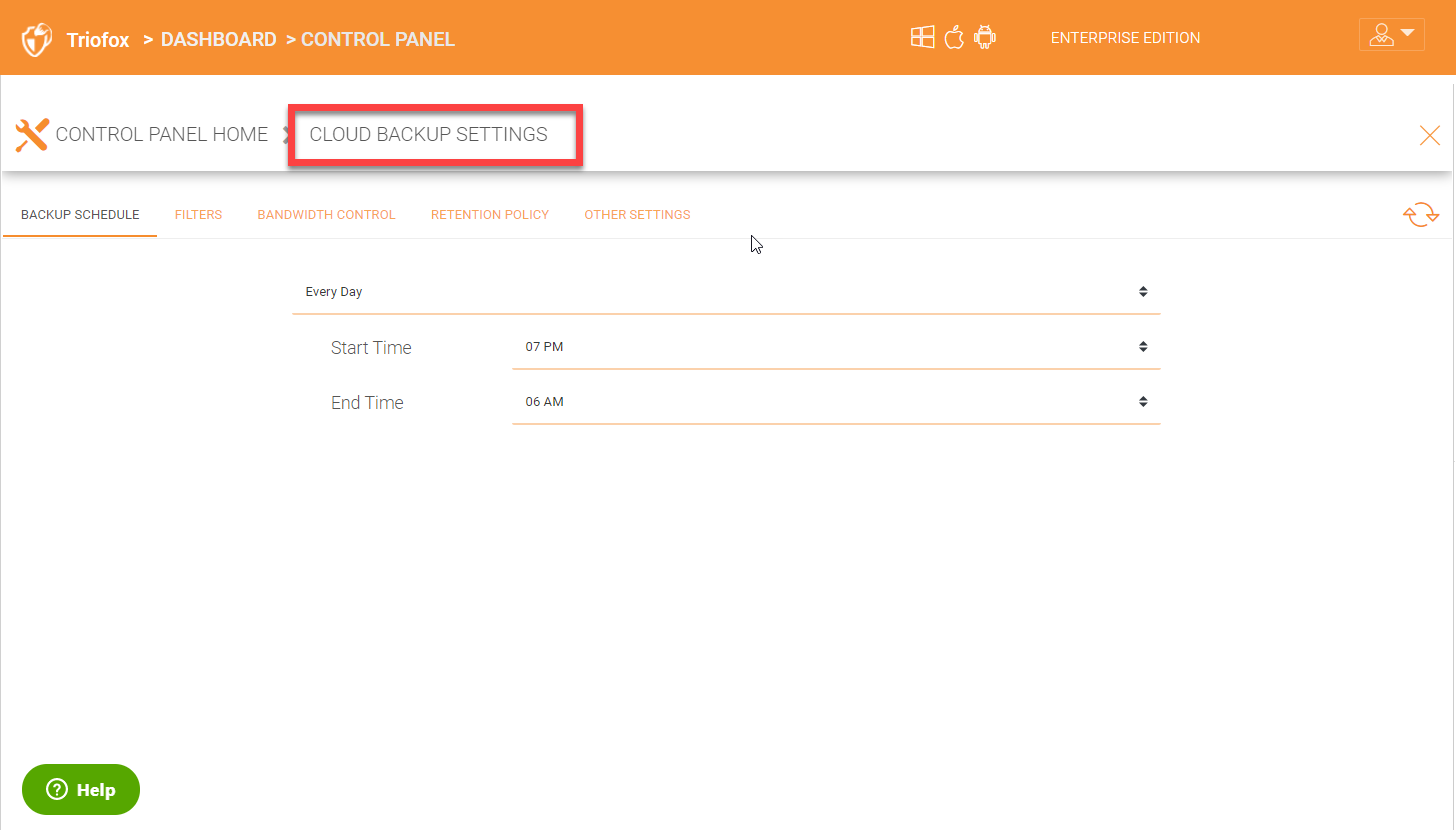
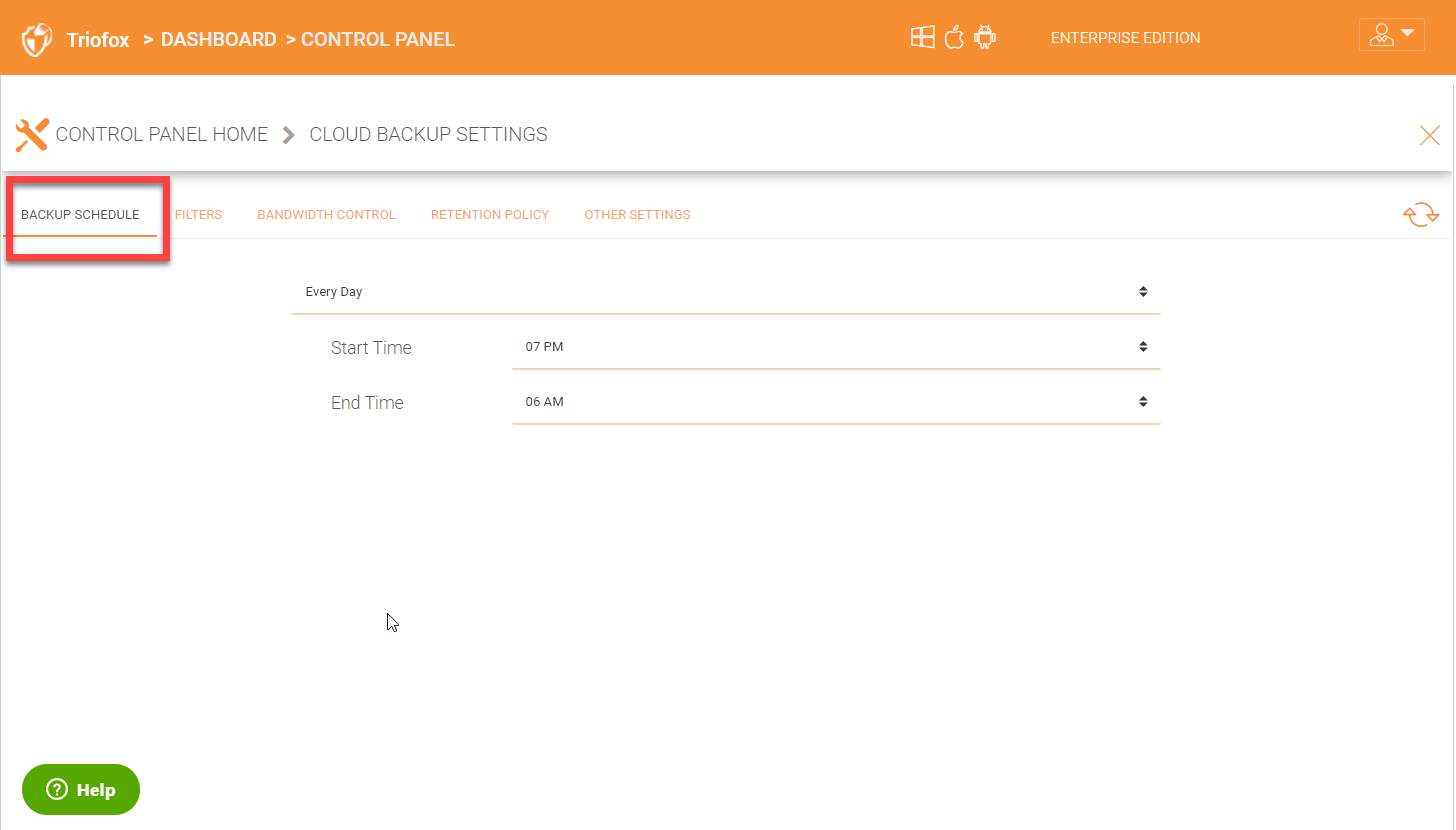
8.13.3 Backup Sschedule
Define the start and end times for daily backups. The default start time is 7 PM and end time is 6 AM.
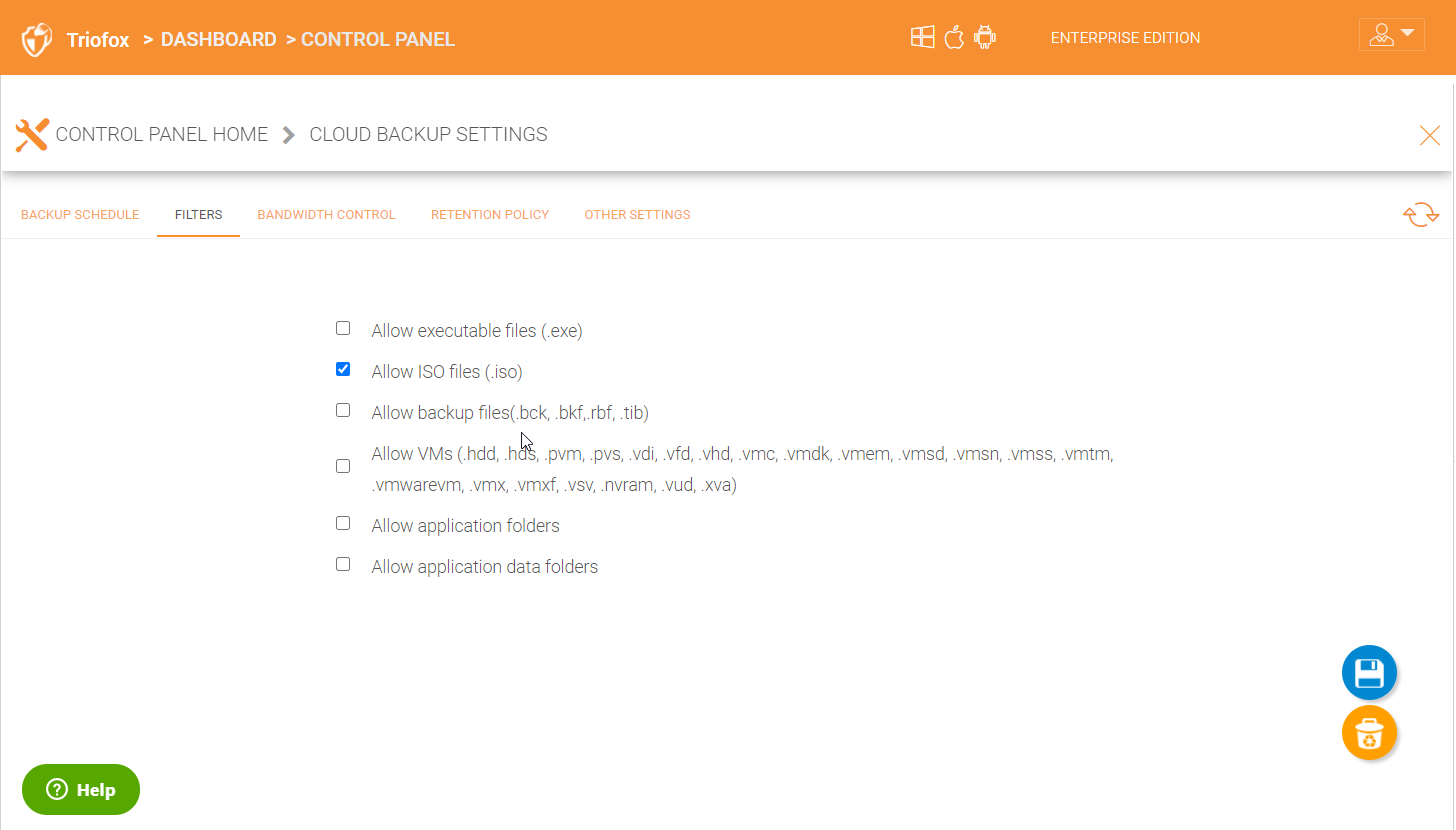
8.13.4 Filters for Files and Folders
Control Panel > Cloud Backup Settings > Details > Filters
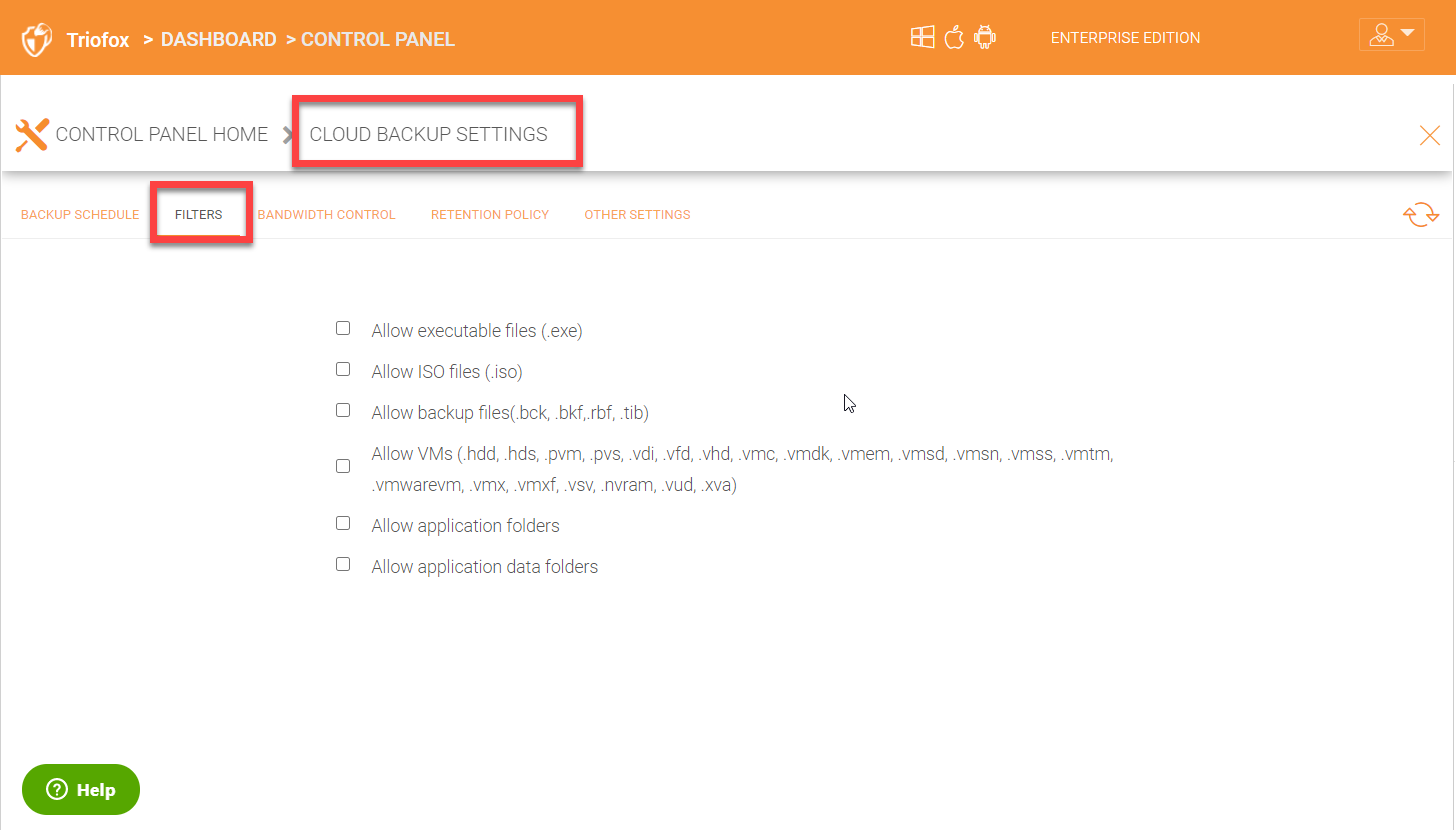
By default, the device backup snapshots will filter out the file types listed in the ‘Filters’ section of ‘Backup Settings’ and must be explicitly enabled. For example, select ‘Allow ISO files (.iso)’ to have ISO files included in each snapshot.
CONFIGURE FILTERS FOR FILES AND FOLDERS
8.13.5 Cloud Backup Bandwidth Control
Control Panel > Cloud Backup Settings > Details > Bandwidth Control
The current cloud backup bandwidth limits are displayed in the settings section as shown below.
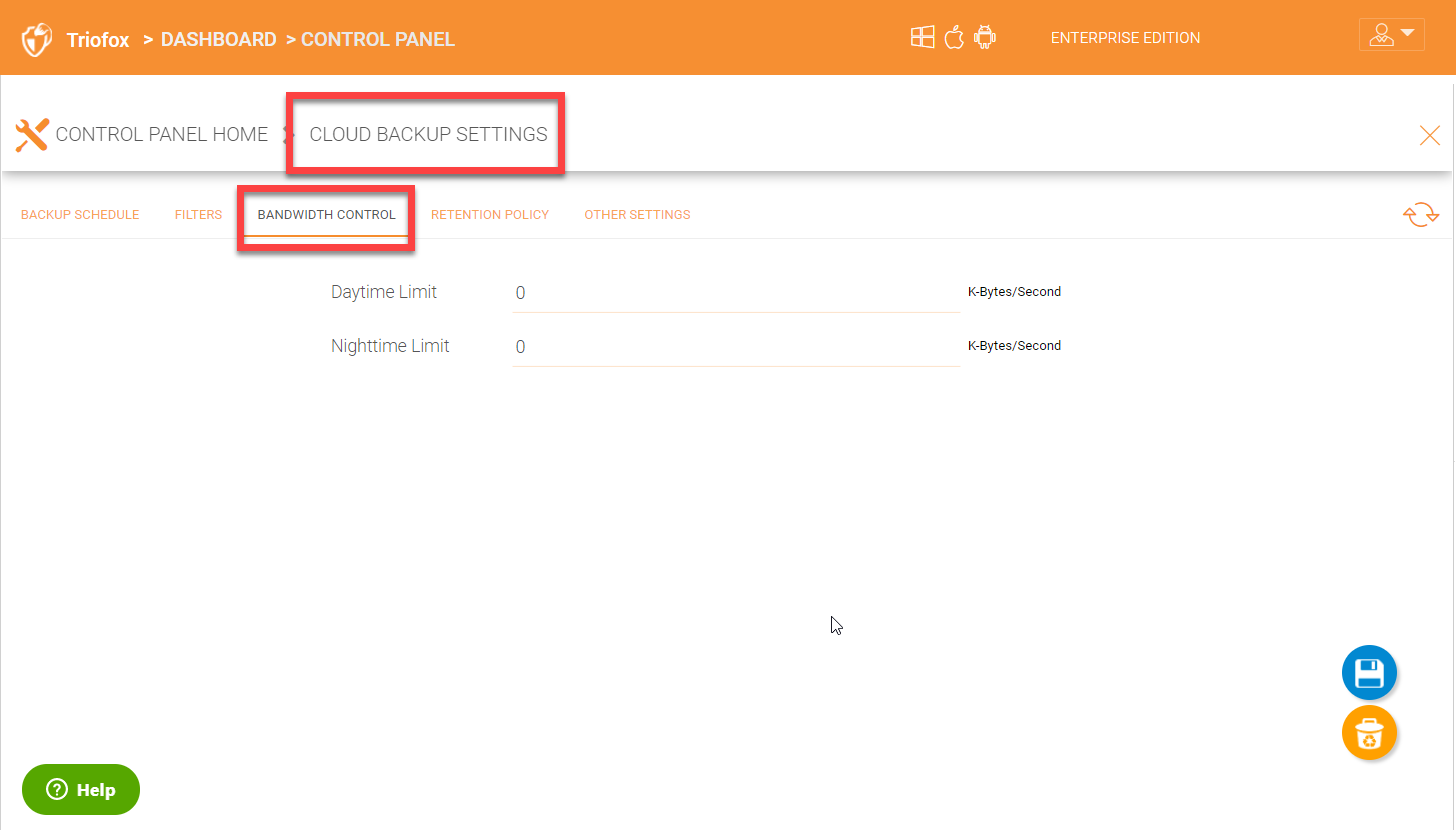
VIEW CLOUD BANDWIDTH LIMITS
Note
Bandwidth limits are in kilobytes per second (kB/s) and 1kB/s = 0.008 Mbps So a setting of 1000 translates to 8 Mbps.
8.13.6 Cloud Backup Retention Policies
Control Panel > Cloud Backup Settings > Details > Retention Policy
There are three retention policies. “Keep last n snapshots” defines the maximum snapshots allowed at any give time. However this setting may be overridden by the value of “Keep snapshots for at least n days” if it is not 0. For example, you may want to only keep the last 2 snapshots available, but if the system is configured to keep a snapshot for at least 30 days, a daily snapshot could result in 30 snapshots being created before any are deleted.
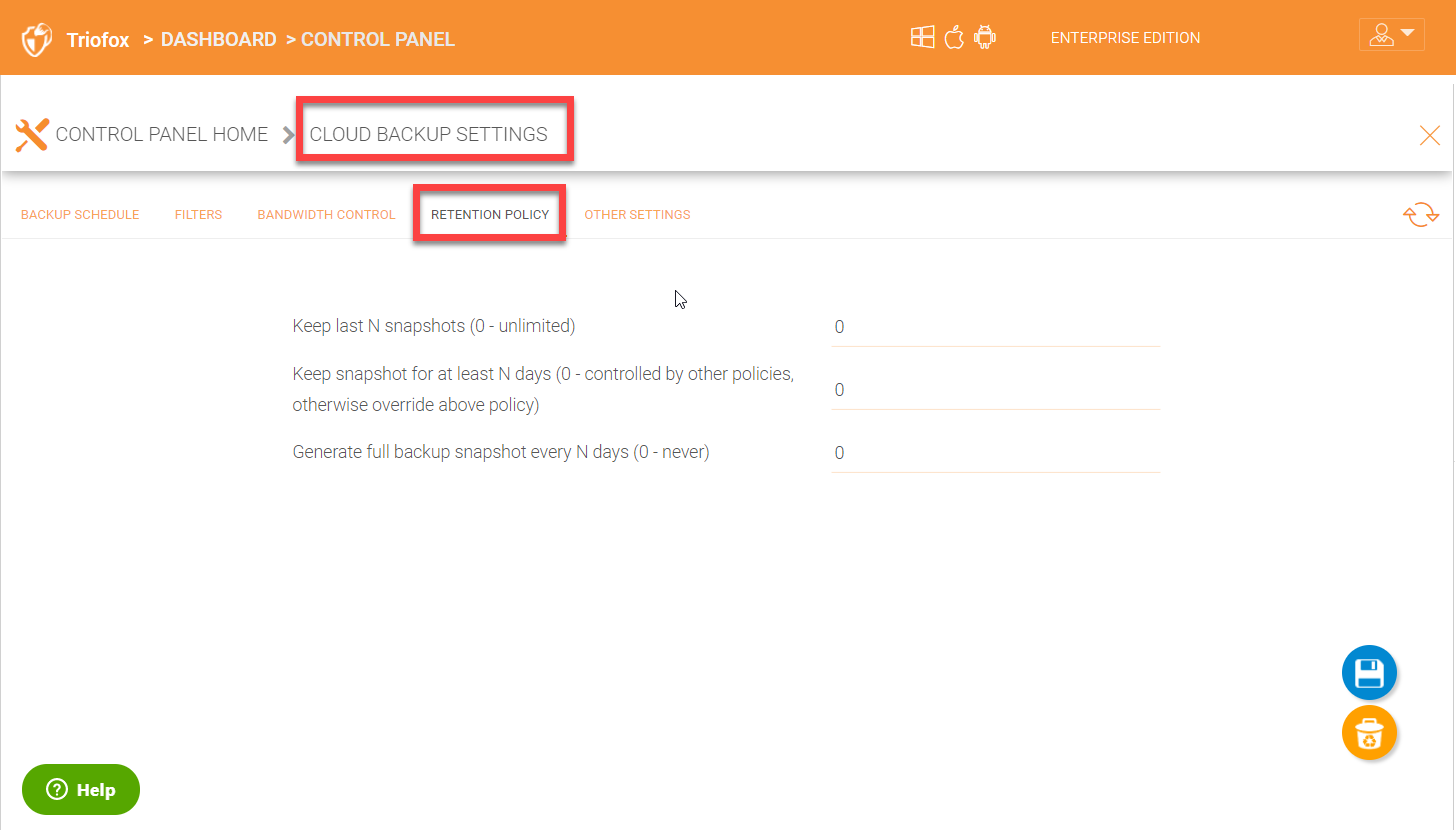
DEFINE RETENTION POLICIES
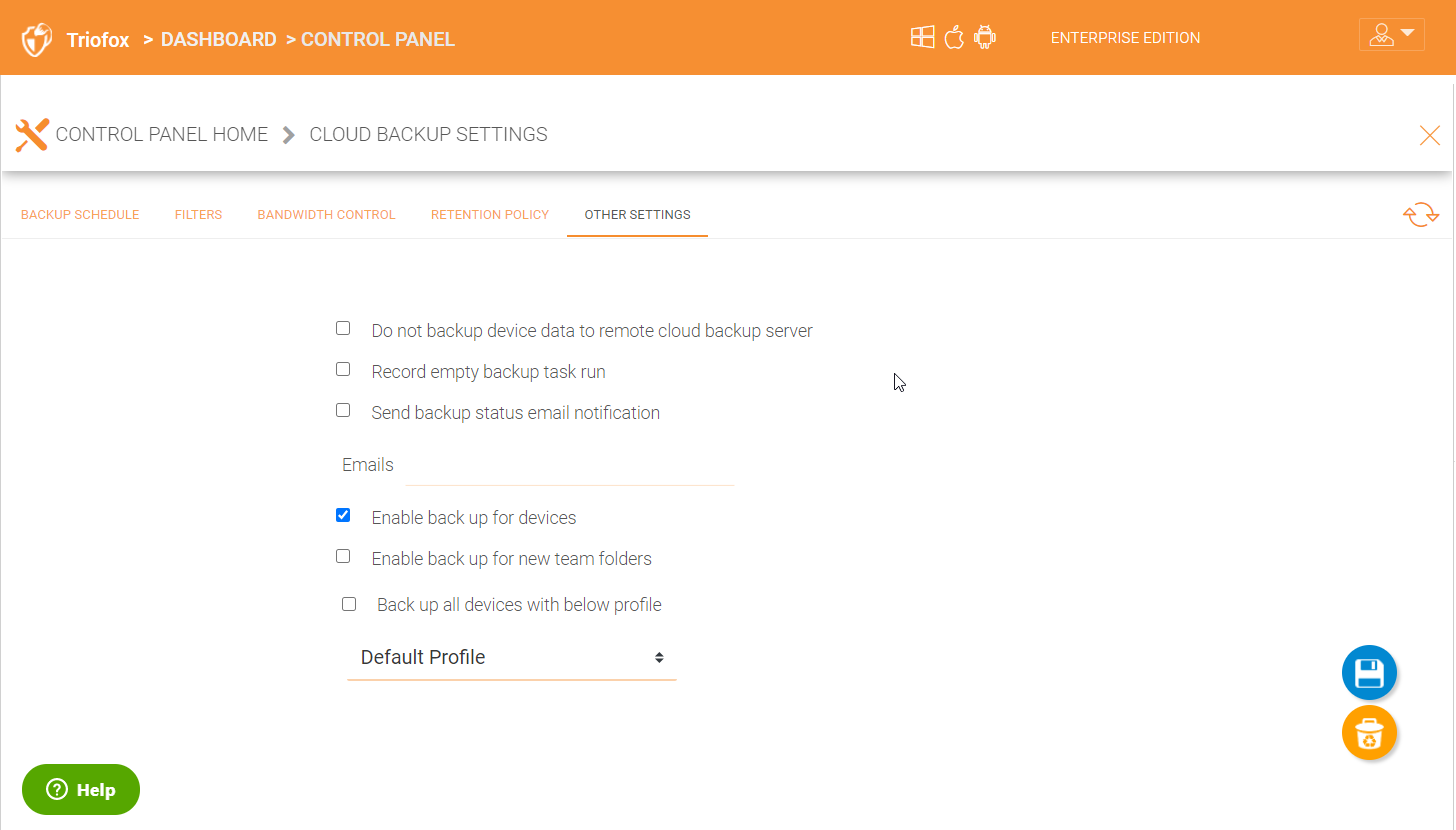
8.13.7 Cloud Backup Other Settings
Control Panel > Cloud Backup Settings > Details > Other Settings
There are more settings that can be configured under the ‘Other Settings’ tab.
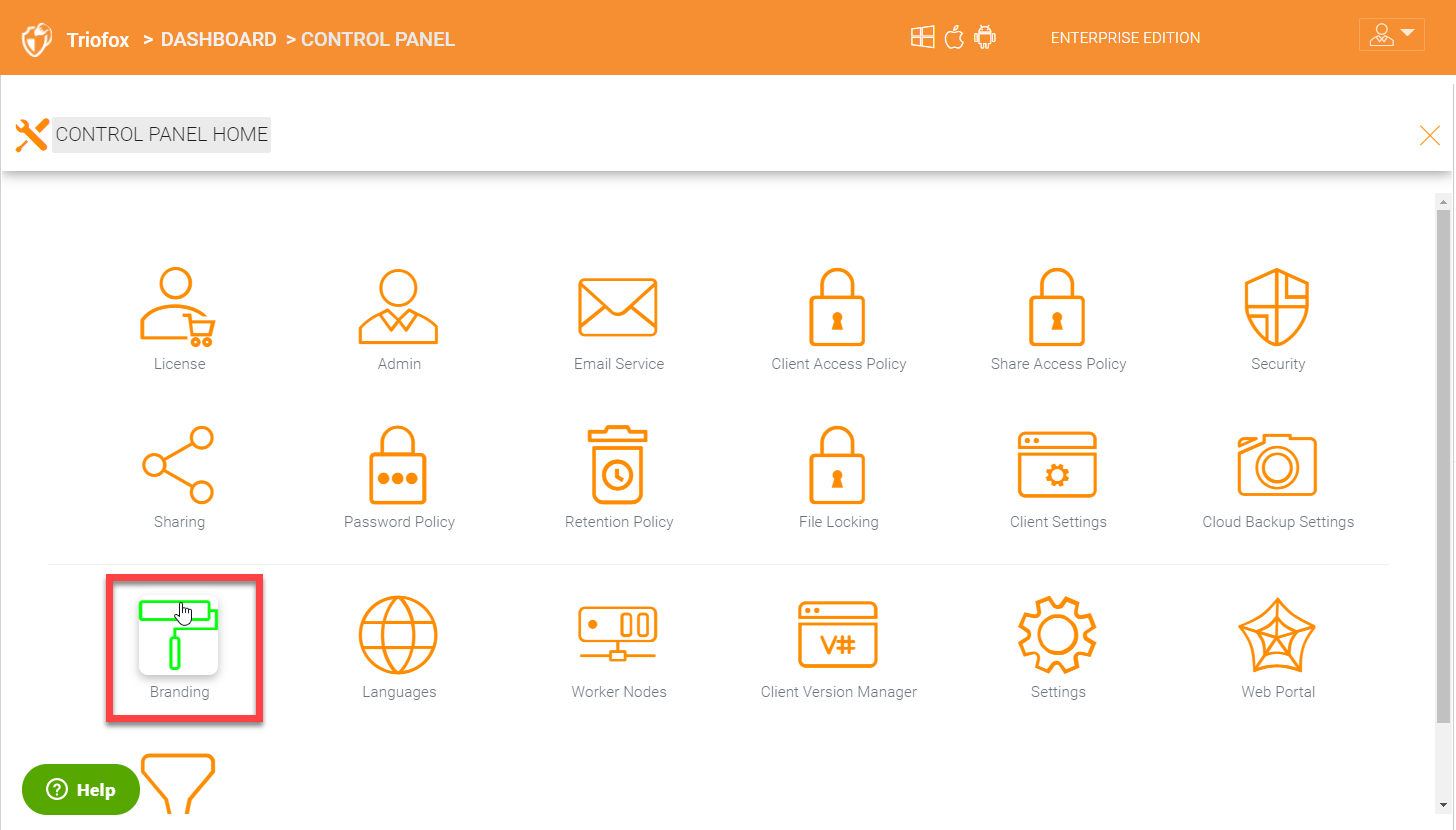
8.14 Branding
Control Panel > Branding
Branding is for changing the logo, bitmaps and other branding related information. There are two branding supports. One is self-service built-in branding, which is completely controlled by the “Cluster Branding” settings in the “Admin DashboardControl PanelBranding”. The other is full-branding service. Both rely on the “Cluster Branding” to change the look-and-feel of the web portal.
Built-in branding will work with white-label clients, which upon the first connection to the cluster, will download the branding related information and use the branding related information. As compared to full-branding service, the full branding clients will have artworks, logo bitmaps and related information burned into the client binaries.
BRANDING
8.14.1 General
Admin Dashboard > Control Panel > Branding > General
Under the general tab you can specify the name and other settings as specified below.
Product Name
This is where you will specify what you would like to call the product. This is the name that users will see when they login either in web portal or the client applications. To access branding settings click the branding icon (1) then “EDIT” (2) and then change the setting you want (3). Don’t forget to save your settings. You can also choose a color theme which you would like your users to see when they login to the portal. You can choose a color theme that is close to your company colors.
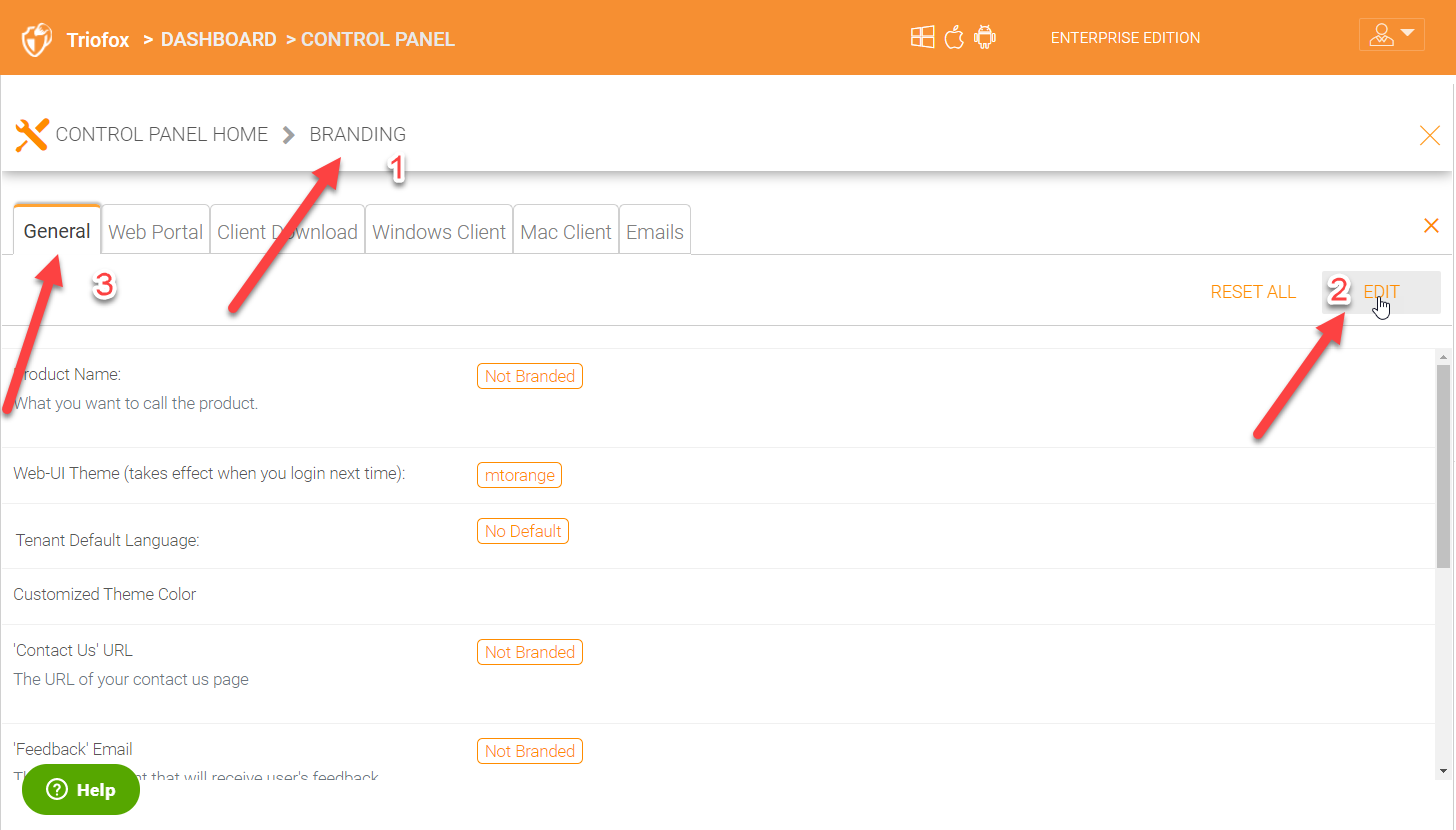
CLUSTER BRANDING
Feedback Email
Users’ feedback will be delivered to this email address.
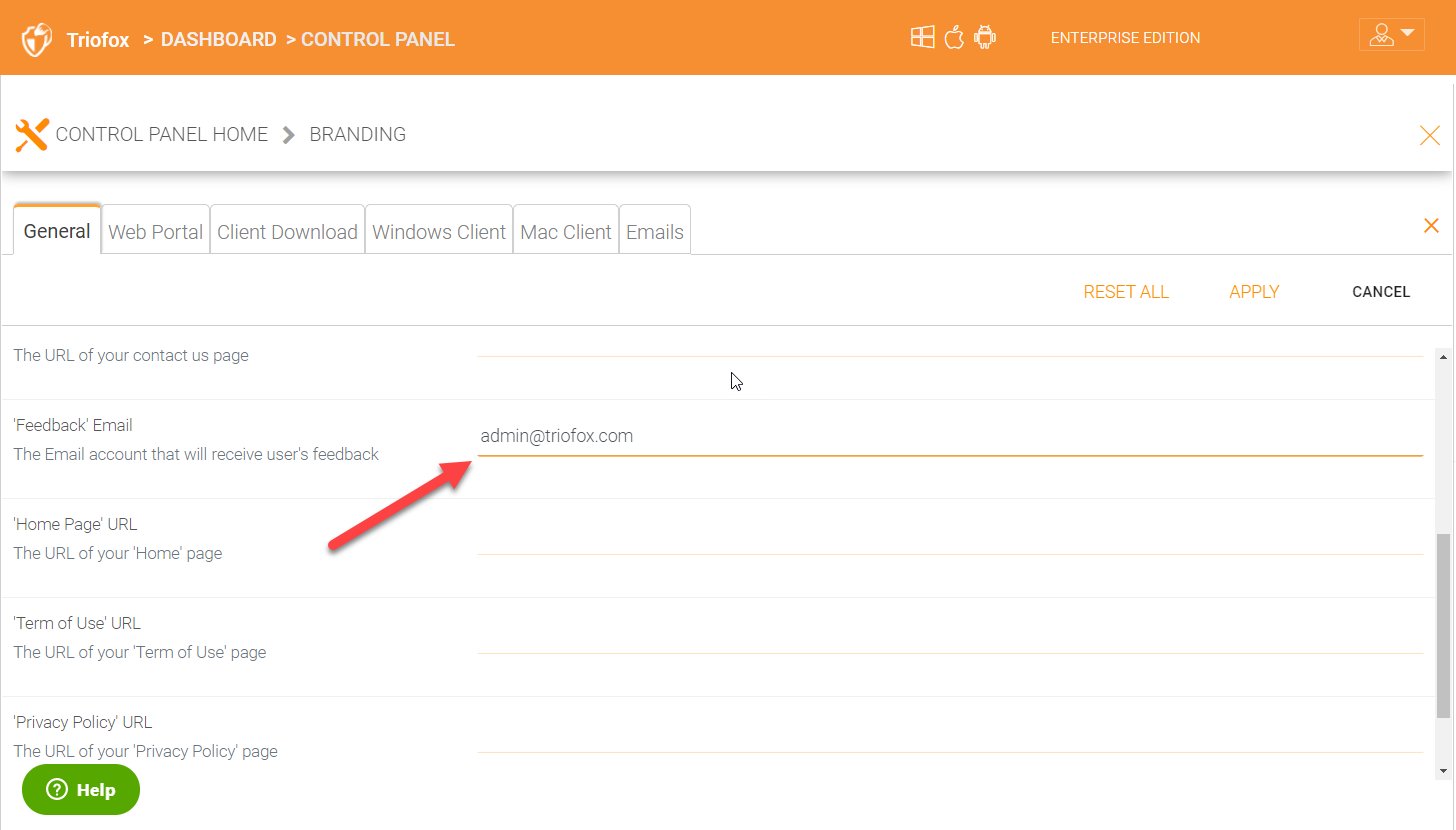
FEEDBACK EMAIL
Home Page URL
This is the URL of your ‘Home Page’ page (1).
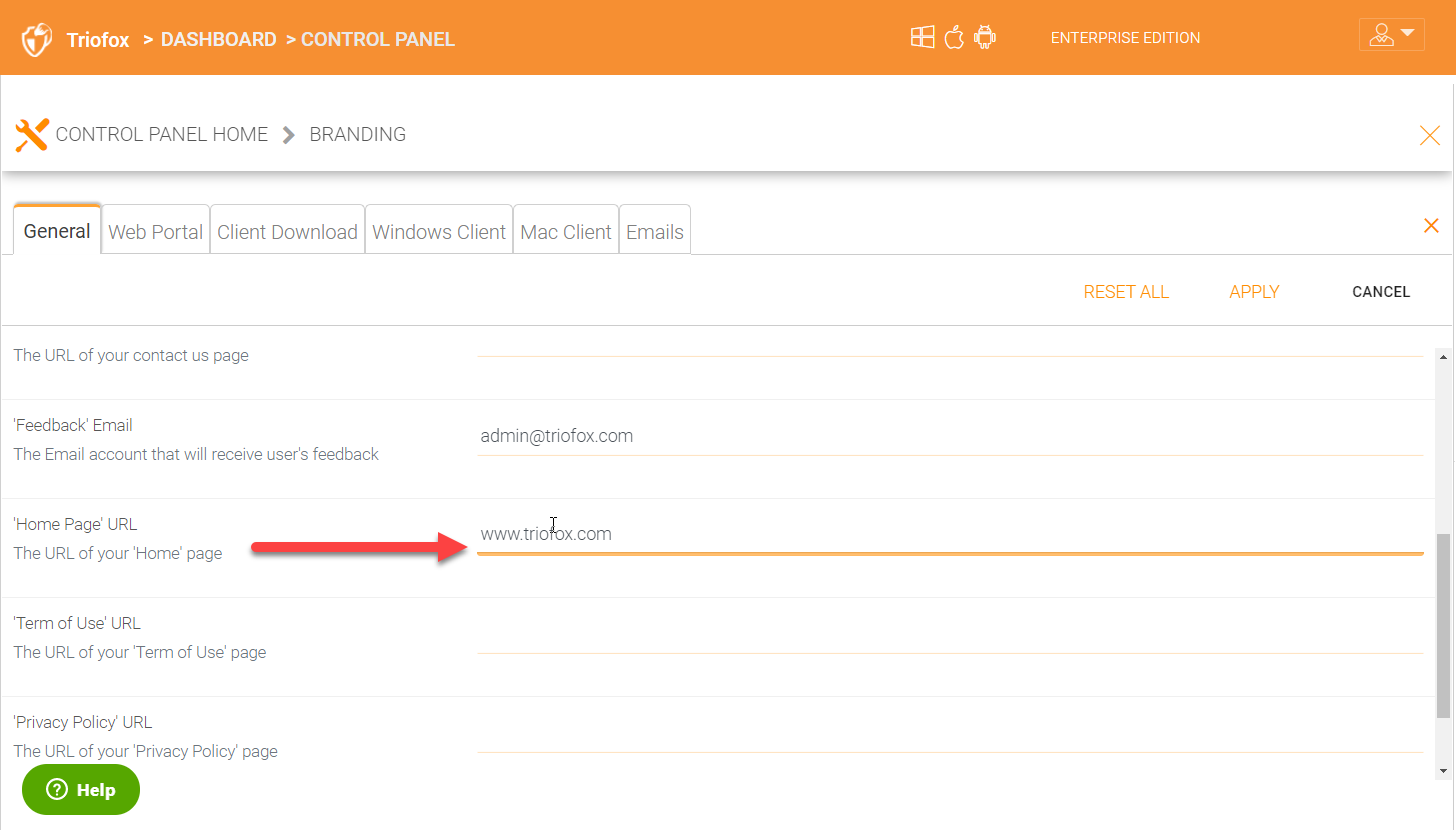
HOME PAGE URL
‘Copyright’ Statement
This is the contents of your ‘Copyright’ statement
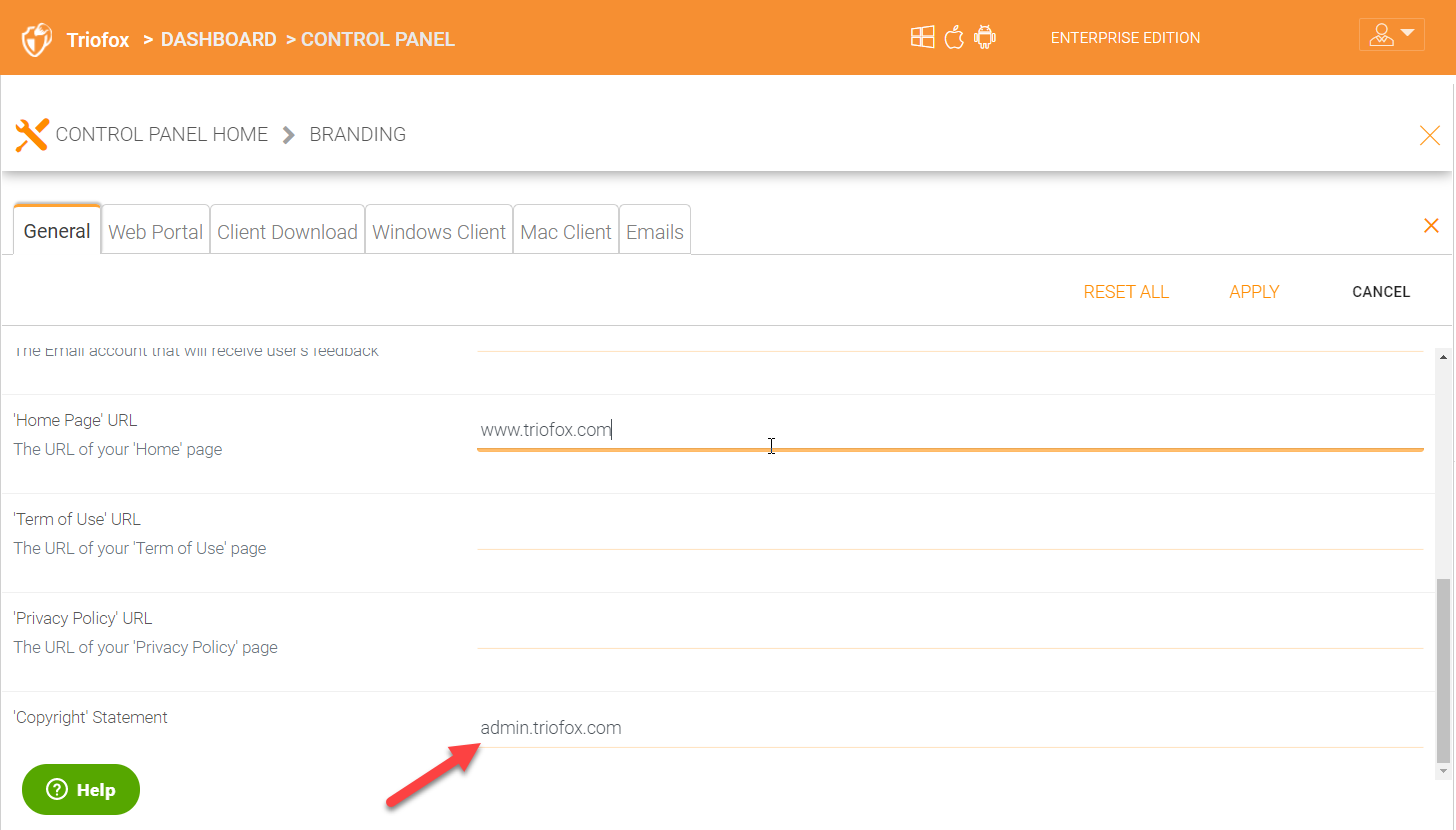
COPYRIGHT STATEMENT
8.14.2 Web Portal
Control Panel > Branding > Web Portal
Note
The best way to get icons to work is by putting the icon files on the same server and reference the icons via a relative link.
For example, you can create a sub folder under the Install Folder of the Cluster Server, such as under root/imagetest folder. The dimensions for all icons for each setting under web portal should match what is displayed for each setting. The branding of the icons and images require the icons and images with the same width/height as specified or same aspect ratio if the resolution is higher.
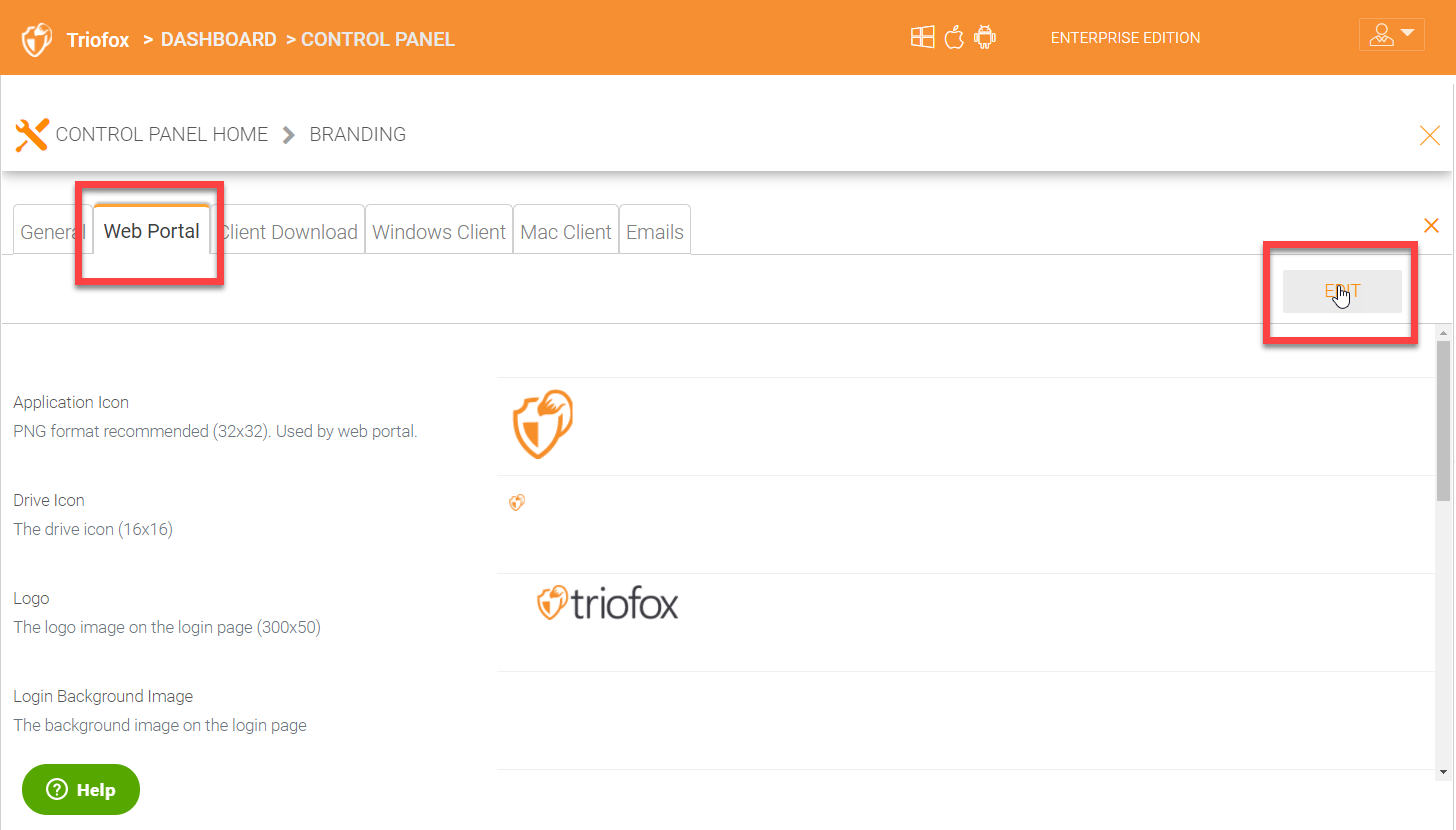
WEB PORTAL SETTINGS
Application Icon
- From the Web portal (1) section of cluster branding, you can change the application icon (2). This is the image that
is displayed next to the product name in the web portal.
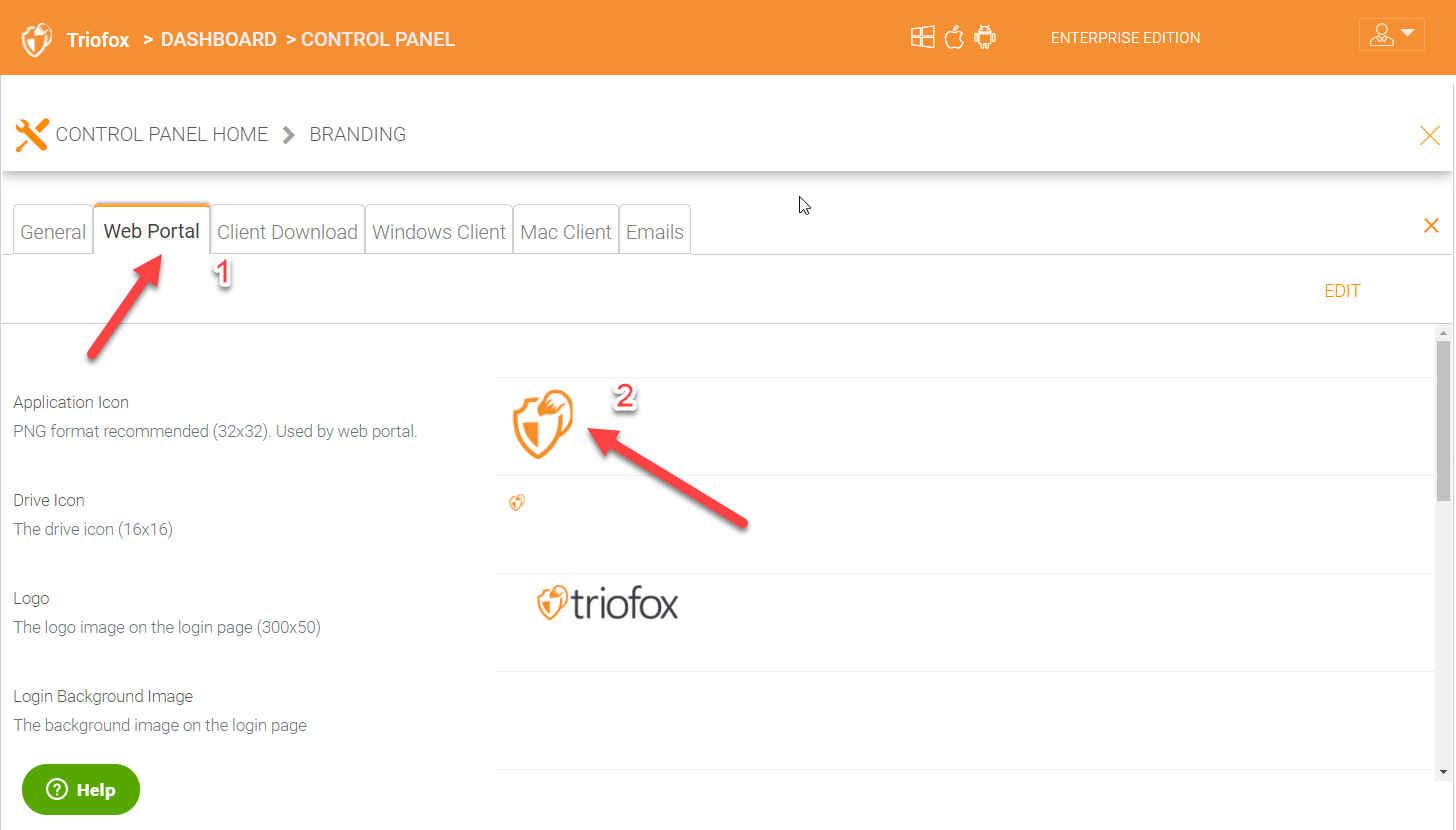
WEB PORTAL SETTINGS
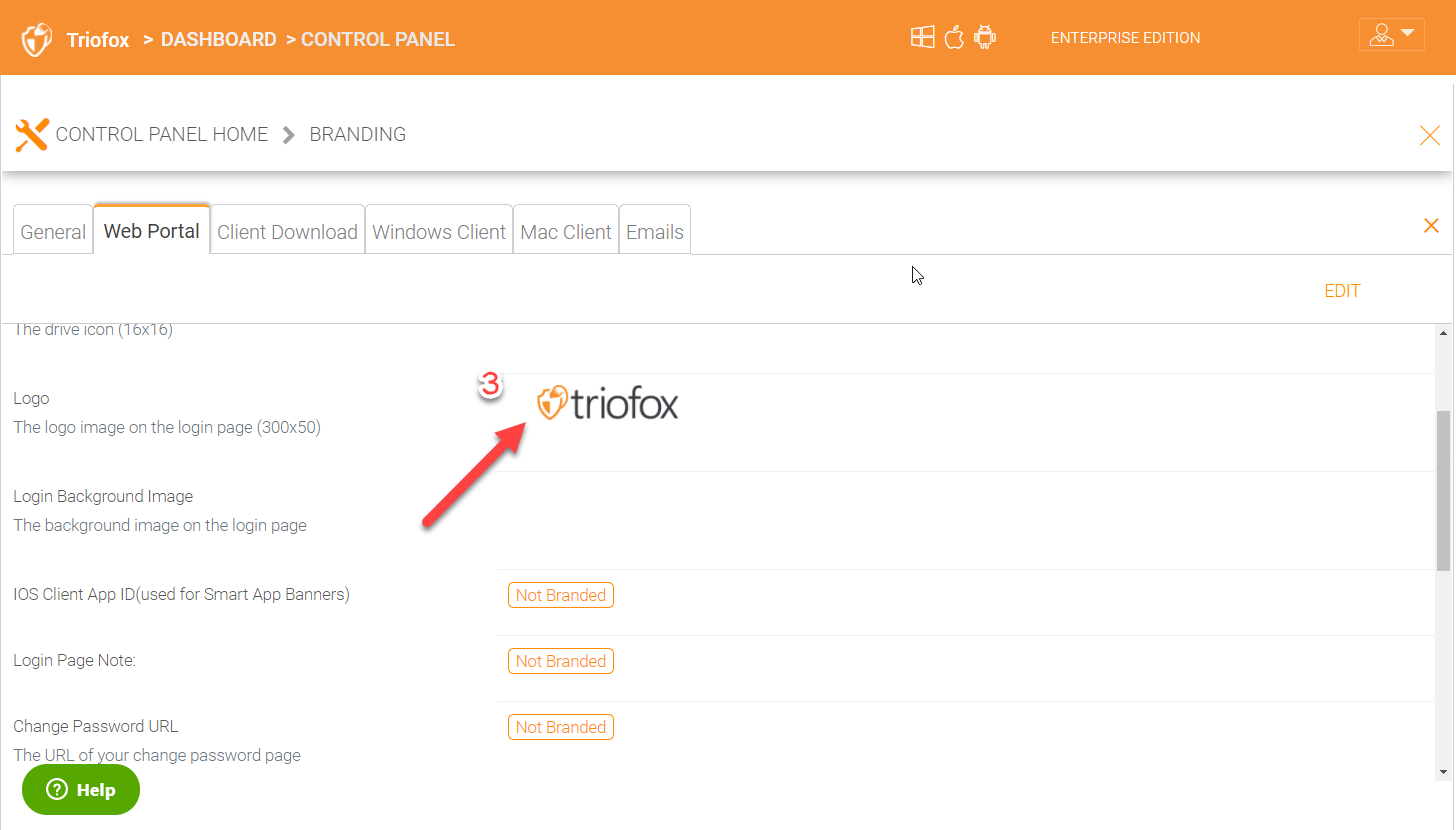
Logo (3)
This is where the company logo that should be uploaded.
WEB PORTAL SETTINGS
Drive Icon (4)
This is the icon that will be used for the cloud drive. For example in the web portal tree view.
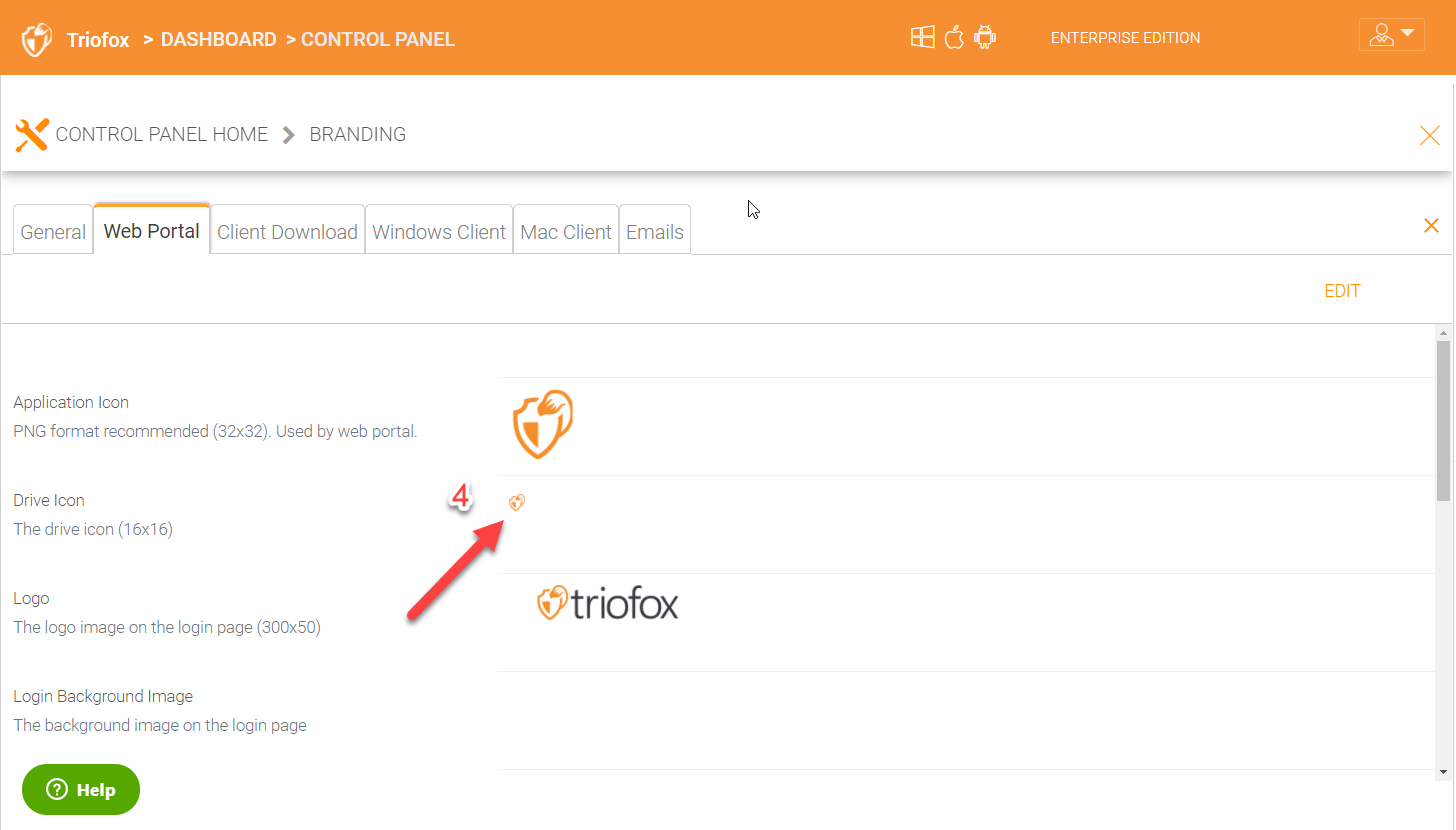
WEB PORTAL SETTINGS
Logo Url & Login Page Left Image (5)
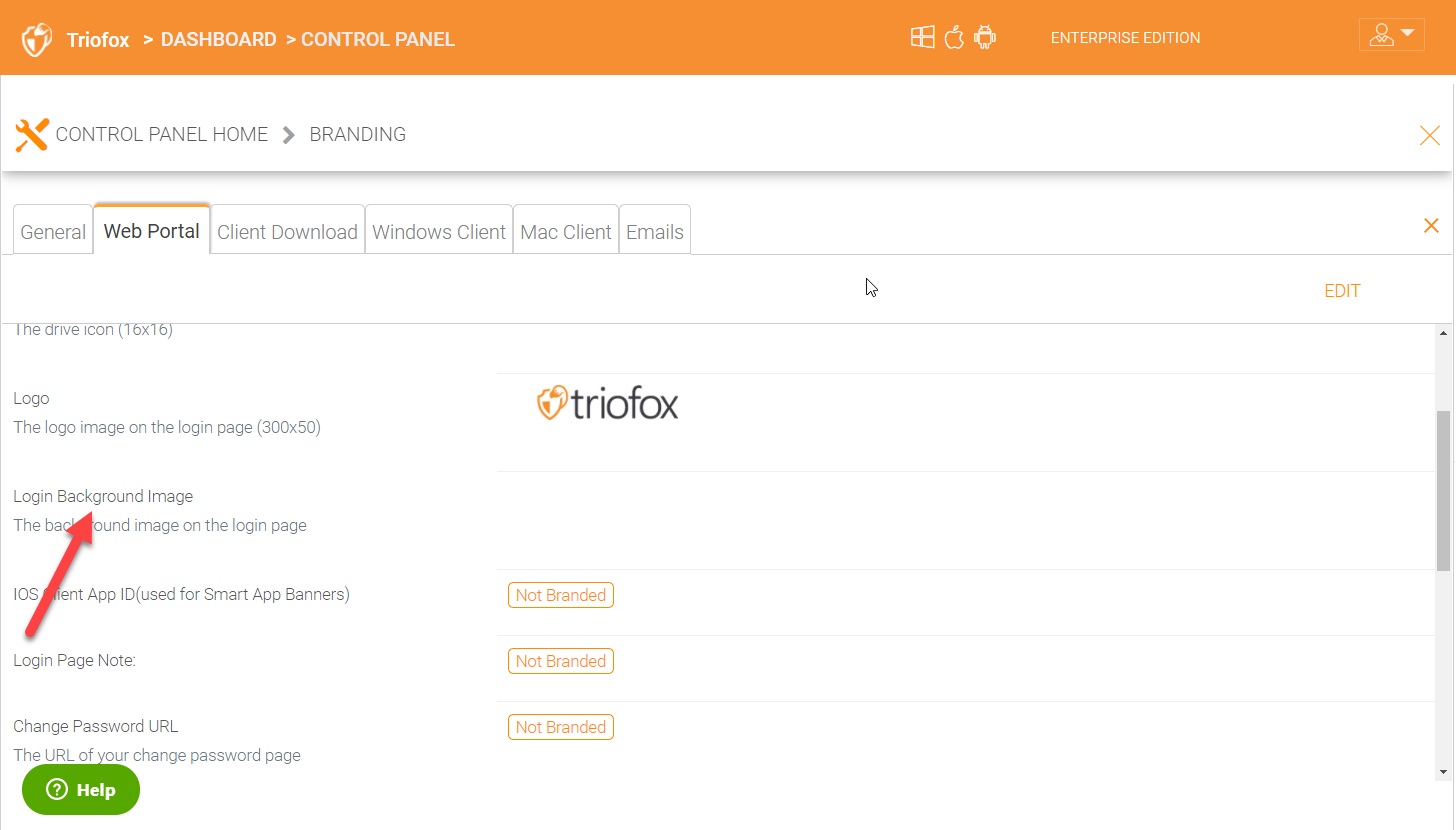
Please follow the same steps for branding settings for ‘Login Background Image’, ‘File Share Stamp Icon’, ‘IOS Client App ID’, ‘Login Page Note’, ‘Change Password URL’, ‘Tutorial Page URL’.
Client Download
Control Panel > Branding` > Client Download
You can choose not to show the download link for some clients here.
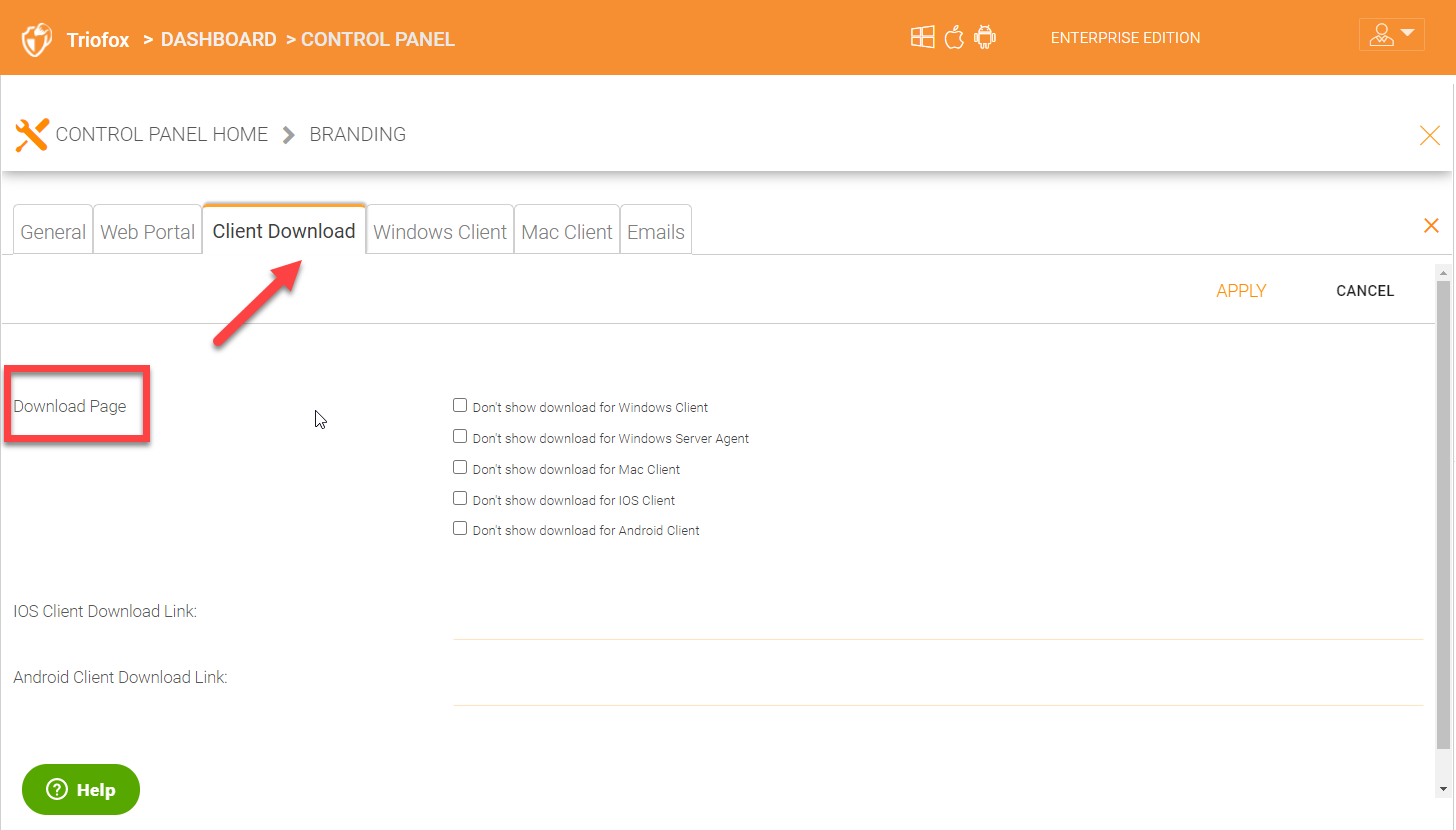
CLIENT DOWNLOAD SETTINGS
Mobile Clients Download Links
Once you brand your own iOS client, Android client, Windows Phone and Windows Store application, you can point the download link to your own AppStore and Google Play locations.

CLIENT DOWNLOAD LINKS SETTINGS
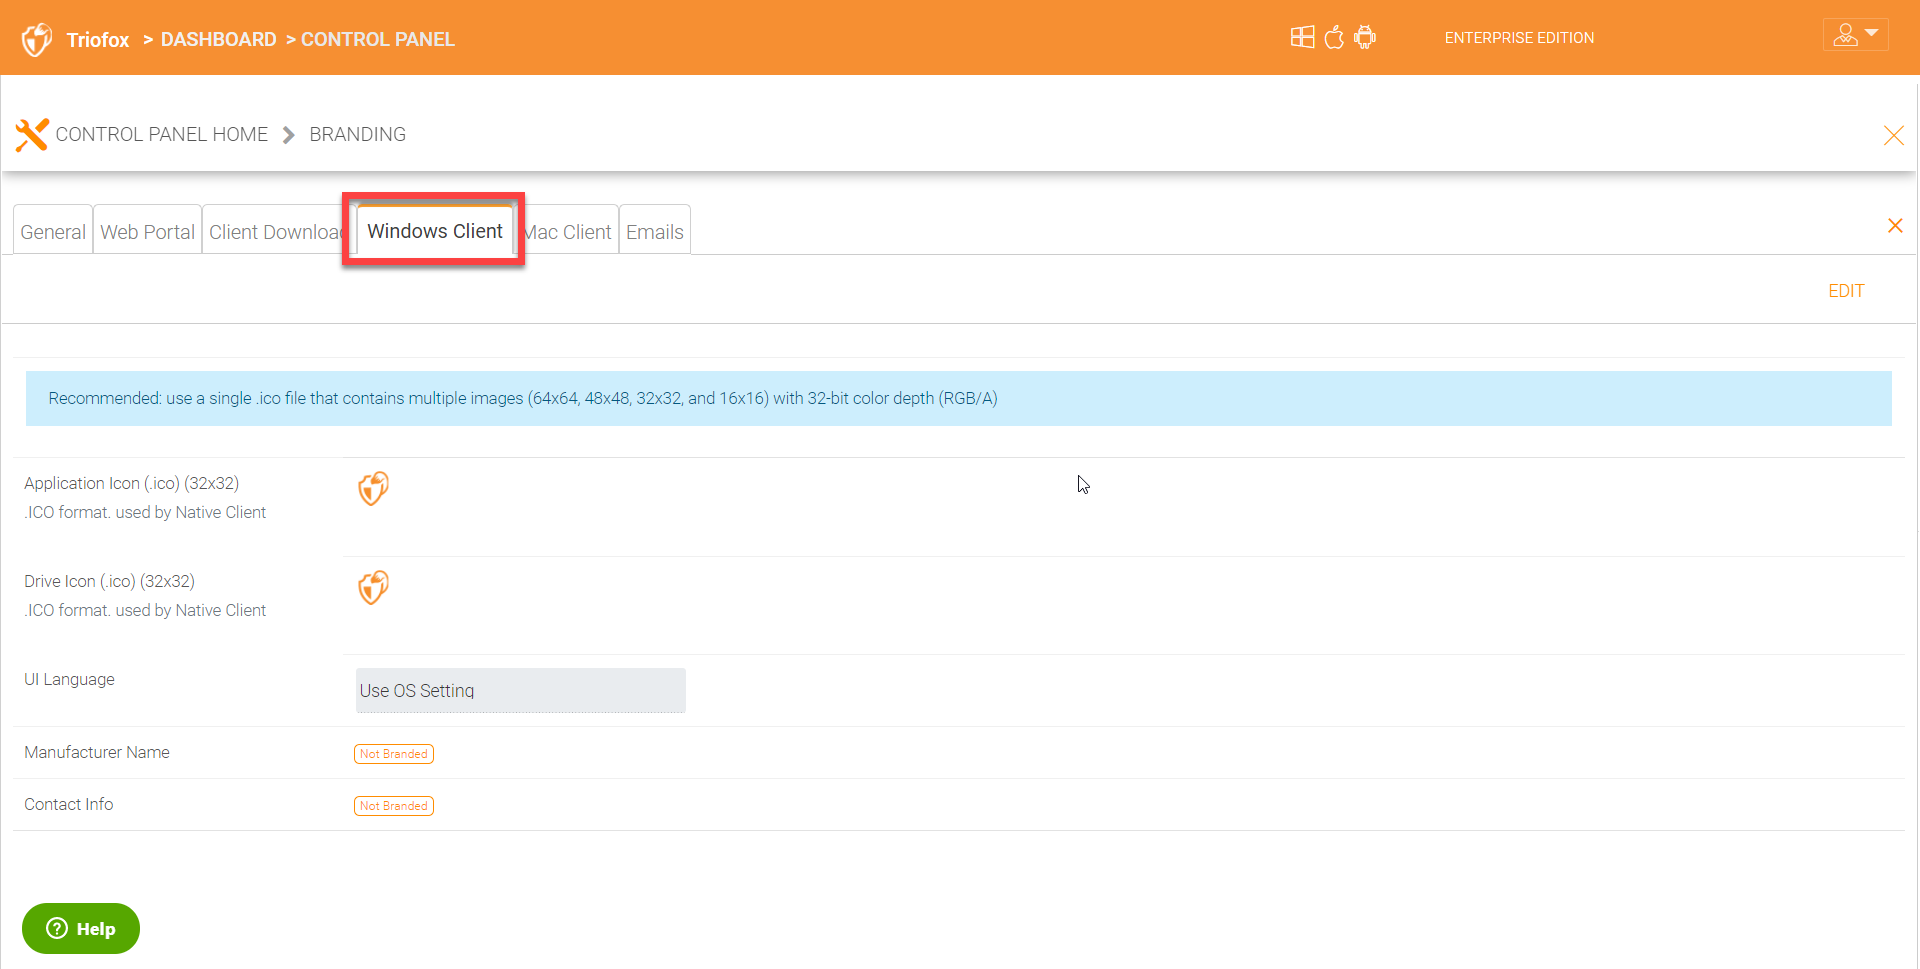
8.14.3 Windows Client
Control Panel > Branding > Windows Client
The application icon and drive icon URLs can be specified here. Also, you can put in your company name under ‘Manufacturer Name’ along with the ‘Contact Info’ email. You also have the option here to create your own branded MSI Windows client. You can also use your own code signing certificate in order to digitally sign the MSI package. The advantage of creating your own MSI client package is that when users download and install the Windows Client you provide, they will see your company name along with your branding during the client installation.
Windows client supports multiple languages. Some language packs are included and shipped with Triofox. If you need to run the Windows client under a different language, you can set the UI Language there.
WINDOWS CLIENT BRANDING
Once you clicked the “Edit” button to edit the Windows Client branding information, you will be able to provide EULA (End User License Agreement) and Code Signing Certificate.
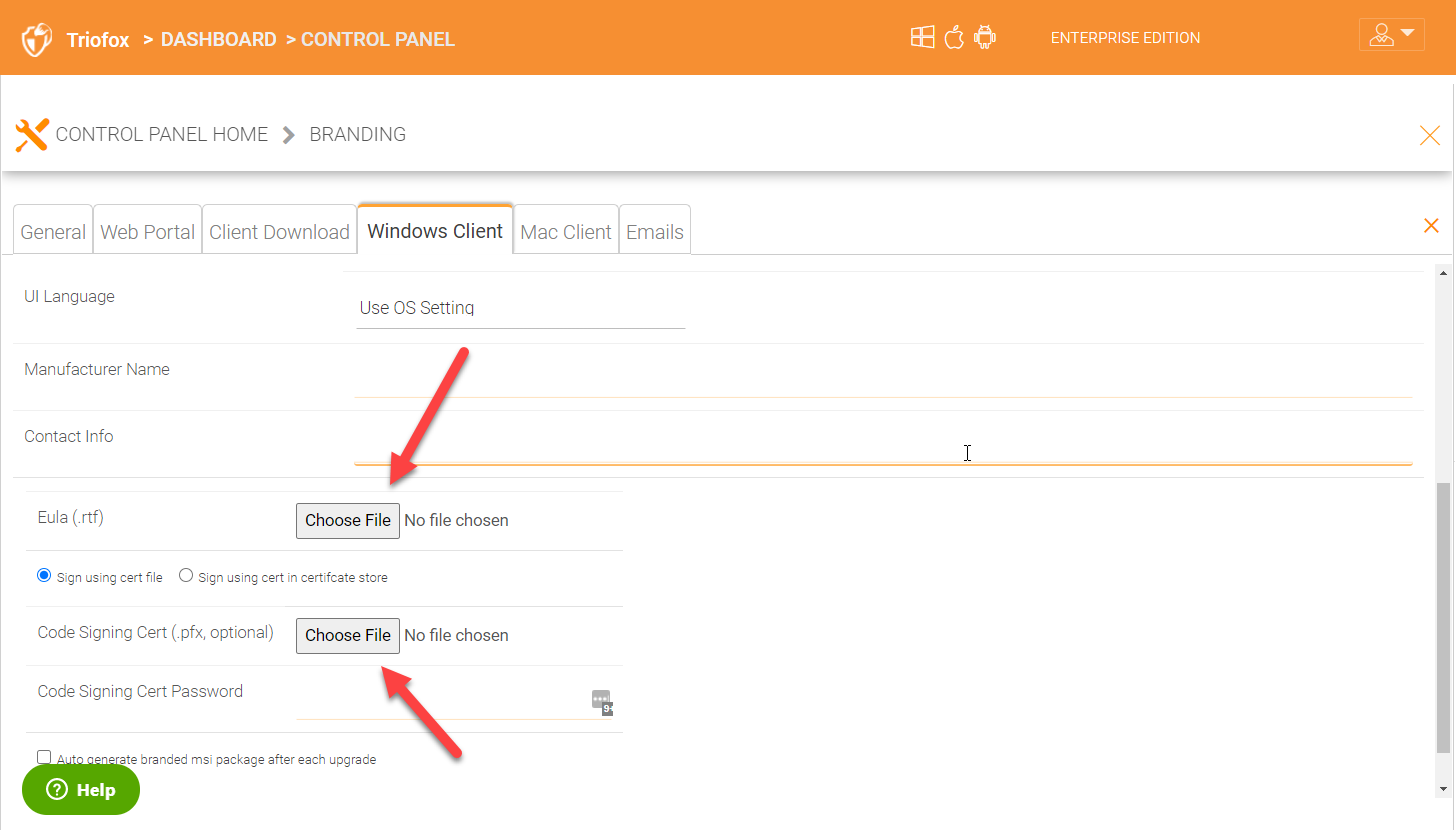
WINDOWS CLIENT BRANDING SETTINGS
EULA
This will be a RTF file format as input.
Code Signing Certificate
You can acquire a code signing certificate from your code signing certificate vendor. Most SSL vendor also provide code signing certificate. Make sure you use SHA 256 (SHA2) as your digital signing certificate hash algorithm.
If your Code Signing certificate is already installed you can also use the option -
Sign using cert in certificate store
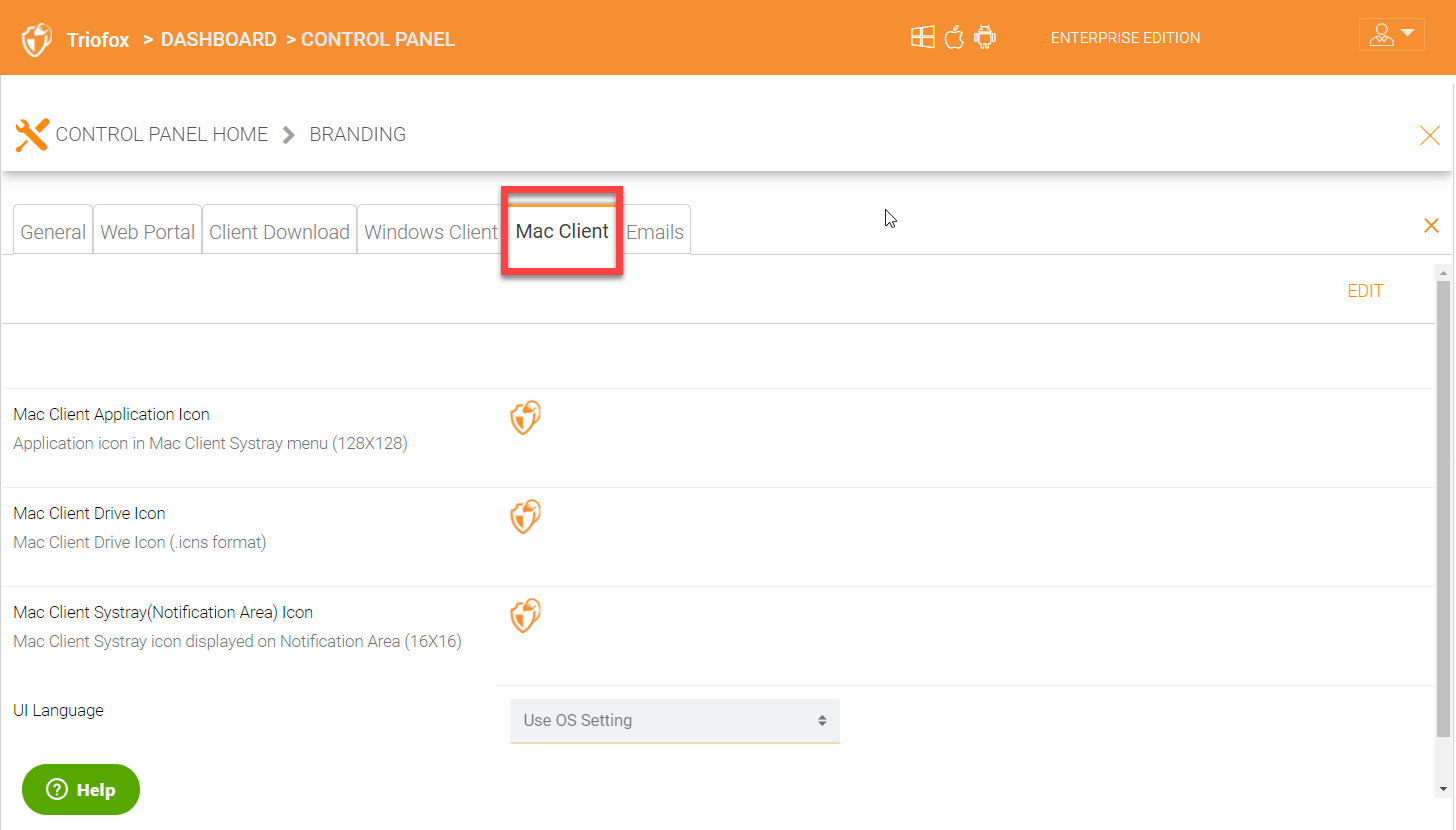
8.14.4 MAC Client
You can configure the MAC client and MAC client installation package branding under here.
Client Branding
MAC CLIENT BRANDING
8.14.5 Emails
There are many places in the Cluster Manager that need to contact the users via email. So the “Emails” tab is used to set up the email templates used for contacting users via email.
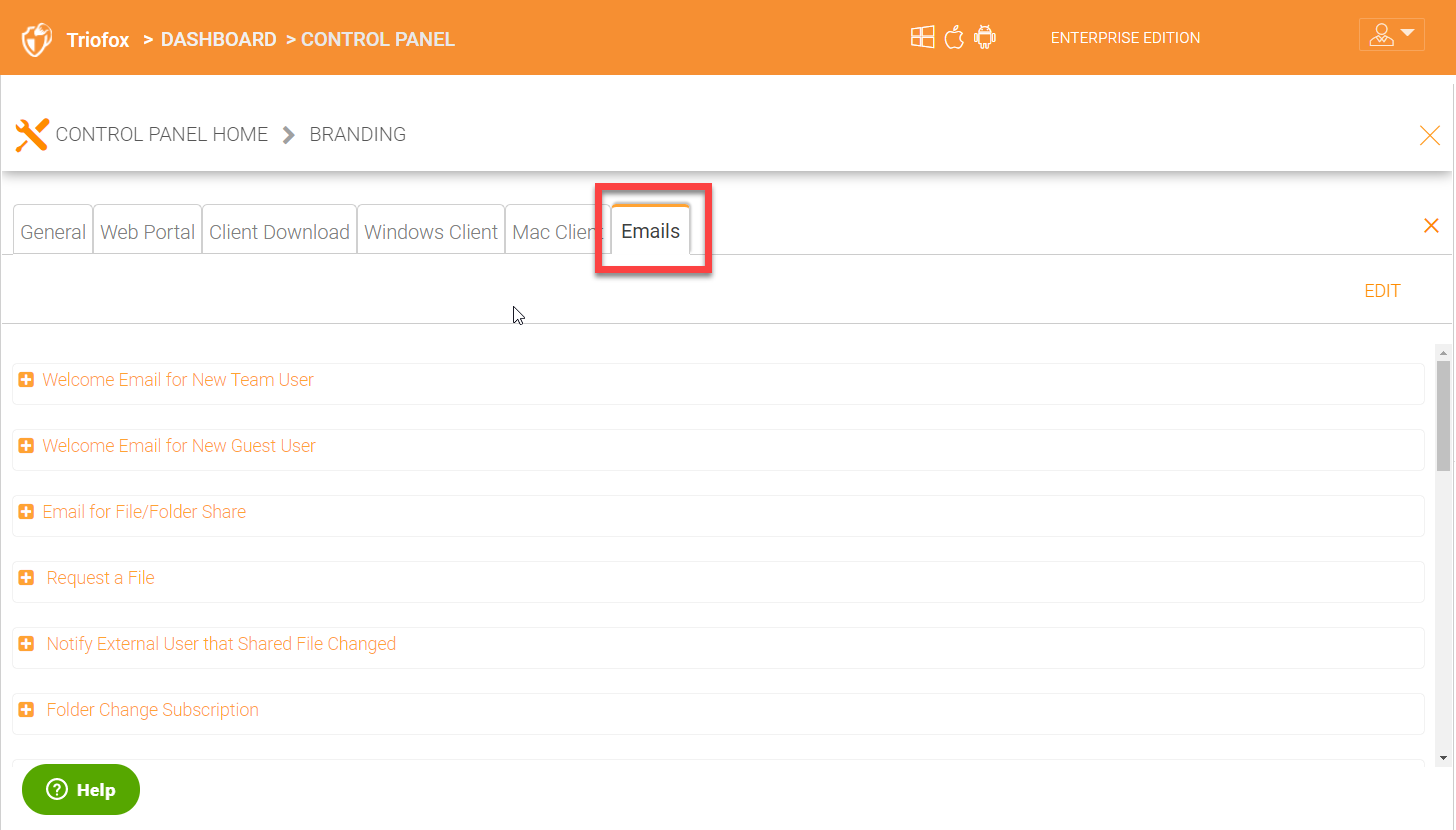
Welcome Email for New Team User
The team user is a regular user in a tenant. This is the email template that is sent to the user when the user account is created.
Welcome Email for New Guest User
Guest user is a regular user in a tenant that doesn’t have a home directory associated. So the guest user can only operate within shared files and folders from other regular users. This is the email template that is sent to the guest user when the guest user’s account was provisioned.
Email for File/Folder Share
This is the email sent to a user when the user is about to receive file/folder shares.
Request a File
This is the email sent to a user when the user is about to receive an invitation to upload a file.
Notify external user that shared file changed
When a shared file/folder changed, this is the email that is sent to the user who receives file/folder shares.
Admin Reset User Password Email
This is the email that sent to a user when the user’s password is reset.
User Reset Password Email
This is the email that sent to a user when the user resets the password for himself/herself.
New Sign-in Action Email
This is the email notification sent to the user when the user logins from a specific machine.
Settings
This is to set the reply email address. Typically the email is sent with the SMTP service set. However, if the reply address is different, you can set it here.
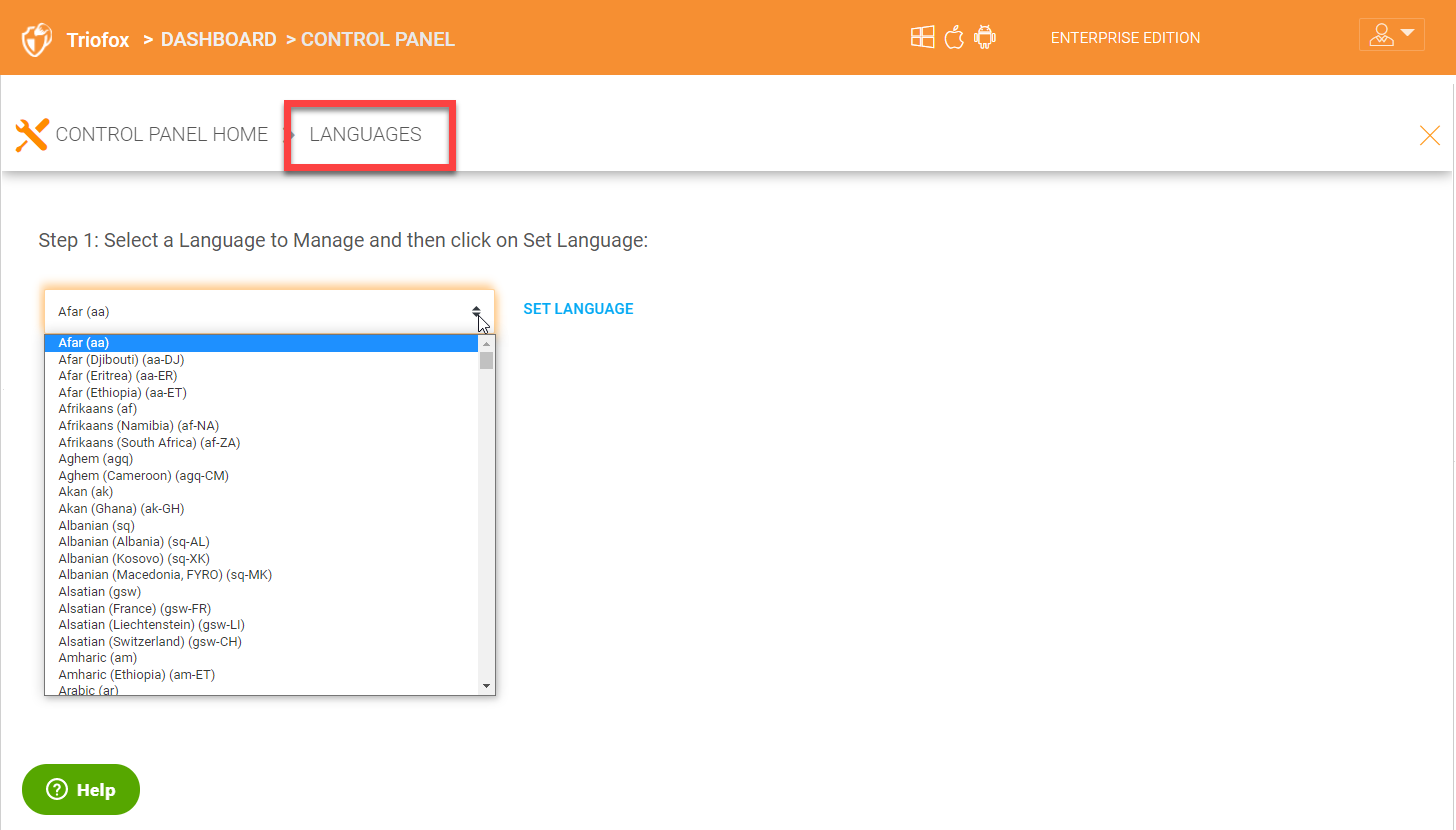
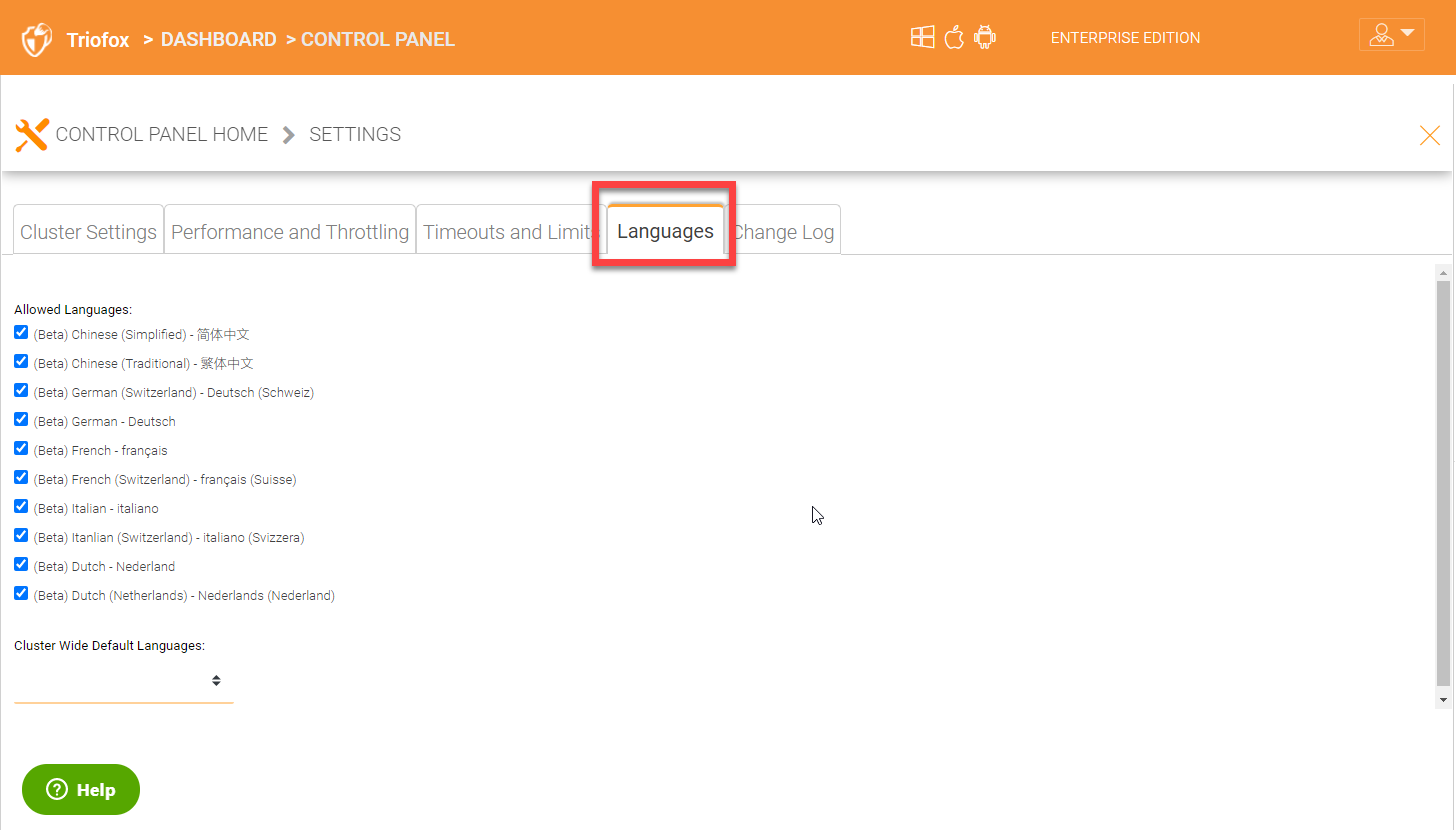
8.15 Languages
Amin Dashboard > Control Panel Languages
You can select a language to manage and set under languages.
LANGUAGES
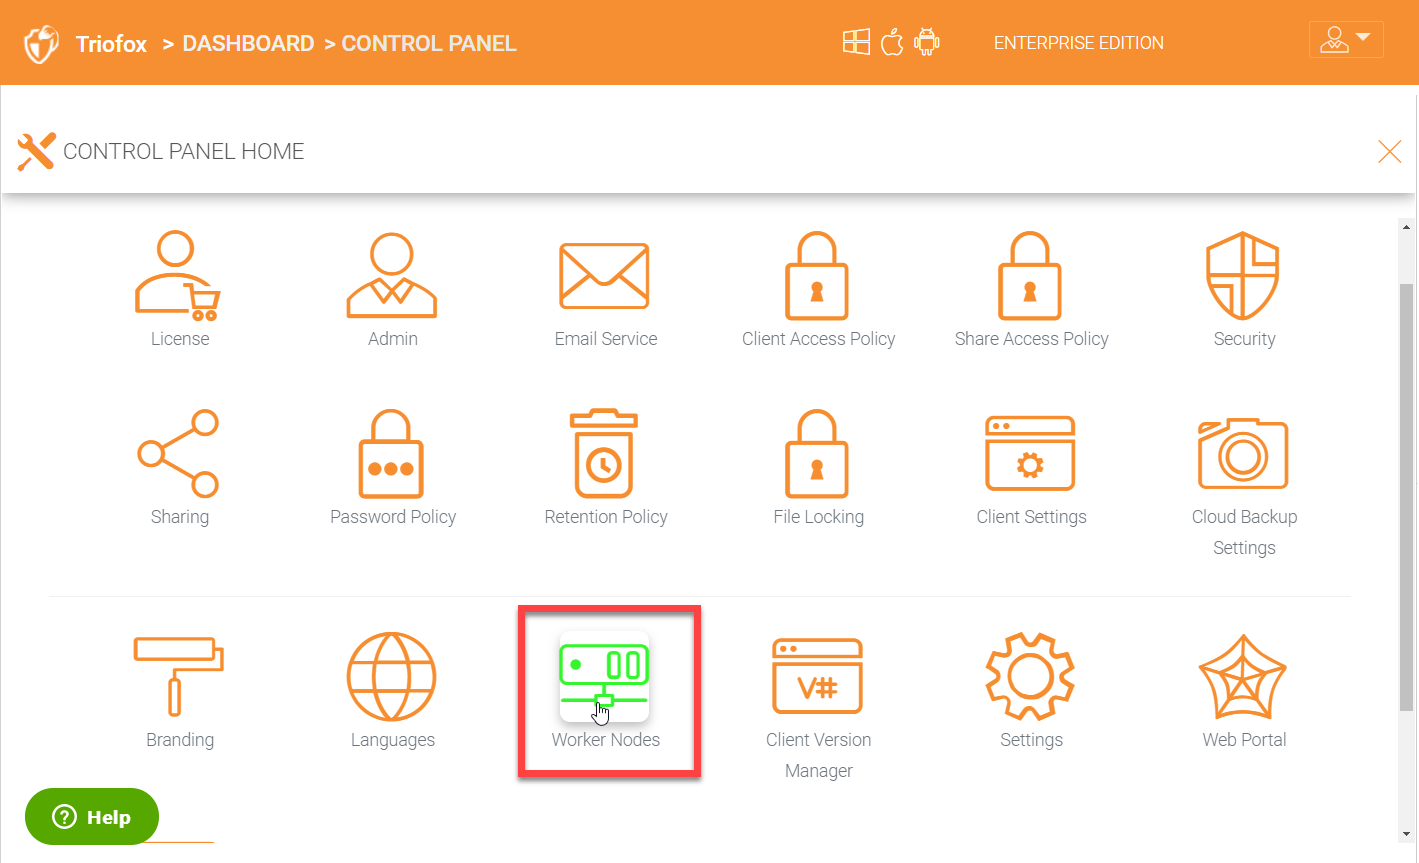
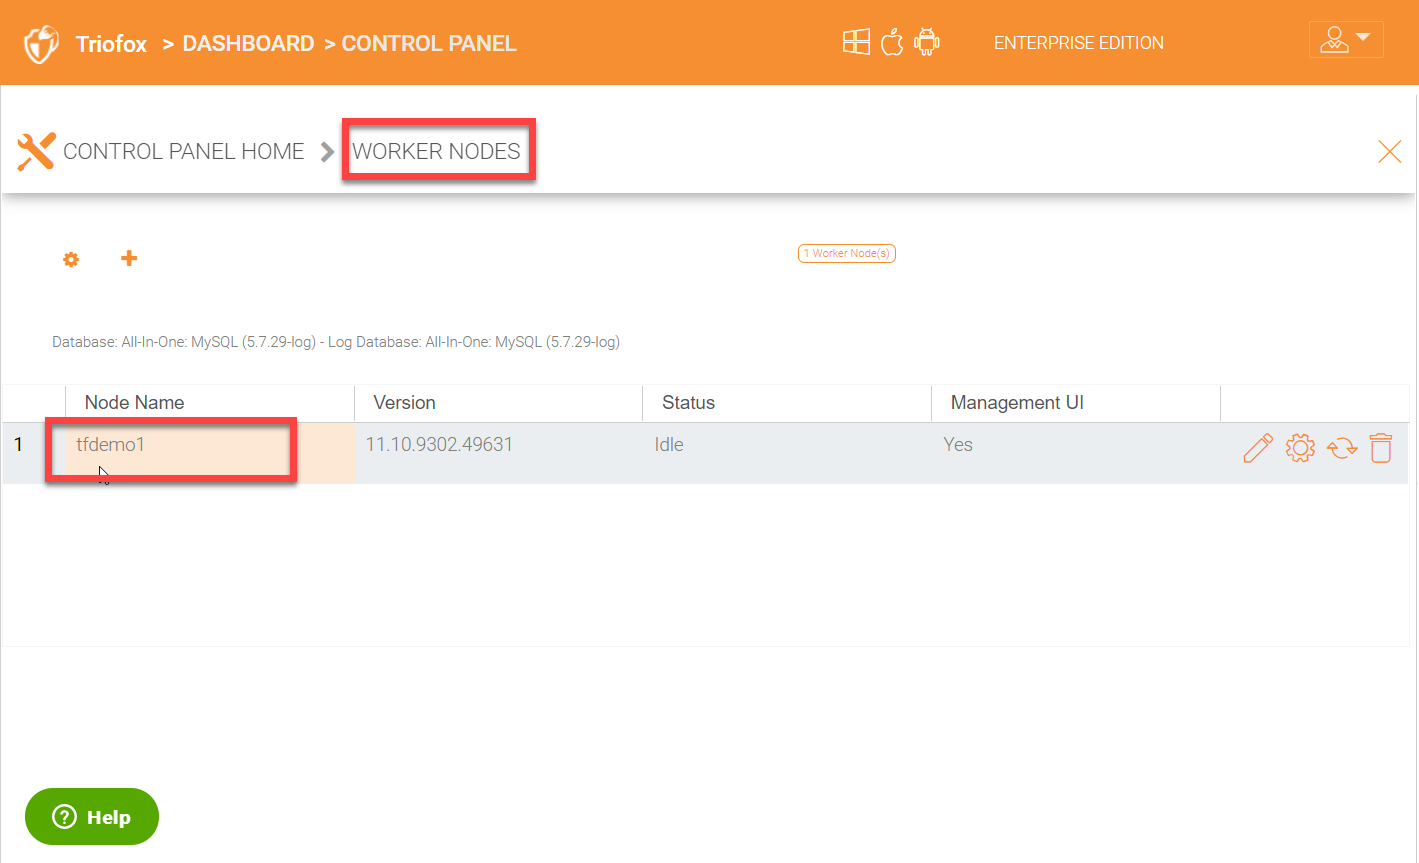
8.16 Worker Nodes
Admin Dashboard > Control Panel Worker Nodes
Cluster Server Farm includes “Worker Node(s)”.
CLUSTER SERVER FARM NODES
The Account Management, Sign-in and Load-balancing services will be installed on this physical machine (or virtual machine). Depending on the load, you may need 1 to N such nodes. Normally, we recommend for every web front node (if you want to deploy Triofox in the DMZ for example as the front end), you can have 10+ worker nodes. When you have small deployments, you can skip web front nodes and combine them into worker nodes. All the installation work is the same. If you do not need web front node, you do not need to assign them in the cluster manager.
Example:
ACME Corporation deploys two web front nodes node1.acme.com and node2.acme.com. Each node is running a copy of the Cluster Server connecting to the same SQL database.
ACME Corporation acquires a domain name (DNS) of cloud.acme.com which is load balanced to node1.acme.com and node2.acme.com.
When Users point their browsers to https://cloud.acme.com it is directed to one of the nodes login page.
Note
NOTE 1: If you have hardware load balancing available, you do not need to use web nodes at all.
NOTE 2: Windows 2016/2019 comes with Network Load Balancing (NLB). If you use NLB, you do not need web nodes at all.
Basically, if you have any existing load balancer, you can omit web nodes.
Worker Node
Cluster Manager > Cluster Server Farm > Worker Nodes
This type of node will contain services like Web Browser Based File Manager, Storage Service Connectors, and etc. Again, additional nodes can be added as the load increases. Because there is cache information located on each node, users will have an affinity to a single node once it is assigned. If the load balancer distributes users evenly to all worker nodes, the cache information may exist on all worker nodes.

SSL NOTICE
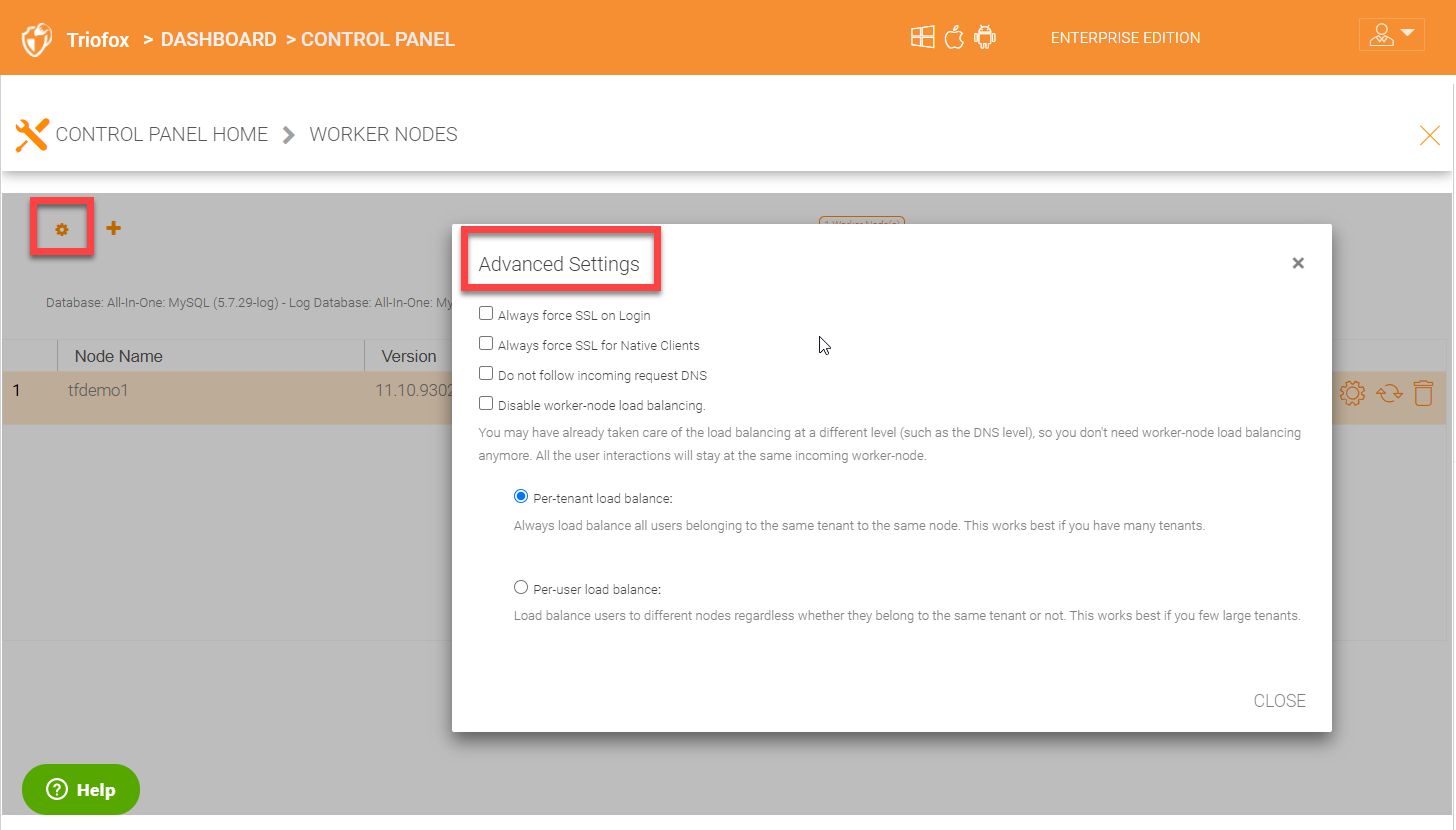
Worker Node Advanced Settings
There are some settings that apply to all worker nodes. After you click on the “Advanced Settings” icon, the Advanced Setttings panel will show.
More
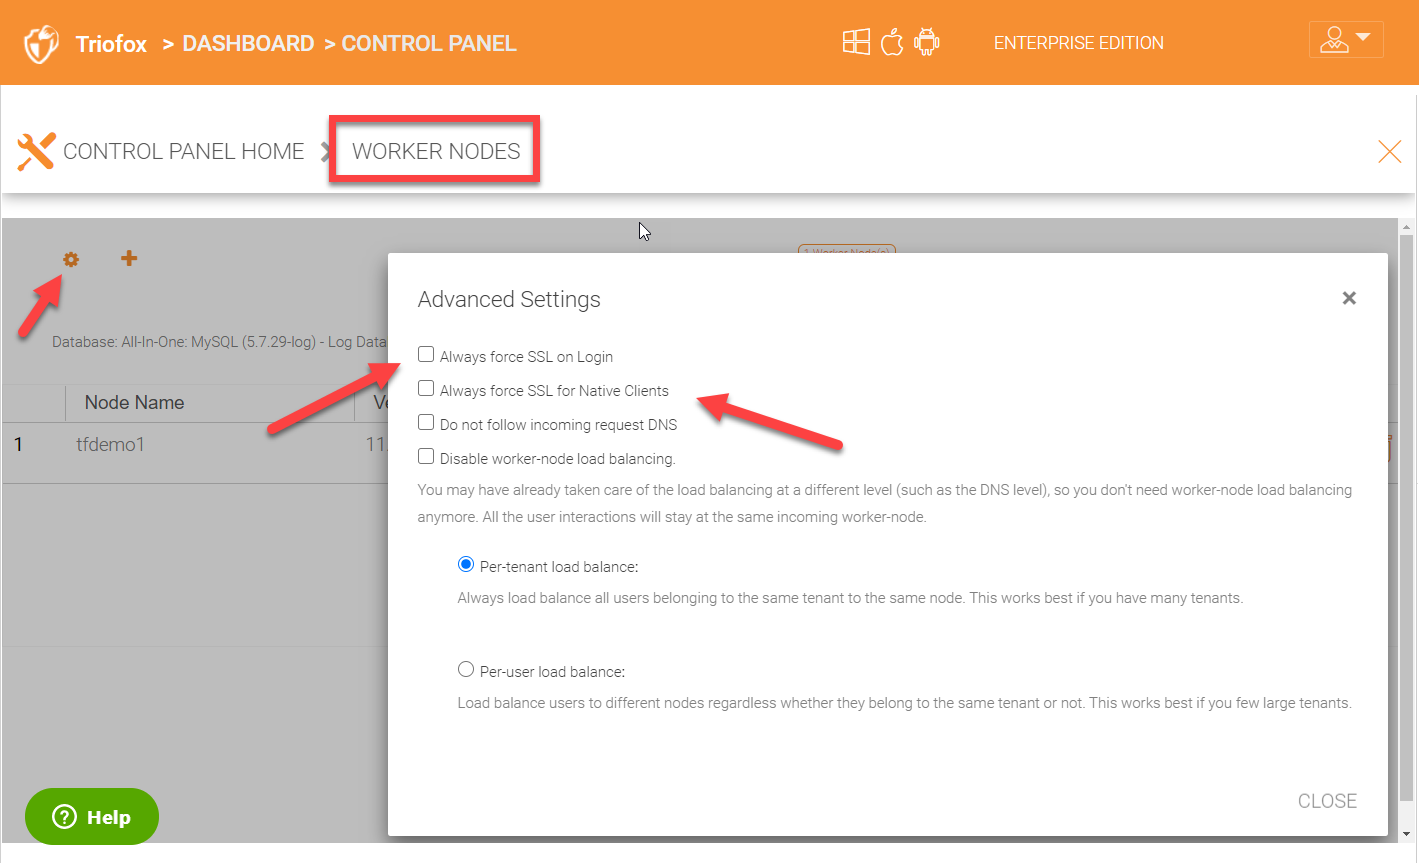
Always force SSL on Login
In a production environment, almost 100% of the time you will need to check “Always force SSL on Login”. When this is checked and when Triofox detects that the incoming connection is HTTP, it will do a redirect to HTTPS. If you turn on SSL, you will need to setup SSL certificate first.
However, if you have SSL-offload, such that SSL is offloaded to a hardware appliance, and after that, the incoming connection is HTTP between the hardware appliance and Triofox. In this SSL-offload case, you will NOT check “Always force SSL on Login” because it will create an infinite redirect loop because the incoming connection is always HTTP as far as the Triofox Server is concerned.
Always force SSL for Native Clients
In a production environment, almost 100% of the time you will need to check Always force SSL for Native Clients.
Especially, in the case of SSL-Offload, you MUST check “Always force SSL for Native Clients”. Otherwise, the Triofox Server may think that the incoming connection is HTTP so it will continue to encourage the native clients (such as Windows client) to use HTTP instead of using HTTPS.
Note
In iOS devices, the Application Transport Security may be enforced by the operating system and HTTPS must be used for an iOS Application to connect to the Cluster Server.
Do not follow incoming request DNS
The description will be added later.
Disable worker-node load balance
When you have your own load balancer, you will disable worker-node load balancing. The Cluster Server has built-in node-affinity load balancing. When you have your own load balancer, you may have session-affinity or just simple round-robin, either one is fine.
Note
How to add a worker node?
You just go ahead to install the Cluster Server during the installation and point the Cluster Server to the same database. Once the installation of the Cluster Server worker node is completed, reboot. The web portal page will pop up, asking you to add the worker node to the server farm.
Warning
What if you changed the Cluster Server’s Host Name?
For Windows server 2012 and later Server OS, when a server is newly provisioned, it is typically named in hostname format similar (WIN-ABCDEFG). Sometimes, it is desired to change the name in the Control Panel -> Systems. If the Cluster Server is already installed, changing the name will make the Cluster Server add itself again with the new name. So next time when you visit http://localhost on the Cluster Server after the server has been renamed, you will see the worker node section has both the node with the old name (which no longer exists) and the node with the new name (Which is current and good). In this case, you just need to simply remove the worker node with the old name.
Worker Node Properties
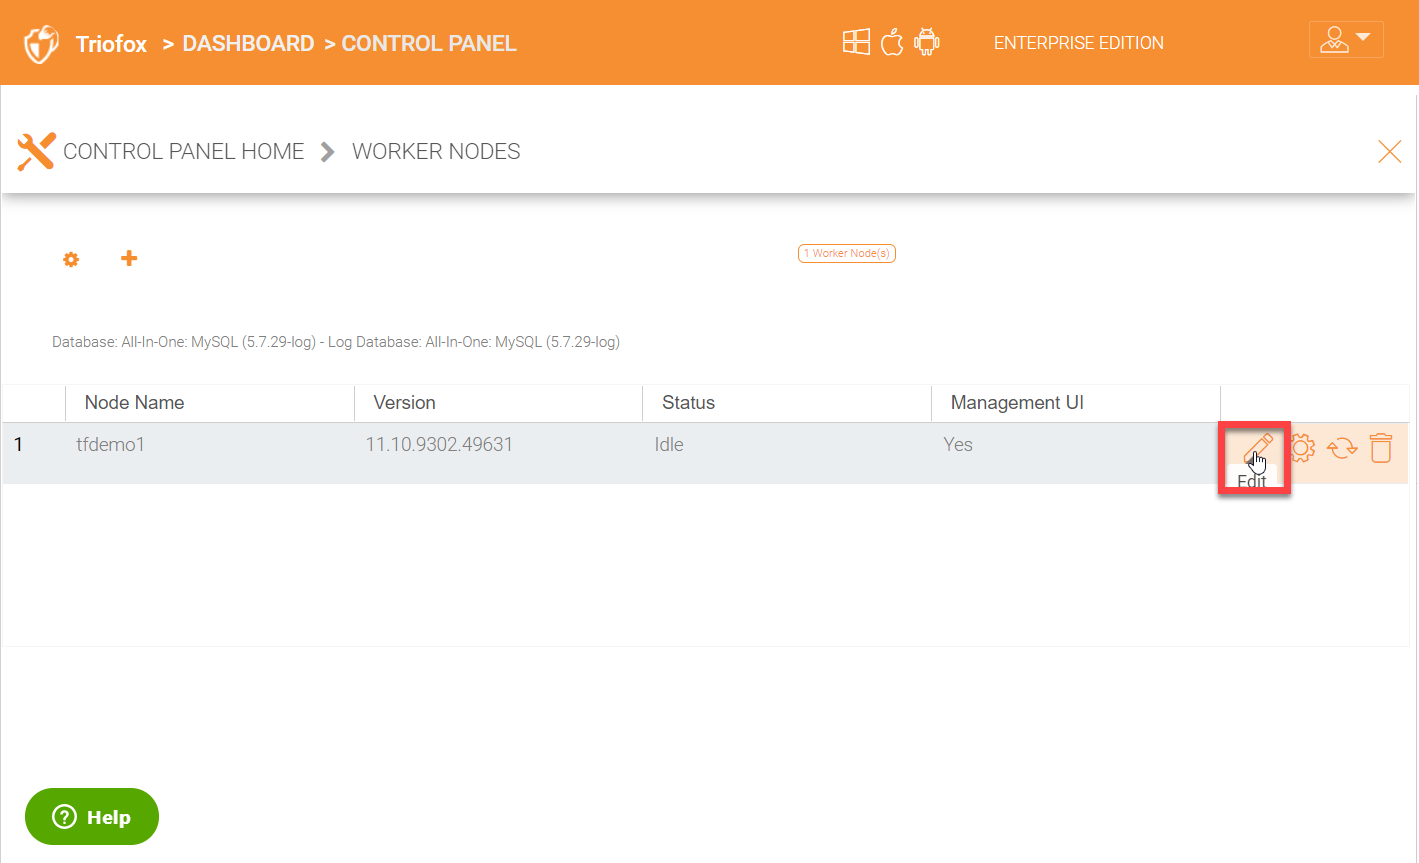
WORKER NODE PROPERTIES
You may need to modify the worker node properties when you setup SSL and the DNS name for the cluster.
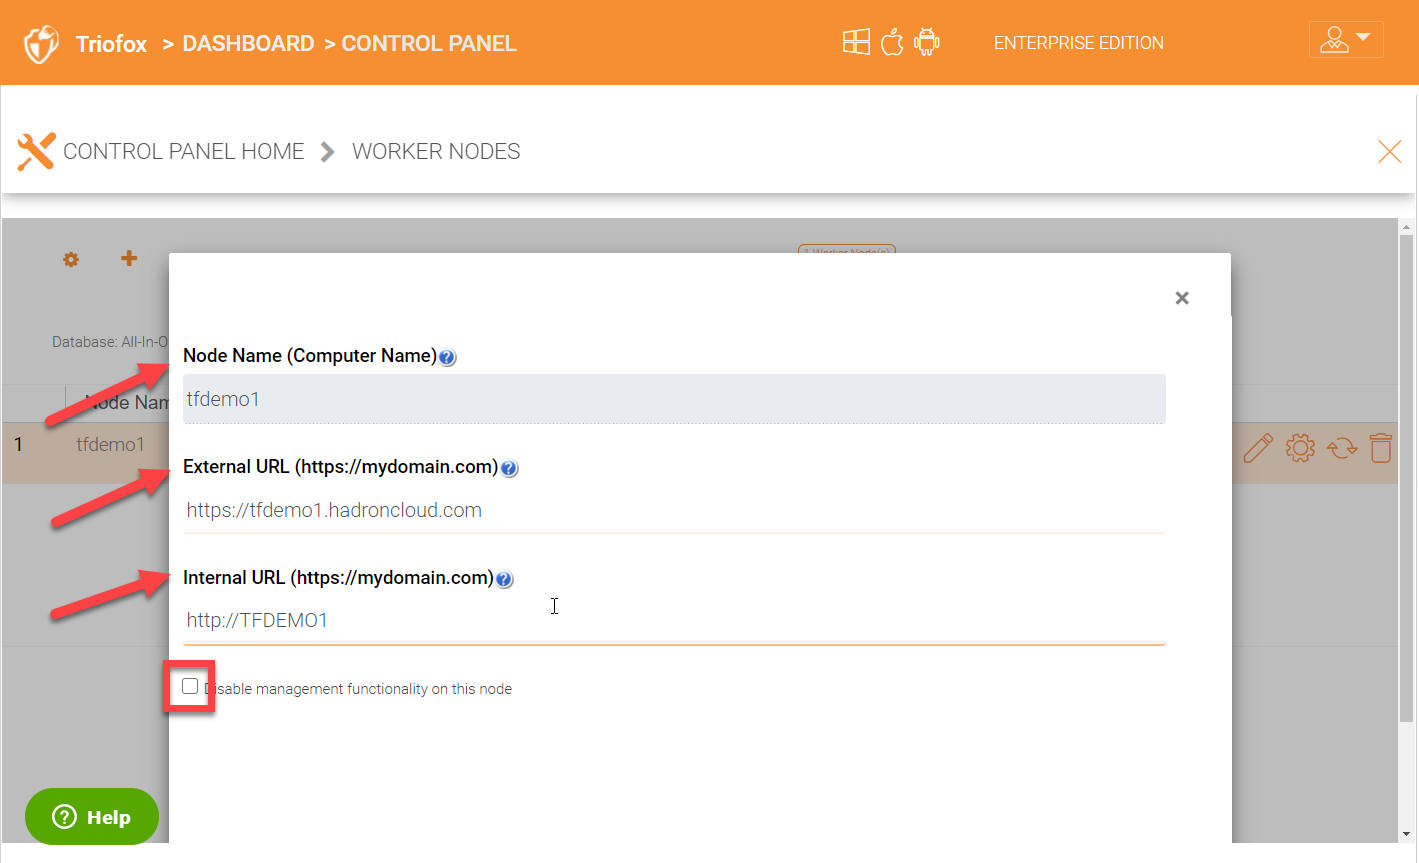
Node Name
The Node Name needs to match the worker node’s hostname. Sometimes, if you rename a worker node’s Windows hostname (NETBIOS name) after the Cluster Server installation, upon reboot, the Cluster Server will pop up a web page, asking you to add the new worker node. In that case, you can go ahead and add the new worker node and then delete the old worker node.
External URL
The External URL needs to match the worker node’s external URL. In a production environment, this typically is in an https:// format with the node’s DNS name.
External URL is a critical property for Email templates. Once the Cluster Server installation is finished, the dashboard will have a warning message, ‘External DNS has not been configured for this worker node. Some functionality may not work properly. Config Now’
The moment that you have finalized on the External DNS name of the Cluster Server, you must come here and configure the ExternalURL property for the Cluster Server.
Internal URL
The Internal URL is the node’s internal URL, typically in the form of http://local-ip-address format. In later Cluster Server builds, this property is hidden and there is no need to set it any more.
Disable management functionality
You can create an internal facing worker node (that doesn’t have an externalURL) and only allow management functionality on this worker node. This is a security feature.
Worker Node - Edit Cloud Monitor Setting
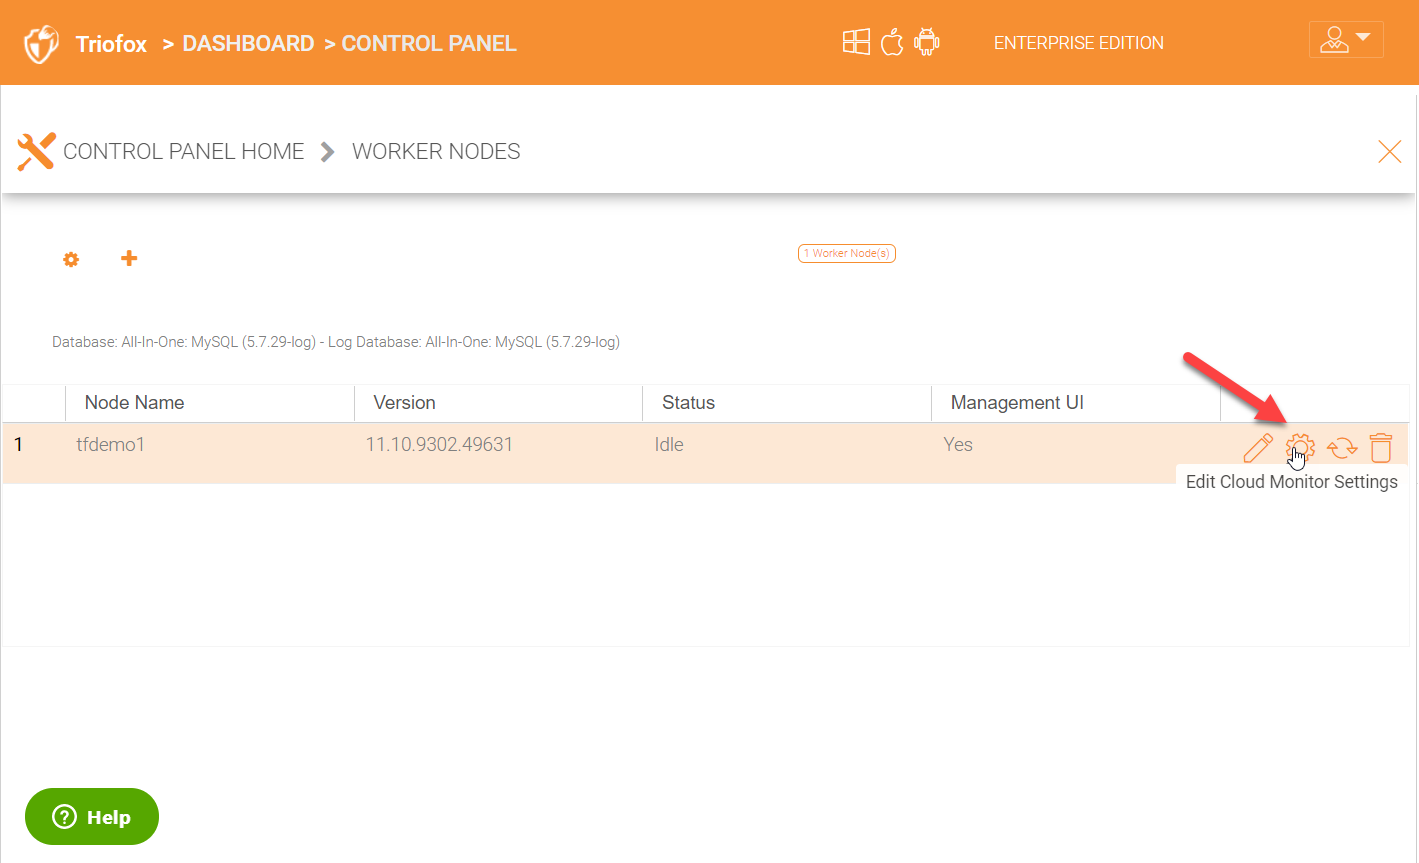
CLOUD MONITOR SETTINGS
Enable Storage Scan
Enables or disables storage scan on the worker node. On the worker node, there is a cloud monitor service. The service will be doing background monitoring and make scan storage from time to time to correct quota calculation and perform other maintenance tasks.
Scan Starts Hour
Typically you will set the scan start time to sometime in the early morning like 1AM.
Scan End Hour
Typically you will set the scan end time to sometime in the morning like 8AM before everyone comes to work. The main idea is to leverage idle time (when people are not at work) to do the scanning.
Scan User Storage Every (n) Days
Typically you can set it to every week or every other week. so a number between 7 to 15 is reasonable.
Enable Change Monitor
Enable change monitor monitors the attached local storage such as storage from file server network share and report file change notification to remotely connected clients. This usually is required if your users are both modifying documents directly from the backend attached network share and also from the front end Cluster access clients.
Index External Storage
This setting will index storage services added via the “Storage Manager”. The index will be written to the files table in the database.
Enable Storage Purge of Deleted User
When a user is deleted from the system, the user’s home directory is not immediately removed. And a lot of times, you don’t want to delete it at all. For example, a user is deleted from the Cluster Server, but the user may still continue to use the files and folder directly from the network.
Process Background Task
Whether this specific node will process background task.
Send daily scan email
If the storage scan is enabled, a daily scan email will be sent to the cluster administrator about the result of the scan.
Send daily notification email
If the storage scan is enabled, a daily notification email will be sent to the cluster administrator about the result of the notifications.
Enable Change Monitor for Home Drive
If Active Directory Home Drive integration is on, this will allow the Cluster Server to monitor the changes on the home drive and notify remote client agents that the files/folders have changed.
Enable Scan on Published Home Drive for AD Users
If Active Directory Home Drive integration is on, this will allow the Cluster Server to monitor the changes on the AD home drives and notify remote client agents that the files/folders have changed.
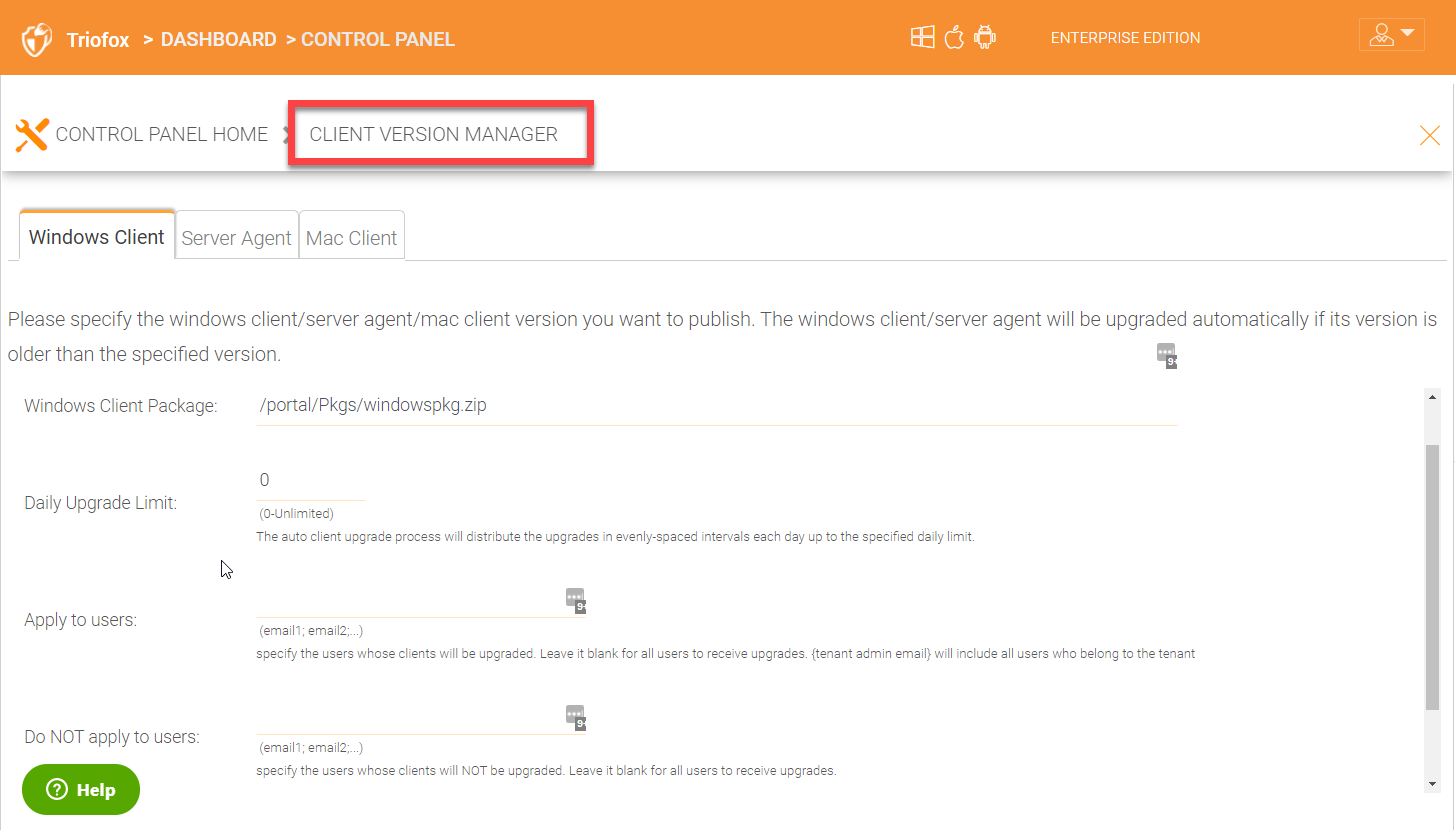
8.17 Client Version Manager
Admin Dashboard > Control Panel Client Version Manager
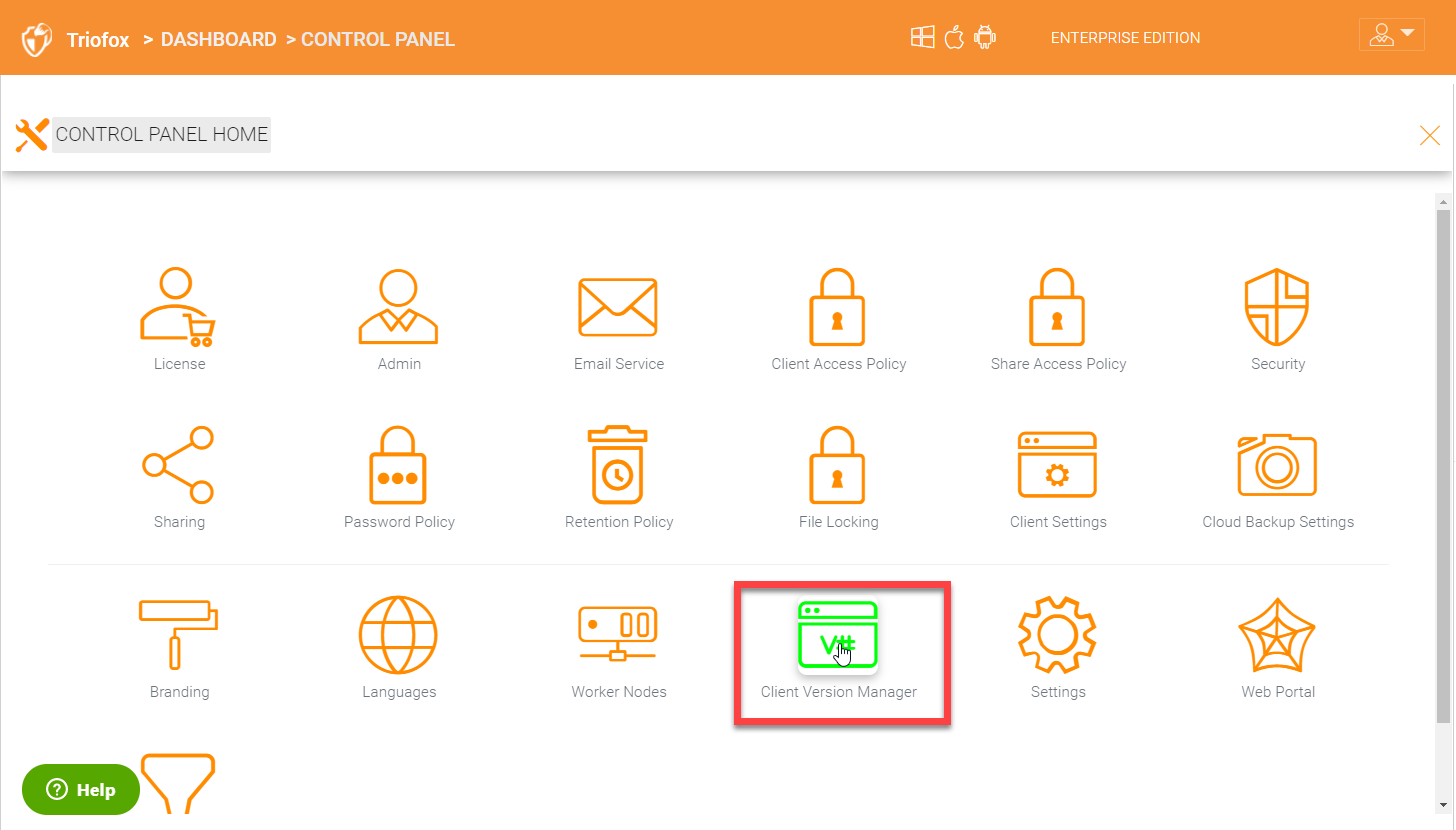
CLIENT VERSION MANAGER
Client Version Manager is where you can see the latest client versions currently available. Everytime you upgrade your Triofox server, the latest client dlls are also added which you can distribute automatically to all the end users. You can publish the Windows clients, Server Agent clients, and MAC clients. You can also choose to publish the latest clients to a selected few users to test and then push it our to everyone once it is fully tested.
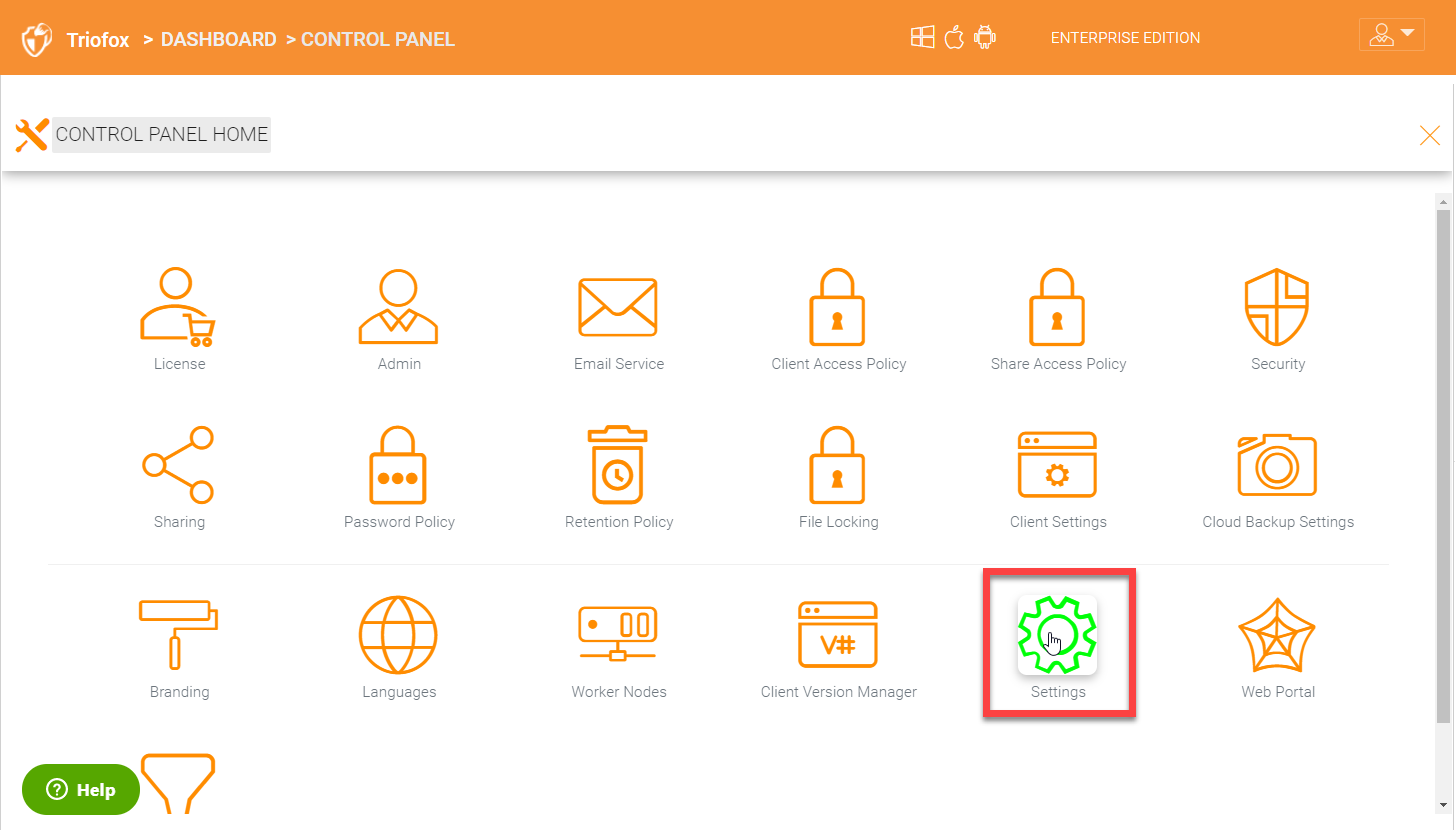
8.18 Additional Settings
Admin Dashboard > Control Panel Settings
There are some additional settings that can also be configured under the ‘Settings’ panel.
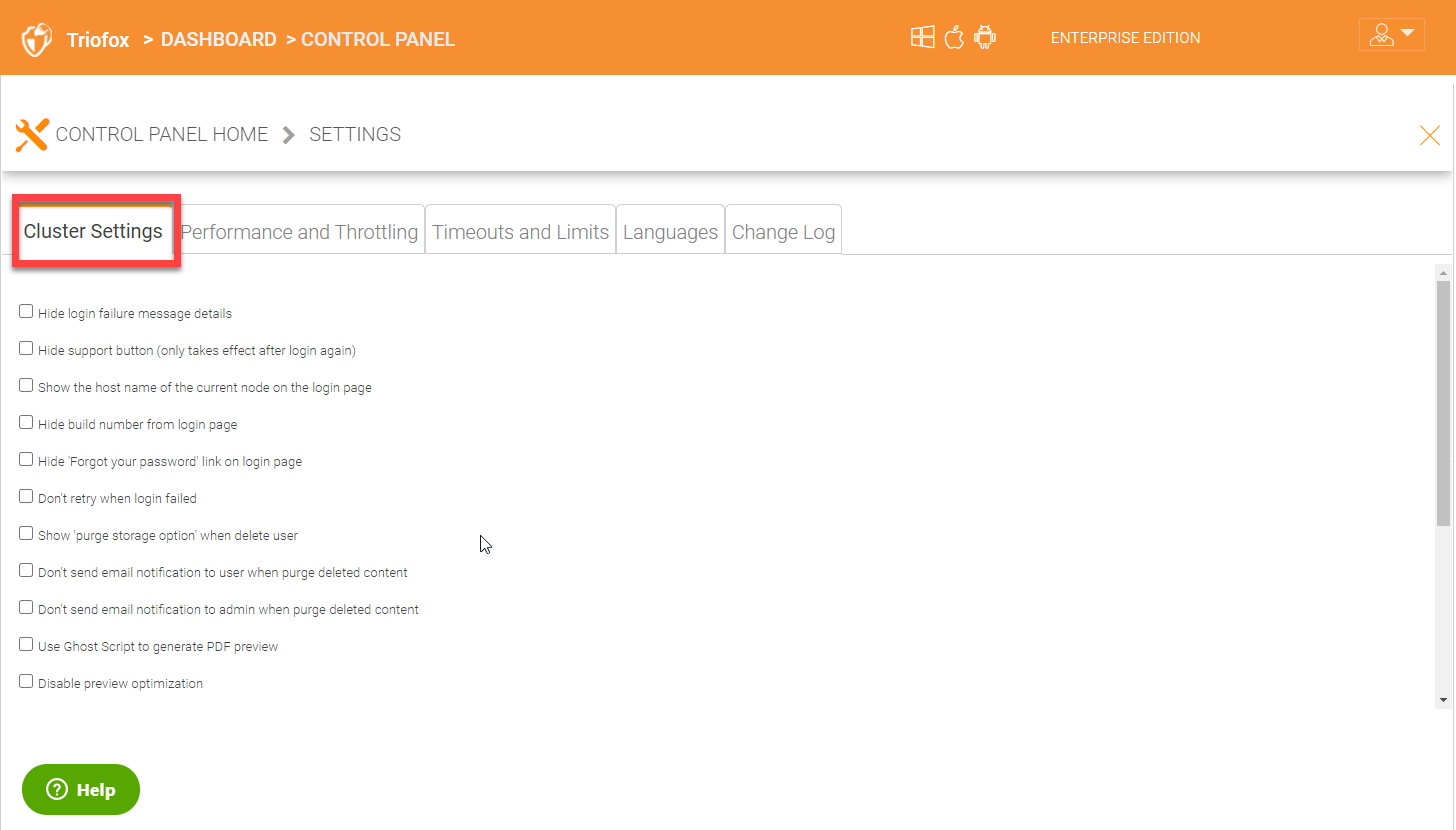
Under ‘Cluster Settings’ tab, you can enable some settings to lock down the environment and also disable some options for users.
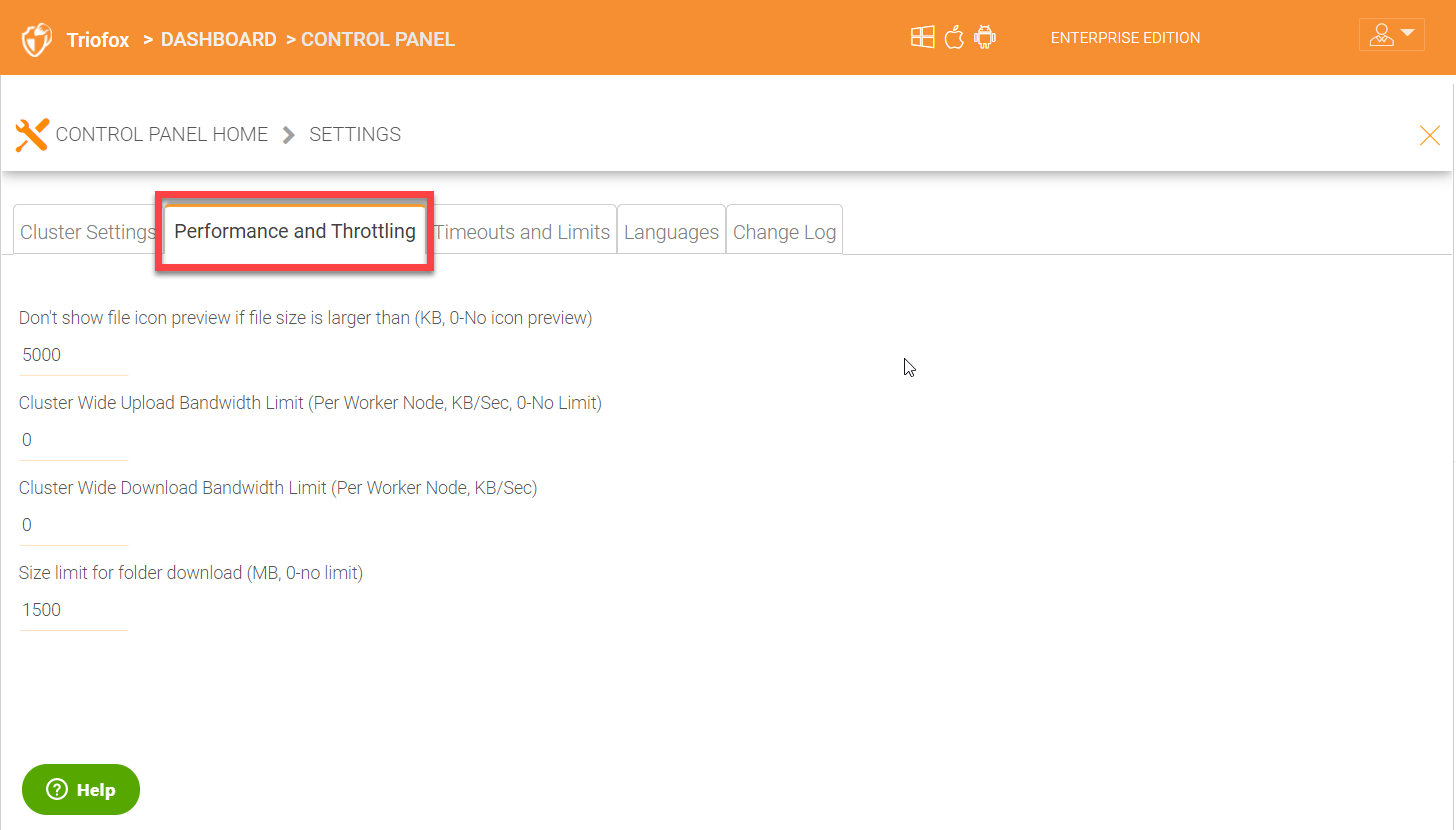
Under ‘Performance and Throttling’ tab, you can configure file icon preview size, upload and download bandwidth limit, and size limit for folder download.
Session timeouts for web browser, native clients, and mobile clients can be configured under ‘Timeouts and Limits’.

By default, file locks idle timeout is 15 minutes after which locks will be released. If you need to change the time duration for file locks, you can configure it under ‘Timeouts and Limits’ also.
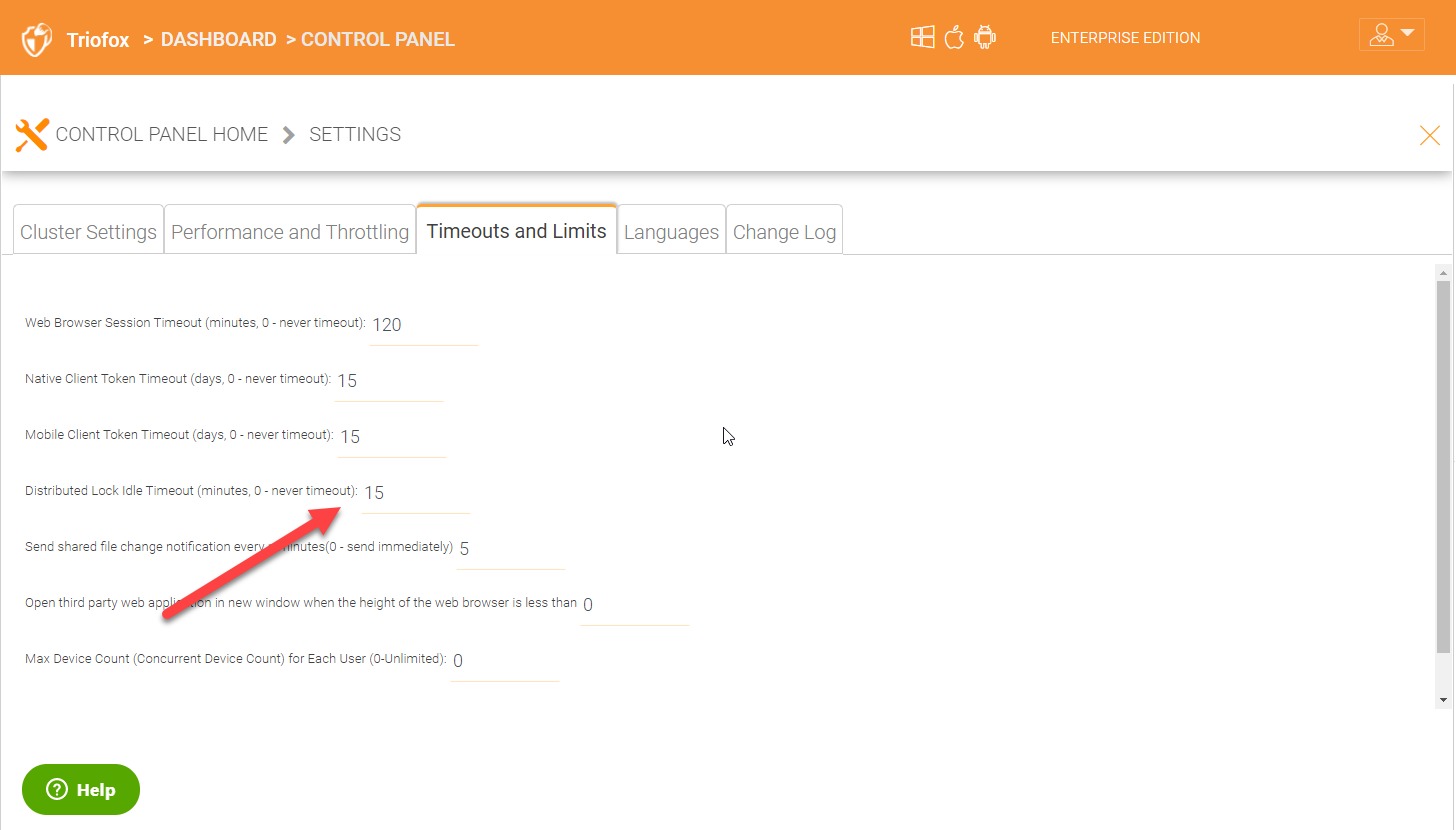
There are additional settings for example, how often file change notifications should be sent and maximum device count can also be configured under this tab.
You can choose the desired language under languages tab.
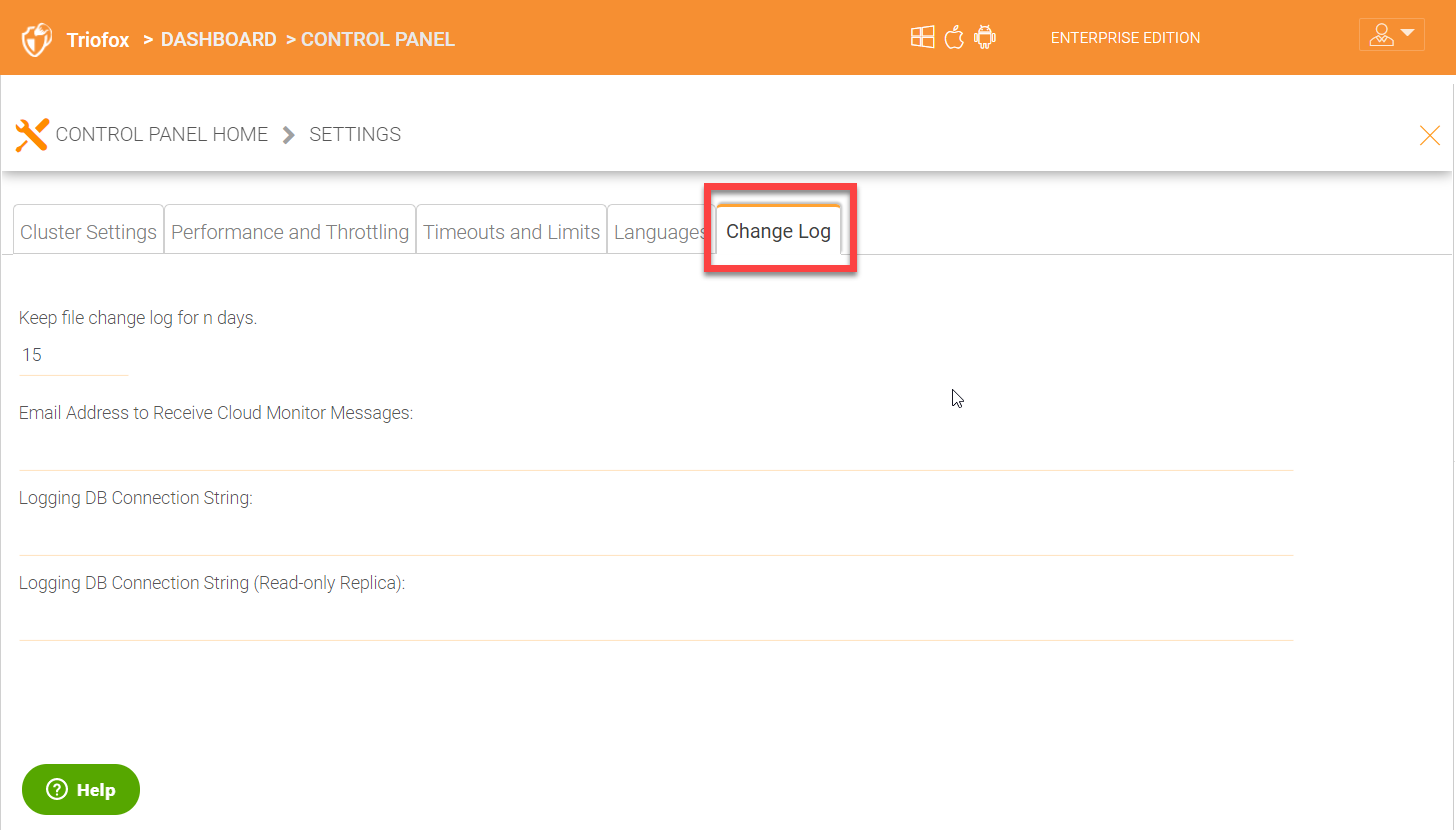
Under the ‘Change Logs’ tab, you can configure settings for number of days to keep the file change logs, an email address to receive cloud monitor messages, Logging database connection string, and logging database connection string (Read-Only Replica).
8.19 Web Portal Settings
Admin Dashboard > Control Panel Web Portal
If there is a need to disable some functionality and features from user’s web portal view, you can configure them under the ‘Web Portal’ settings page.
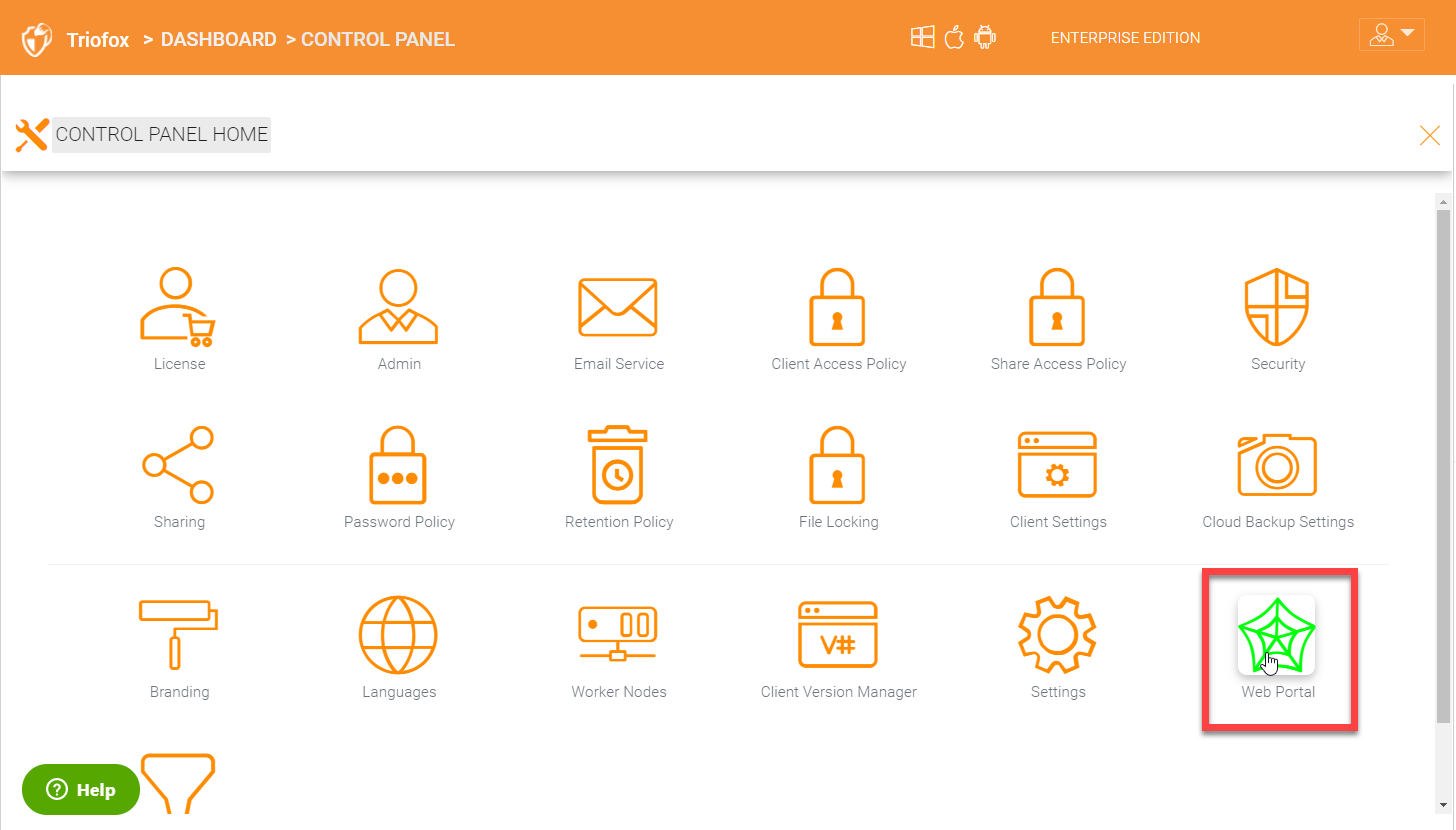
For example, you can disable the folder download from web client, disable search option, disable ‘My Favorites’ on users’ file browser view etc.

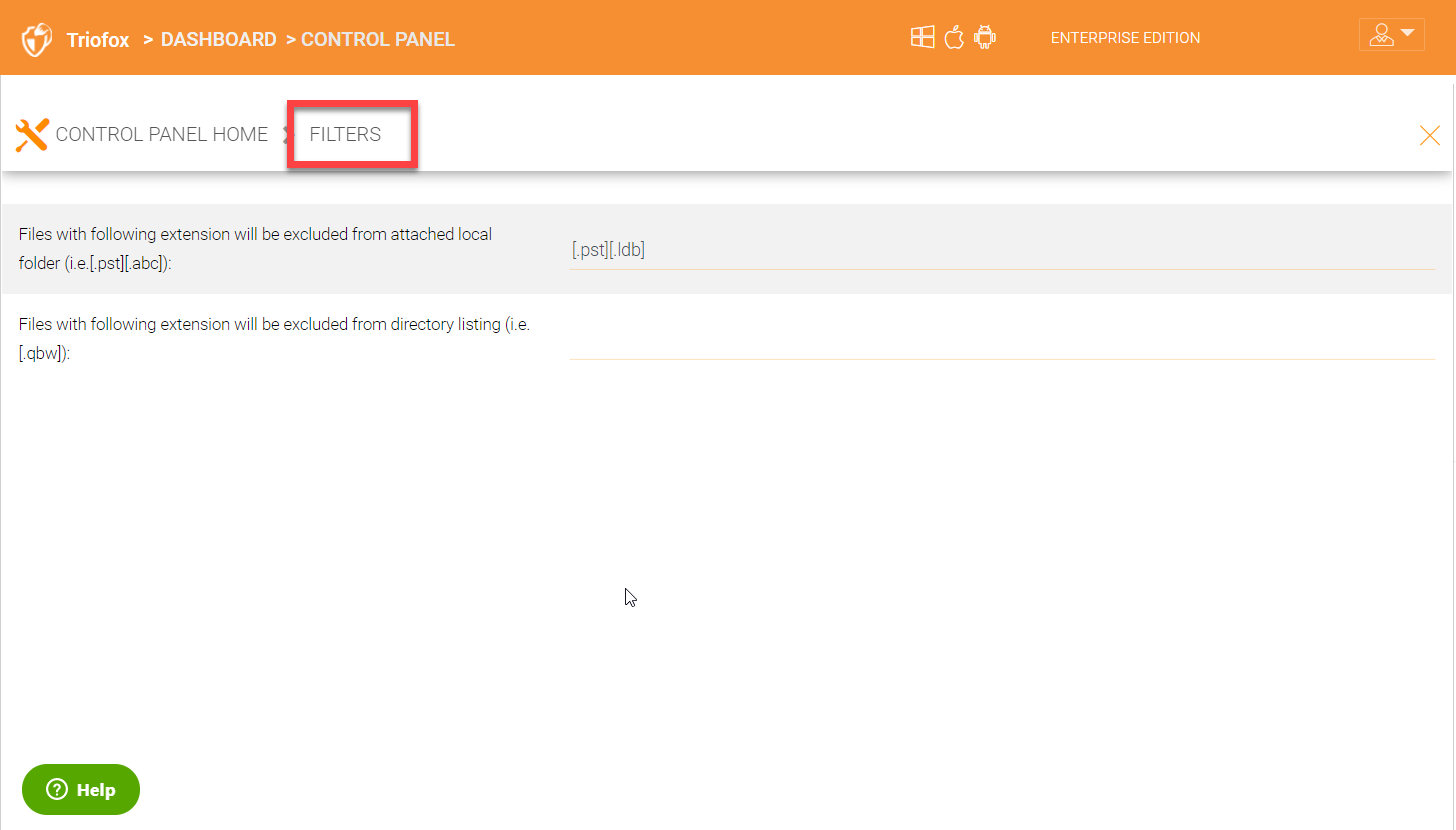
8.20 Filters
Admin Dashboard > Control Panel Filters
Filters panel is where you can add the file extensions that should not be allowed when using Triofox.